Translation and customization

Contents
PRIM allows the translation and customization of several items used in the application, for example, a label, a column header or a button in a menu.
Some of the elements can be translated by opening the "Translation and Security" window, which is accessible from the window in which you are positioned, others are from the "Language Configuration" window.
![]() Translation or customization is not always allowed, some items are not translatable by the user.
Translation or customization is not always allowed, some items are not translatable by the user.
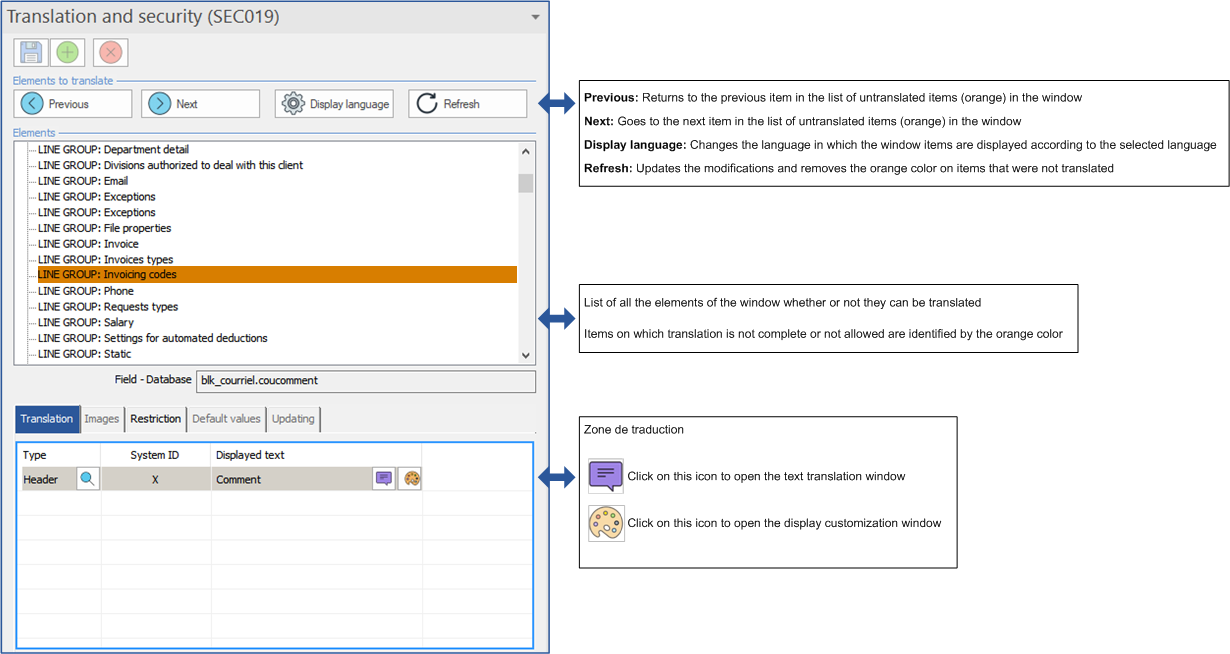
![]() Items on which translation or modification is not allowed are displayed in grey in the translation area of the window.
Items on which translation or modification is not allowed are displayed in grey in the translation area of the window.
![]() Translations and customizations will be visible to all PRIM users.
Translations and customizations will be visible to all PRIM users.
 Window - Translation and security
There are two types of windows in PRIM, so there are two ways to open the "Translation and security" window.
Description of the window
|

Translation - PRIM window
PRIM offers two ways to select an item in a window. In both cases, it will be highlighted in blue to quickly identify it.
•In the window - Select an item and PRIM will position itself on this item in the list •In the item list - Select an item and you will be redirected to the location of the item in the window
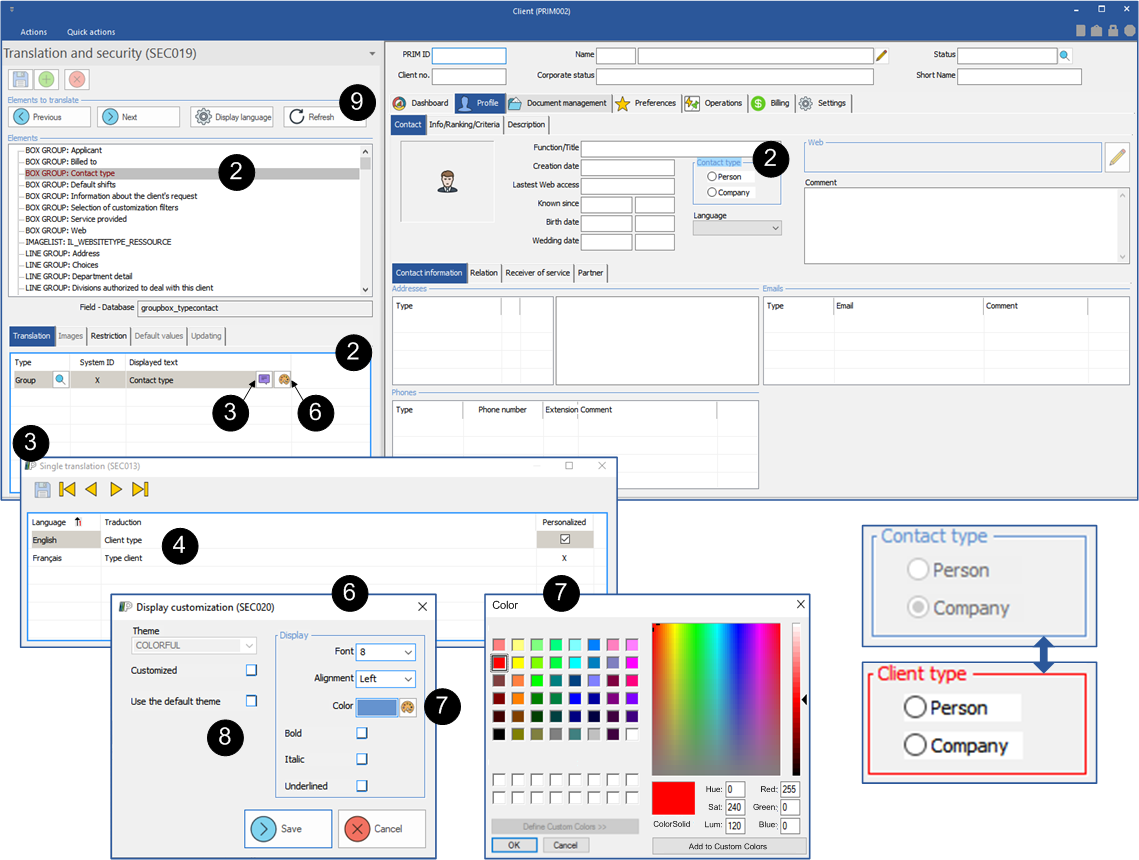
The example below illustrates the modification of an item in the "Client" window. The procedure is the same regardless of the selected item and the window in which you are positioned.
1.Open the "Client" window and click on the icon 2.Select an item in the window. PRIM locates it in the item list and displays the translation details in the section at the bottom of the window. 3.Click on the translation icon to open the translation window. 4.Write your text for each of the proposed languages. 5.Press on 6.Click on the icon 7.For example, to display the text in another color, click on the icon 8.Press the button
9.Press the button
|
Translation - "Languages setup" window
On the ribbon "System", section "Report & communication", click on "Display and translation" to open the "Language setup" window.
In the "Language setup" window:
The tabs "Translatable data Co" and "Translatable data MGMT" contain data which are used in many windows in order to allow translation or modification in one step.
The tab "Windows" contains the list of all windows.
The tab "Menus" contains the items related to the different PRIM menus.
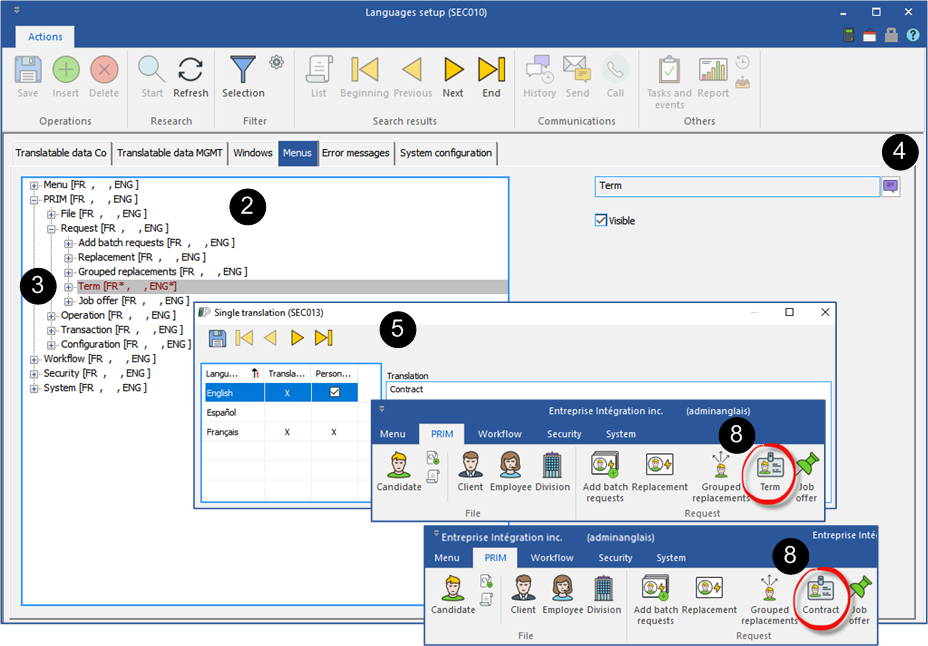
The example below illustrates the modification of the text on the "Term" button.
1.From the "Language setup" window, move to the "Menu" tab. 2.Select the PRIM menu, click on the "+" to extend the tree structure, repeat the operation to extend the section "Request". 3.Click on "Term" which is the word used by default for this type of request. 4.Click on the icon 5.Choose the language, English, enter the new term which is "Contract". 6.Repeat the procedure for each of the languages, if needed. 7.Click on 8.Close PRIM and reopen it to notice the change.
|