From the "Data export" window

Contents
![]() The procedure for exporting data using a template is the same for all data types.
The procedure for exporting data using a template is the same for all data types.
![]() Check with our integration team to ensure that the configuration of your export models is complete and in line with your needs.
Check with our integration team to ensure that the configuration of your export models is complete and in line with your needs.
On the "System" ribbon, click on  to open the "Data Export" window.
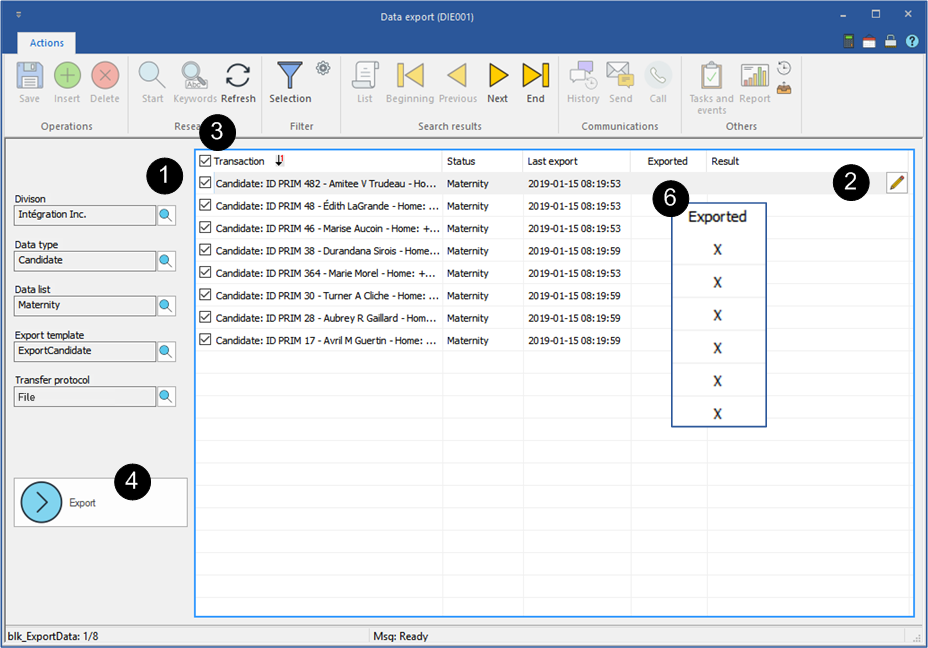
1.Using the icon ![]() (List of values), select the settings from the items proposed in the choice lists.
(List of values), select the settings from the items proposed in the choice lists.
2.The "Result" column will display a message if an item is missing or if there is an error related to the selected record. If necessary, make corrections for these records to continue the export procedure. You will not be able to check records that display an error message.
3.Select all folders from the list or check only those that will be exported.
4.Click on the button  .
.
5.For file transfer export, select the location for saving the file on your workstation and assign it a meaningful name. For example, "Export_Post_Date". If your configuration exports the data directly to another system, you will not have to save the file.
6.An "X" is added in the "Exported" column to indicate the success of the export.
7.It's over for PRIM. If necessary, you can use the resulting file to import this data to another system.