Adding restrictions in a window
PRIM allows you to manage security more precisely, in particular to control access to certain elements of a window.
![]() Only users in the security group "ADMIN" will have access to this window.
Only users in the security group "ADMIN" will have access to this window.
![]() The procedure for adding restrictions is the same for all types of elements found in the "Security Settings" window. Some items will display different types of restrictions, while others will not allow restrictions to be added.
The procedure for adding restrictions is the same for all types of elements found in the "Security Settings" window. Some items will display different types of restrictions, while others will not allow restrictions to be added.
There are two types of windows in PRIM, so there are two ways to open the "Translation and security" window.

 Window elements and restriction types
Window components
Types of restriction
|
||||||||||||||||||||||||||||||||||||||||||||||||||||||||||
 Window section
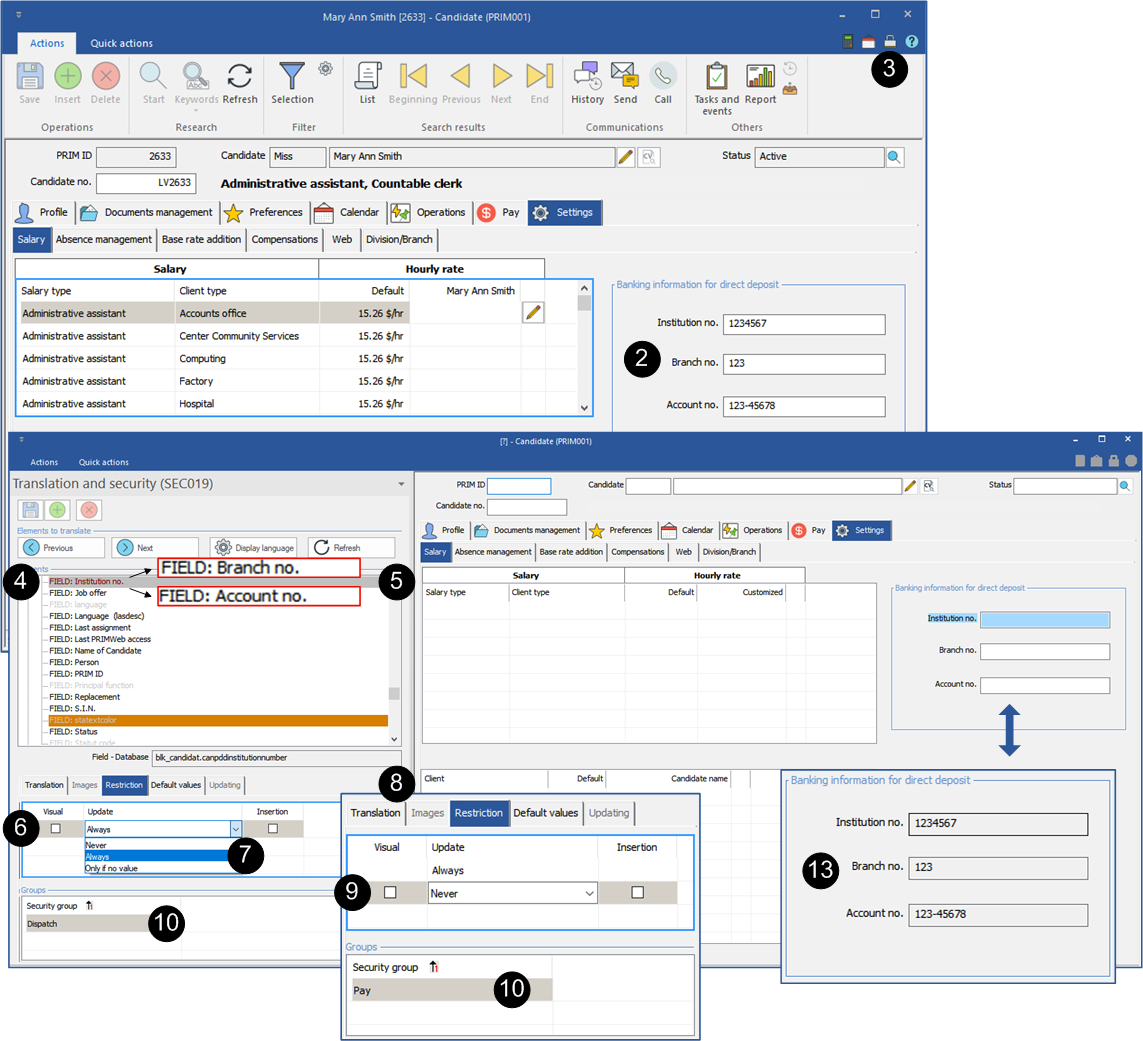
In the example below, restrictions will be added in the "Candidate" window to prevent the "Dispatch" group from changing the candidates' banking information and to allow the "Pay" group to change the same information.
1.Open a "Candidate" window and move to the "Settings" tab. 2.The entry fields in the candidate's banking information section are blank, so they are accessible for modification. 3.On the main toolbar, click on the 4.In the list of components of the window or in the window, locate the component on which you want to add a restriction. 5.Select this item and move to the "Restriction" tab. 6.Click on an empty line to add a restriction. 7.Select an update option. 8.Add a second restriction and select an update option. 9.Select a restriction and move to the "Groups" section. 10.If you have the rights and access for this action, click on a white line to open the security group selection window. Select the security group(s) for which the restriction should apply. Repeat this operation for the second restriction. 11.Repeat steps 5, 6, 7, 8, 9 and 10 to add restrictions on the other components of the window. 12.Click on 13.The entry fields in the candidate's banking information section are greyed out, so they are no longer accessible for modification.
|
 A control
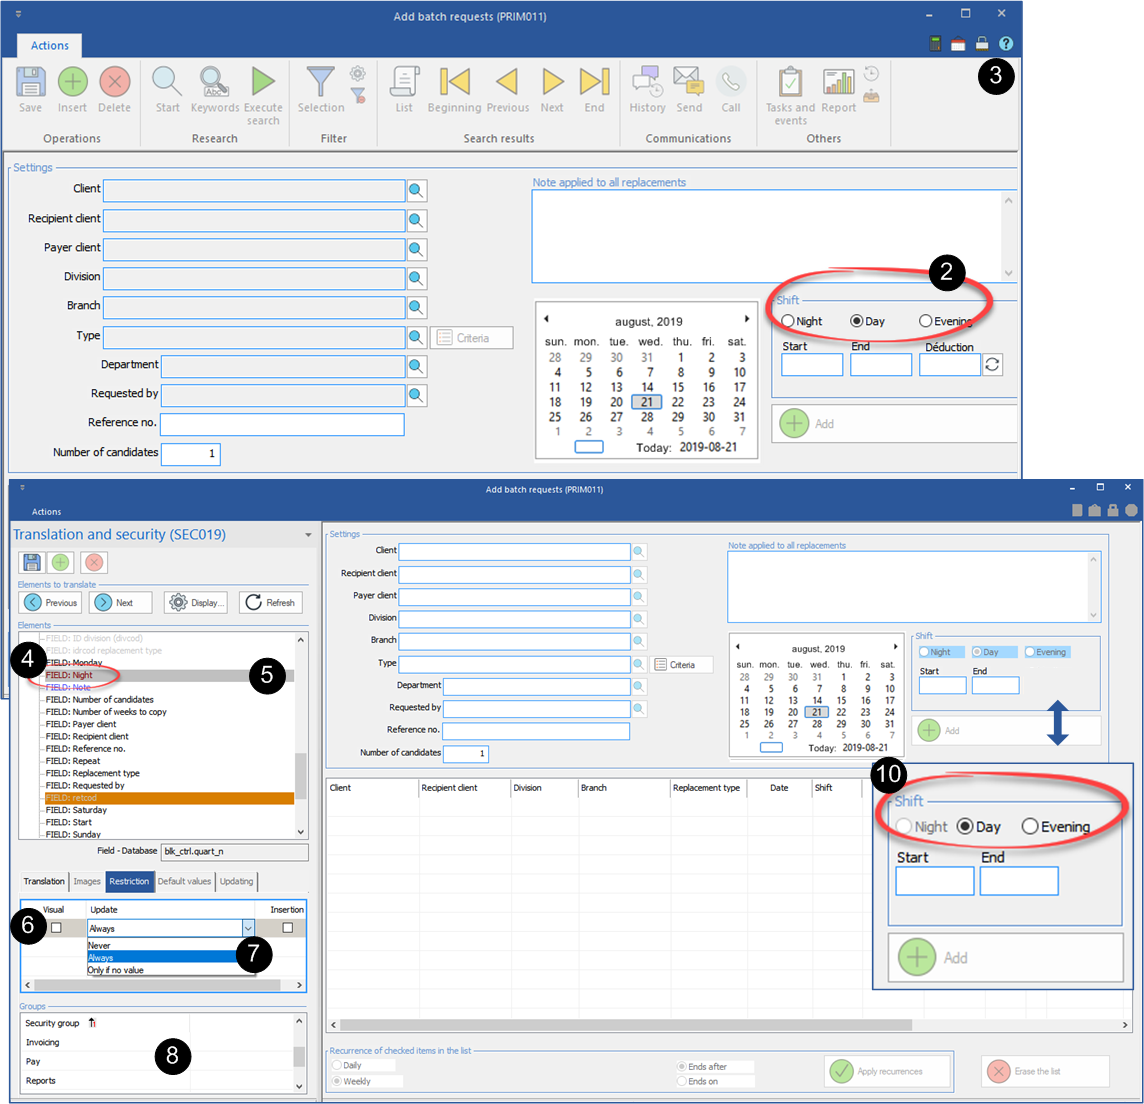
In the example below, a restriction will be applied in the "Add batch requests" window to restrict access to the "night shift" control for all security groups.
1.Open the "Add batch requests" window. 2.All shifts are available for selection when creating replacements. 3.On the main toolbar, click on the 4.In the list of components of the window or in the window, locate the component on which you want to add a restriction. 5.Select this item and move to the "Restriction" tab. 6.Click on an empty line to add a restriction. 7.Check the boxes corresponding to the type of restriction and select an option, if applicable. 8.If you have the rights and access for this action, click on a blank line to open the security group selection window. Select all security groups. 9.Click on 10.The night shift is greyed out, so it is impossible to select when creating replacements.
|
 A tab
A tab
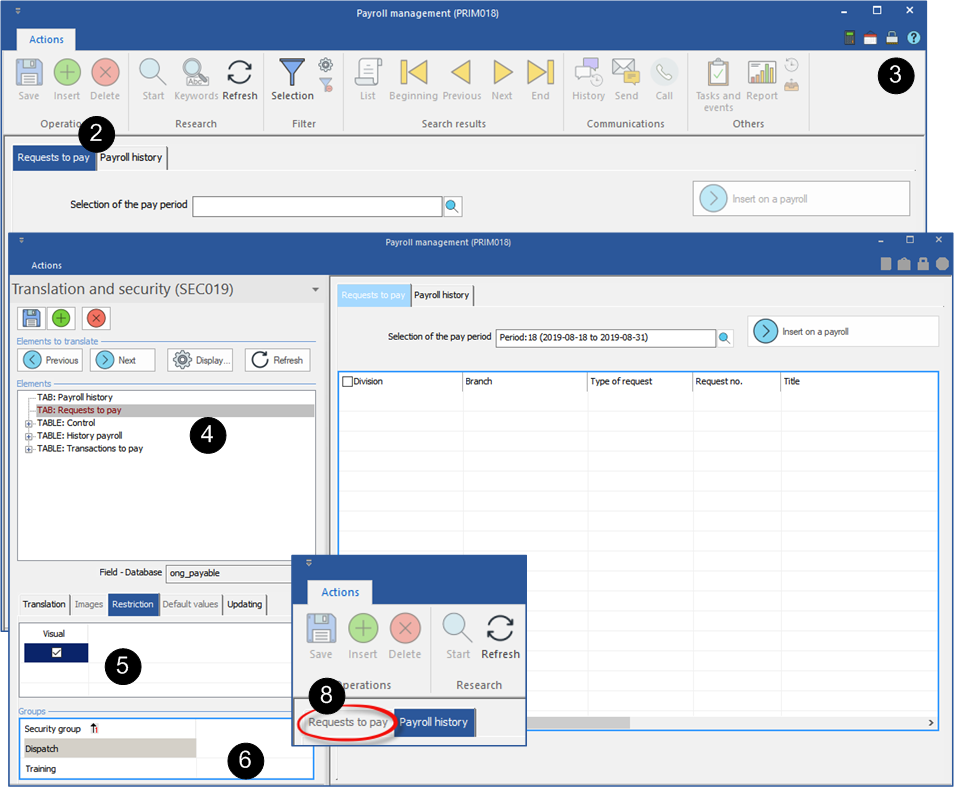
In the example below, a restriction will be applied in the "Payroll management" window to restrict access to the "Requests to pay" tab.
1.Open the "Payroll management" window. 2.The "Requests to pay" tab is accessible. 3.Click on the icon 4.In the "Elements" section, select the "Requests to Pay" tab. 5.Check the box in the "Visual" column to restrict access to this tab. 6.If you have the rights and access for this action, click on a blank line to open the security group selection window. Select all security groups. 7.Click on 8.The "Requests to pay" tab is no longer accessible.
|


