Examples of data export
 Example 1 - Export a list by using a template
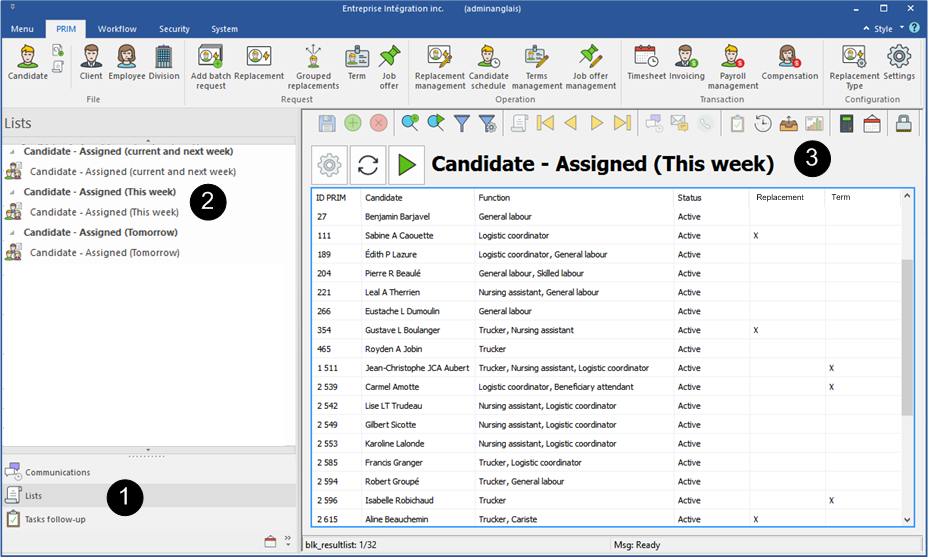
1.Click on "Lists” on the sidebar. 2.Select the list to export. 3.Click on the icon
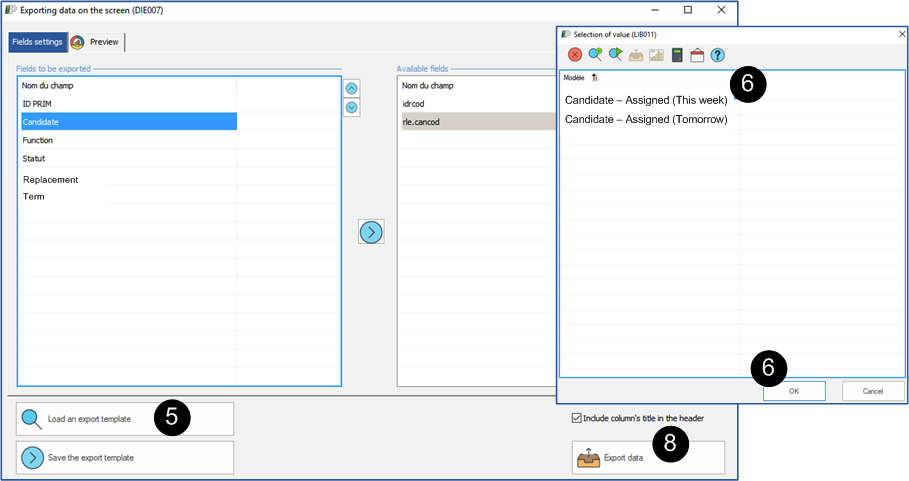
4.The window "Exporting data to the screen" will be displayed. 5.Click on 6.Select the template and click on 7.Click on the tab "Preview" in order to view the data to export. 8.Click on
9.The window "Save as" will be displayed. 10.Select the location and enter the name of the file that will contain the data exported from PRIM. 11.Click on 12.You can now recover the file on your computer at the specified location.
|
 Example 2 - Export a replacements list
1.In the "PRIM” menu. 2.Click on the button 3.Make sure that the selected area is the list of replacements, there will be a blue outline around the list. 4.Click on the icon 5.The window "Exporting data to the screen" will be displayed (see the example above). 6.In the tab "Fields settings ", if needed, choose a template. 7.If applicable, add or remove fields. 8.Click on the tab "Preview" in order to view the data to export. 9.Click on 10.The window "Save As" will be displayed (see the example above). 11.Select the location and enter the name of the file that will contain the data exported from PRIM. 12.Click on 13.You can now recover the file on your computer at the specified location.
|


