The Client Window
On the "Home" ribbon, click on  (Client) to open the window.
At the opening, you are in search mode, you will notice that the fields are green
•You can click on  (Execute search), all records are extracted and PRIM is positioned on the first record of the list.
•It is possible to navigate through the records using the following icons 


•You can start a search by entering a keyword in one of the green fields and click on the icon  (Execute a search).
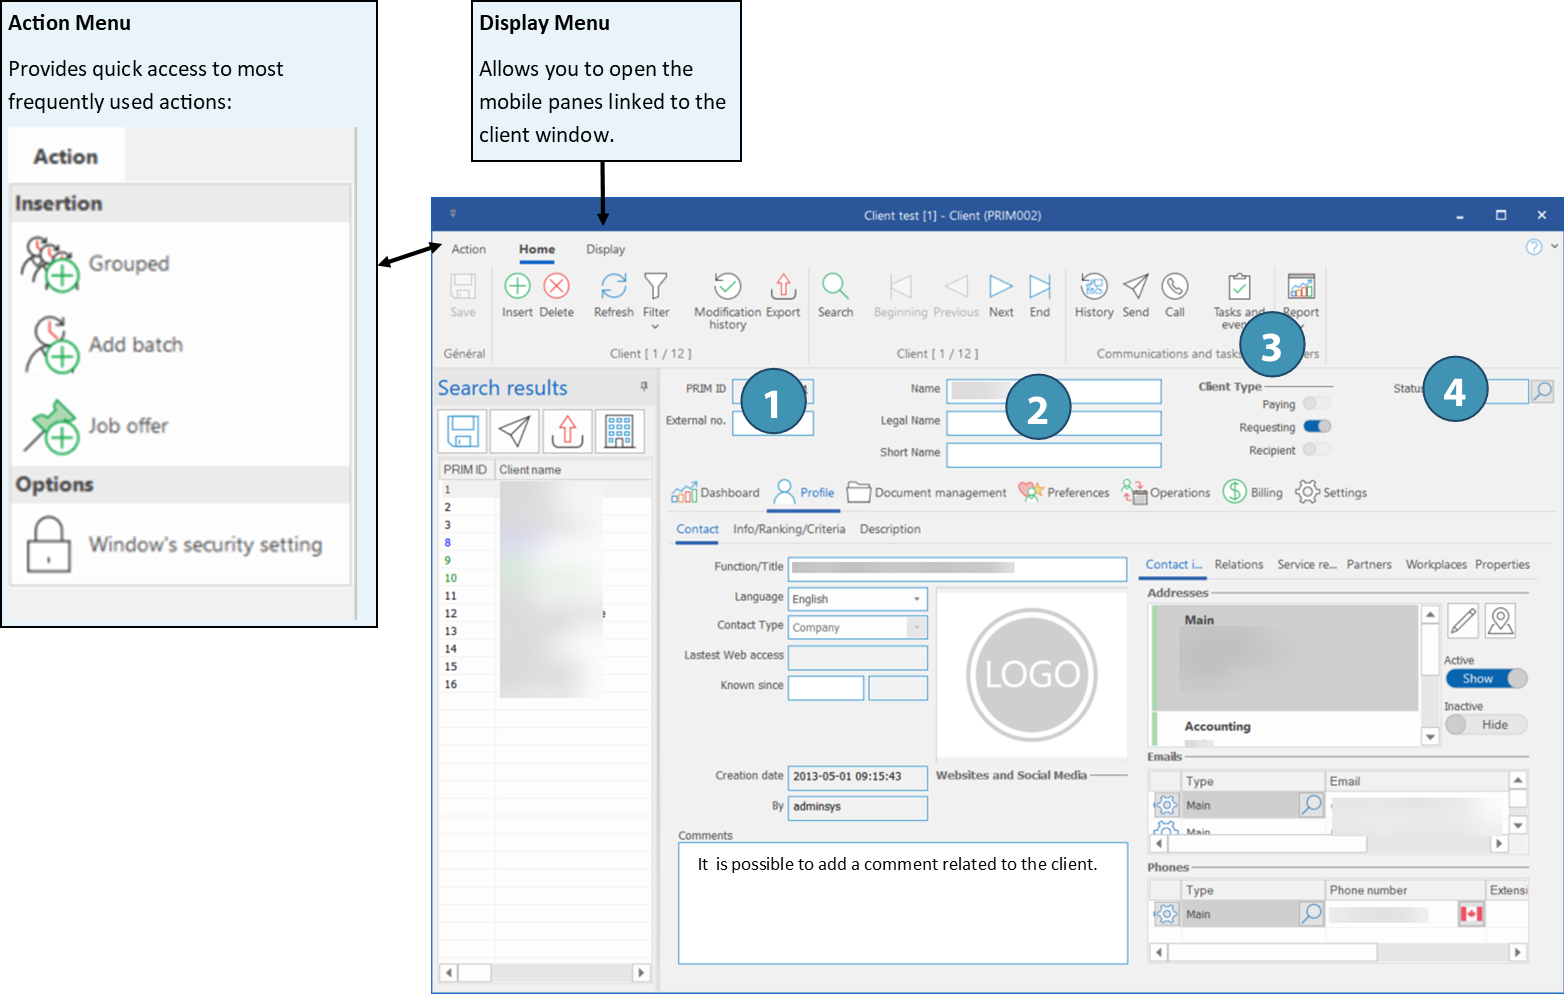
Presentation of the window

1. ID PRIM: Unique identification number generated by PRIM Logix par l'utilisateur (facultatif). Il peut par exemple s'agit du
N⁰ externe: Client identification number entered by the user (optional). For example, it could be the client number as used in the accounting system.
2. Name - Legal name - Short name : If fillled out, PRIM Logix will use the short name to display in the software if the name is too long. Furthermore, it is possible to choose if the invoice is created with the client's name or it's legal name.
3. Client type : PRIM Logix allows to distinguish between 3 client types. Consult the section below to learn more.
4. Status : Current status of the client. Click on  to display status choices and change the status manually.
PRIM Logix allows to distinguish between three types of clients:
•Paying: Client to whom the request invoice of a request will be addressed.
•Requesting : Client who create/sends the request.
•Recipient: Client for whom the service is intended, particularly in the context of home care
 The same client can add up multiple types. The same client can add up multiple types.
Example:
A CHSLD or nursing home (Requesting) search for a nursing aide or personal support worker to provide care at the home of a patient (Recipient). un . The invoice will be addressed to the CIUSSS, an integrated service center (Paying).
|
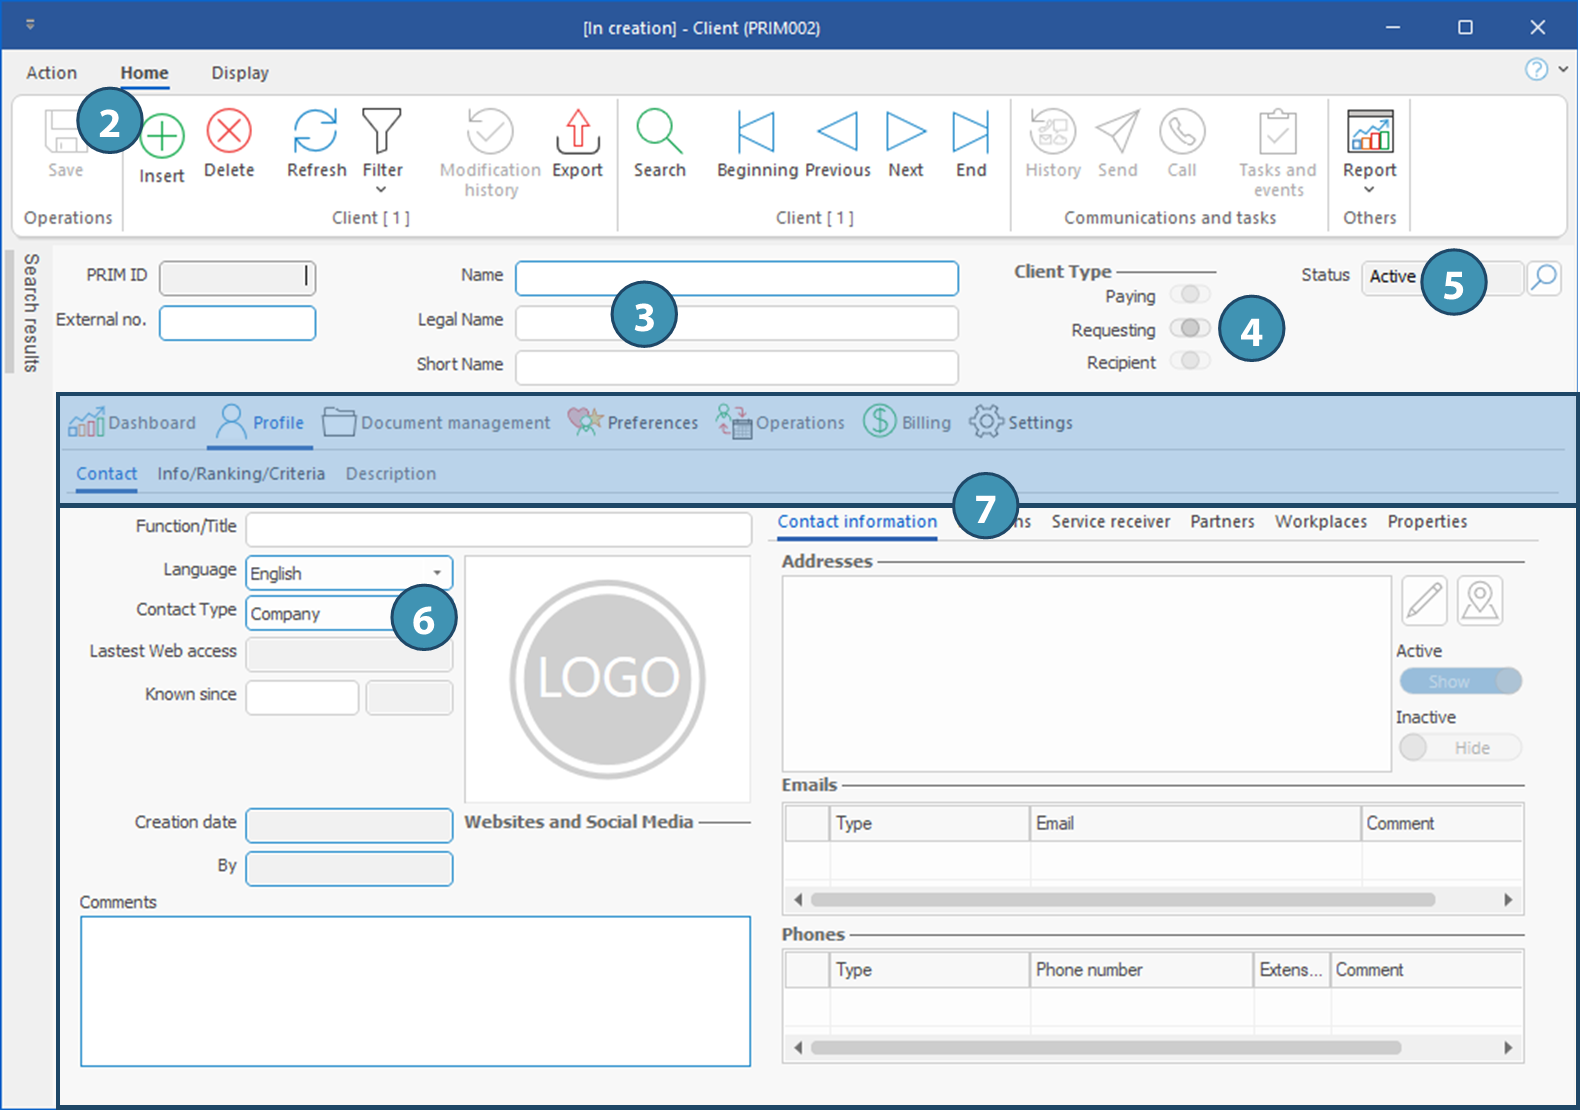
1.In the Home ribbon of the main PRIM window, click on  (Client) to launch the window. (Client) to launch the window.
2.Click on  (Insert) in Home ribbon. (Insert) in Home ribbon.
3.Enter a Name. The fields Short name, Legal name and External no. are optional.
4.Select type « Requesting ». This is the only category that can be selected. If you don't select it, it will be when you save.
 Other types will be added to the file if the client is added as a service receiver or paying partner in a request for another client. Other types will be added to the file if the client is added as a service receiver or paying partner in a request for another client.
5.Client is created with Active status by default. You will be able to change this status after you save.
6.If applicable, select the Contact type (Individual/Company).
 Par défaut, si rien n'est sélectionné, le type de contact « Entreprise » sera appliqué lors de la sauvegarde, et il ne sera pas possible de le modifier par la suite. Par défaut, si rien n'est sélectionné, le type de contact « Entreprise » sera appliqué lors de la sauvegarde, et il ne sera pas possible de le modifier par la suite.
7.Remplissez les autres champs requis dans les divers onglets de la fenêtre, notamment les coordonnées. Pour connaître l'utilisation des divers champs et onglets, consultez les pages correspondantes.
8.Sauvegardez.

|
 (Client) to open the window.
  (Execute search), all records are extracted and PRIM is positioned on the first record of the list.


 (Execute a search).
 to display status choices and change the status manually.


 (Insert) in