Display or modify availability in PRIM Logix
Availability management of a candidate is done through its file. In the "Display" ribbon, click on "Availability" to open the Availability pane. Note that at opening, you will be redirected to the "Calendar" tab of the candidate's file.
There si two type of availalbility or unavailability : the usual availability schedule is defined in the Availability management window , and punctual availabilty or unavailability periods can be define directly in the calandar using the availability pane.
 An asterisk * before the wording Available, Unavailable or the reason for unavailability means that this is a punctual availability or unavailability and not the usual schedule.
Presentation of the candidate's calendar
The calendar can display a view by Day, Week or Month (A).
You can navigate between weeks, days or months using navigation icons or the date selection tool (B).
To add punctual availability or indicate a time range where a candidate is not available:
•Double-click in the calendar to open the availability pane, if it is not open. Use the cursor to select a specific time range or a full day by clicking at the top of the corresponding column (Day or Week view).
•The quick action button (1) allows you to directly add an availability time slot according to the predefined templates.
•You can also enter these availabilities in the "Availability" pane by clicking on the corresponding button (2).
•You can use the keyboard shortcuts in the calendar to directly indicate candidate's availability by selecting the corresponding time slot.
To use a keyboard shortcut: place the cursor in the target field, then use the shortcut corresponding to the desired template. (See "Availability templates" to define keyboard shortcuts.
It is possible to select and move (drag-and-drop) any time frame to another space in the calendar. If the moved period is overlapping another defined time frame, this other time frame will be adjusted accordingly.
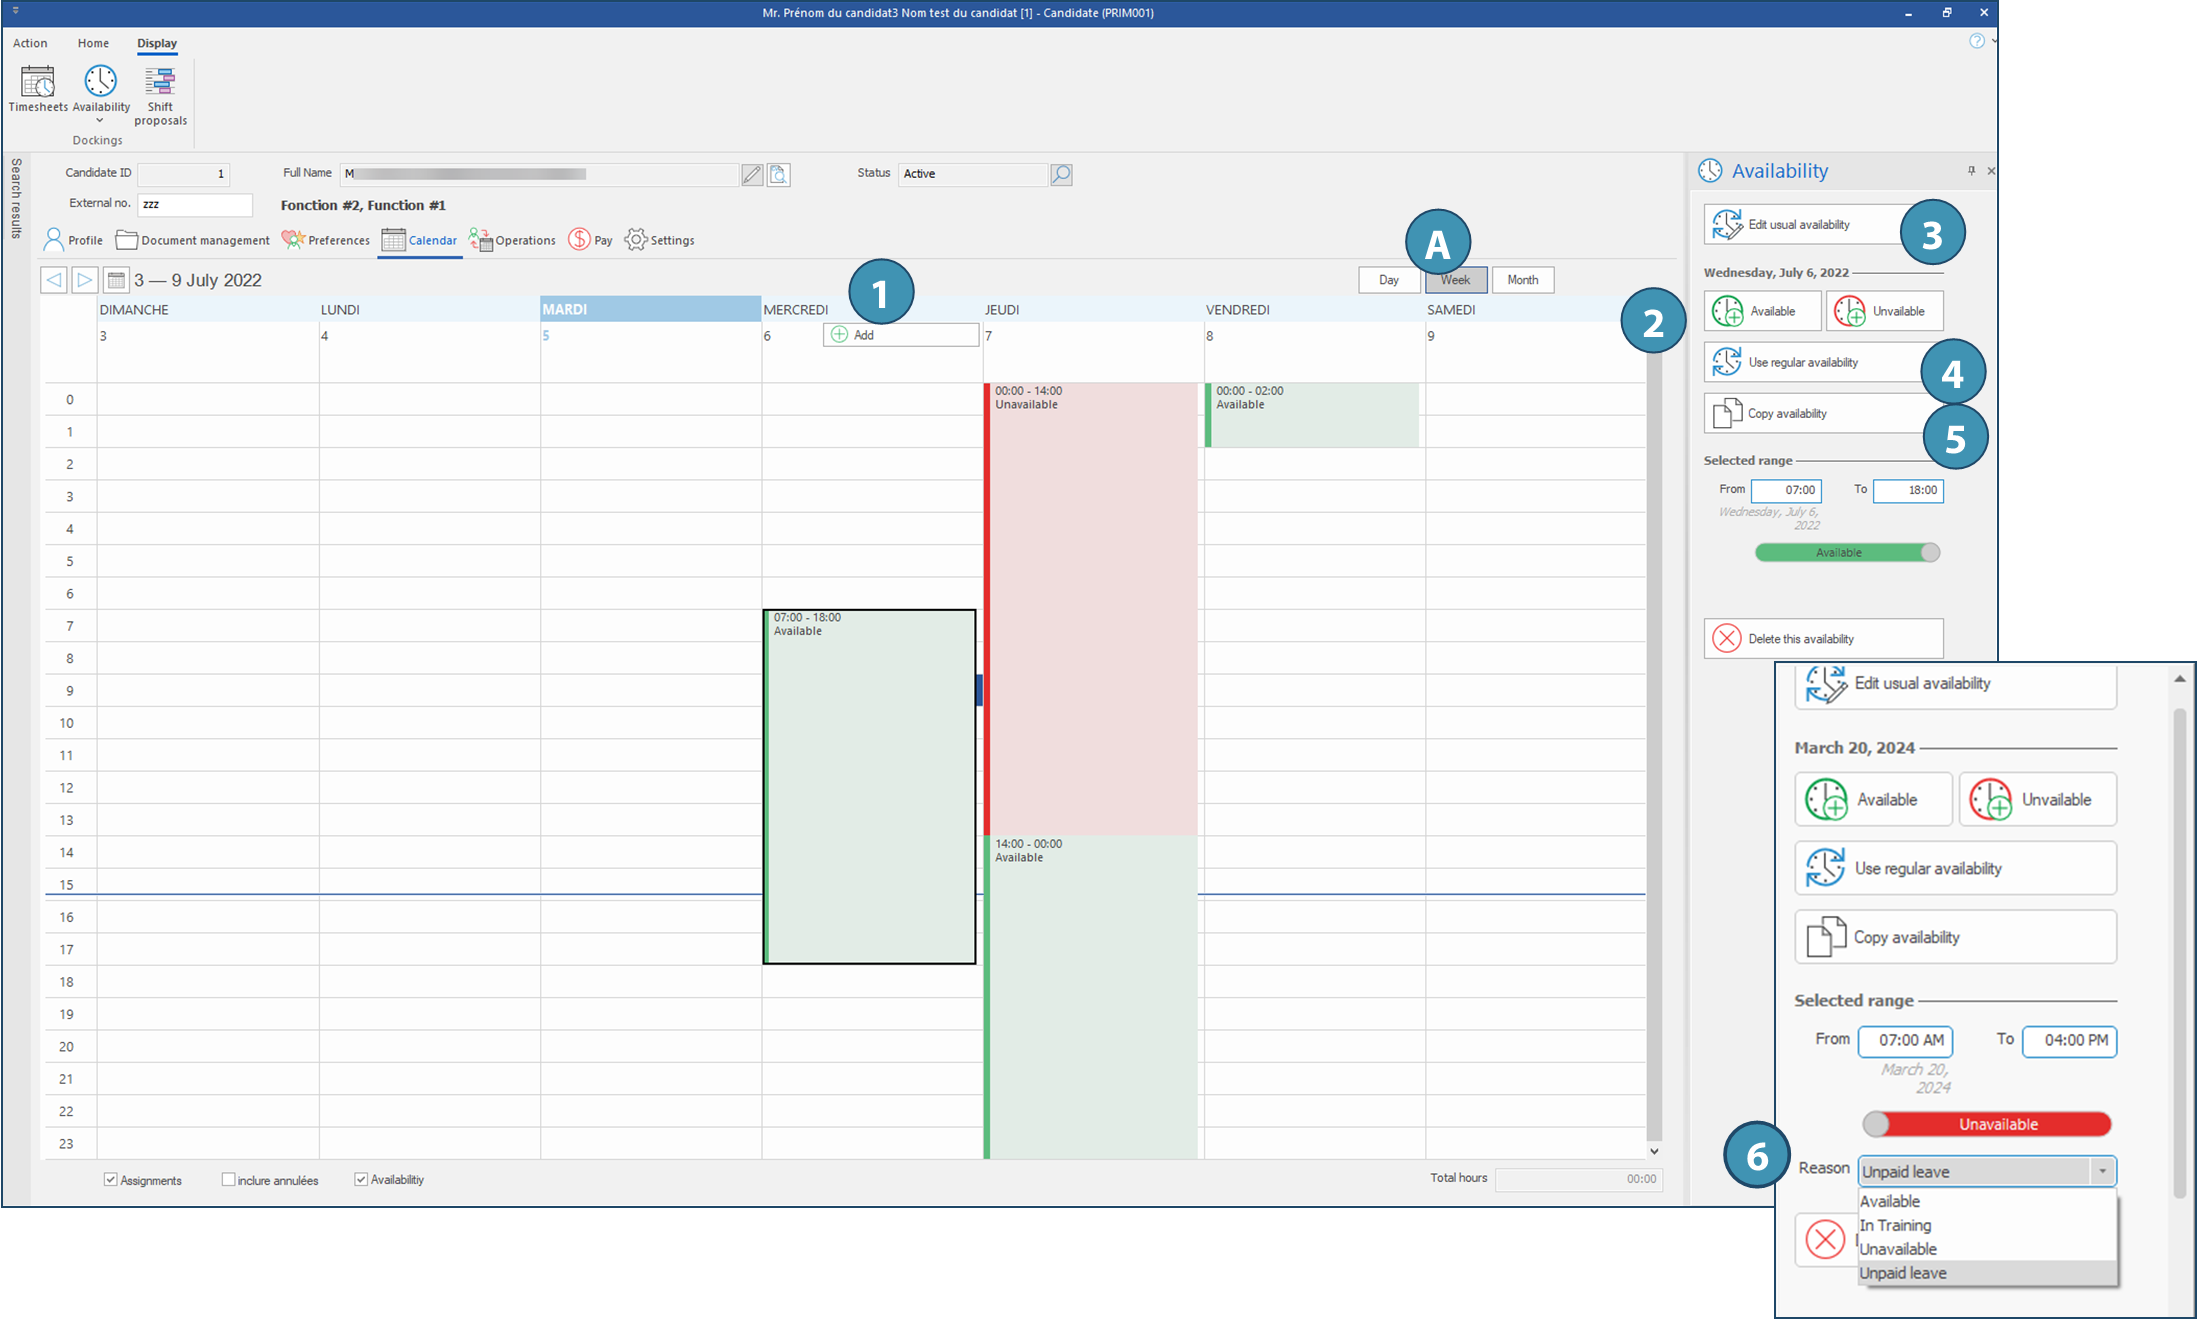
Possible actions in the "Availability" pane
•Edit usual availability (3): This button will allow you to open the Availability management window and define the usual availability schedule.
•Use regular availability (4): This button allow you to use the actual availability template in one click.
•Copy availability (5): moving your cursor in a day that already has availability data, this button will copy availability the availability to a specific date. Use the calendar to select the date(s) you want to copy availability to.
For selected range:
These options will only be available for punctual availability or unavailability time frames. To supersede a period included in the regular availability schedule without changing the full schedule, just add an opposite time frame (for example, insert available time frame to replace the unavailable spot)
•From: To: Edit the hours of the selected range
•Reason (6): For unavailable periods, a reason for absence can be specified. These reasons must first be defined in the "Reasons for absence" pane of the configuration window
•Delete this availability: Delete the selected range.