|
Navigation: Training plan > Section 7 - Operations - Temporary > Grouped shifts (PRIM005) Modify a grouped shifts request |
Scroll Prev Top Next More |
Modify a grouped shifts request
After creating a batch request, some changes may be required, either due to an error during data entry or a change in the request. Below are some of the changes that are permitted after creation.

If you add or modify the End date of a recurrent schedule, PRIM Logix will adjust the work shifts, canceling all the shifts already created in the system for which the date is later than the new end date. Shifts that have not already been created will not be created and will disappear from the Operations pane and the various calendars (client, candidate).
|
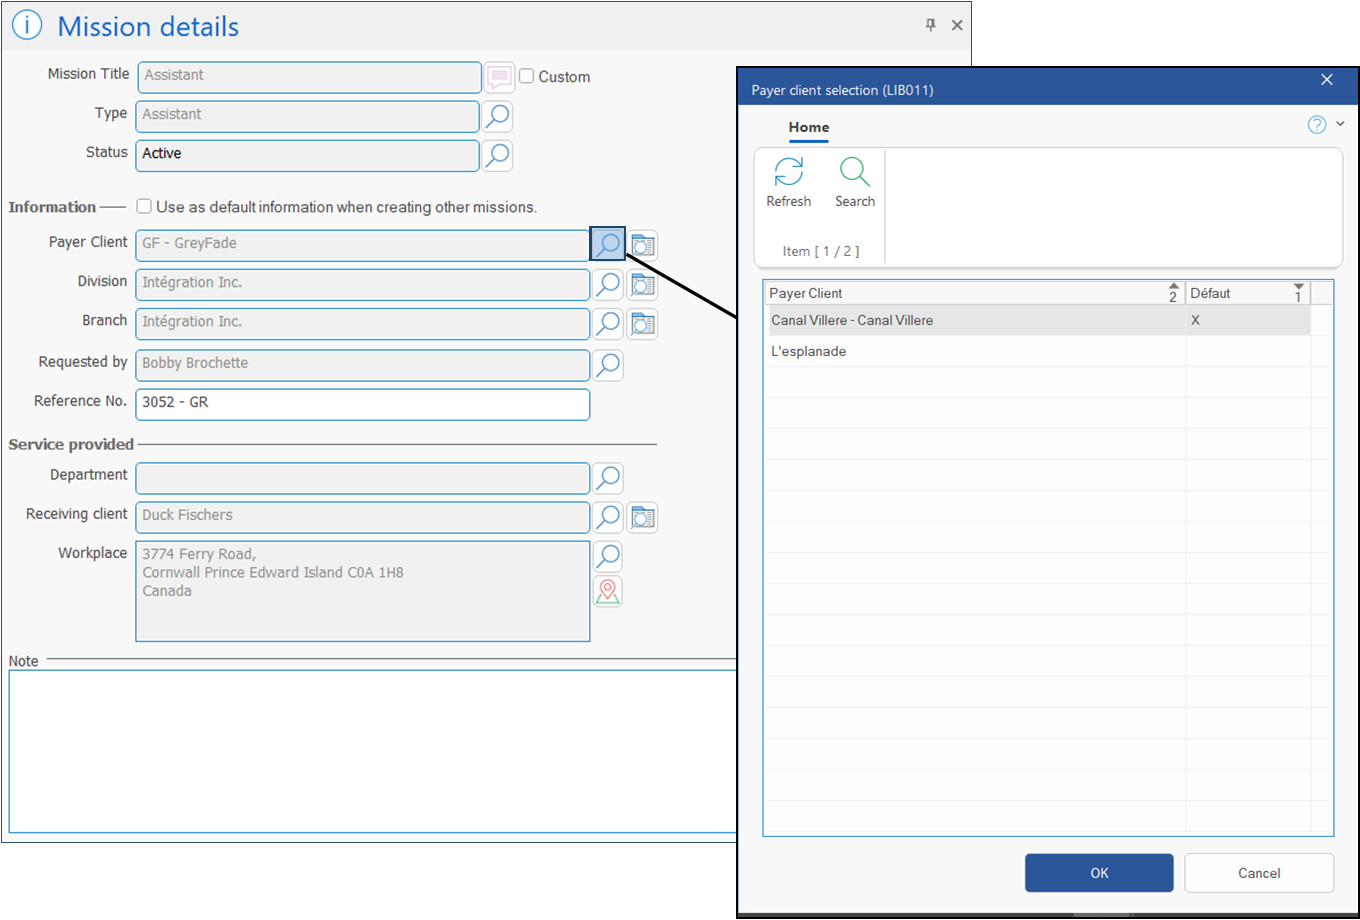
The information related to the recipient or payer client is managed according to the status of the mission. Depending on the status of the mission, you can click on the magnifier besides the name of the recipient or payer client and select the desired client.
The information is updated in the corresponding requests.
ⅰIf no payer or recipient clients has been set up for the requesting client, the option to select another payer or service receiver client is not available.
|
The main advantage of a recurring schedule is that you don’t need to select and create all the dates in the schedule, provided that it follows a specific repeating pattern. Shifts will then be generated over time, according to a schedule defined by your settings.
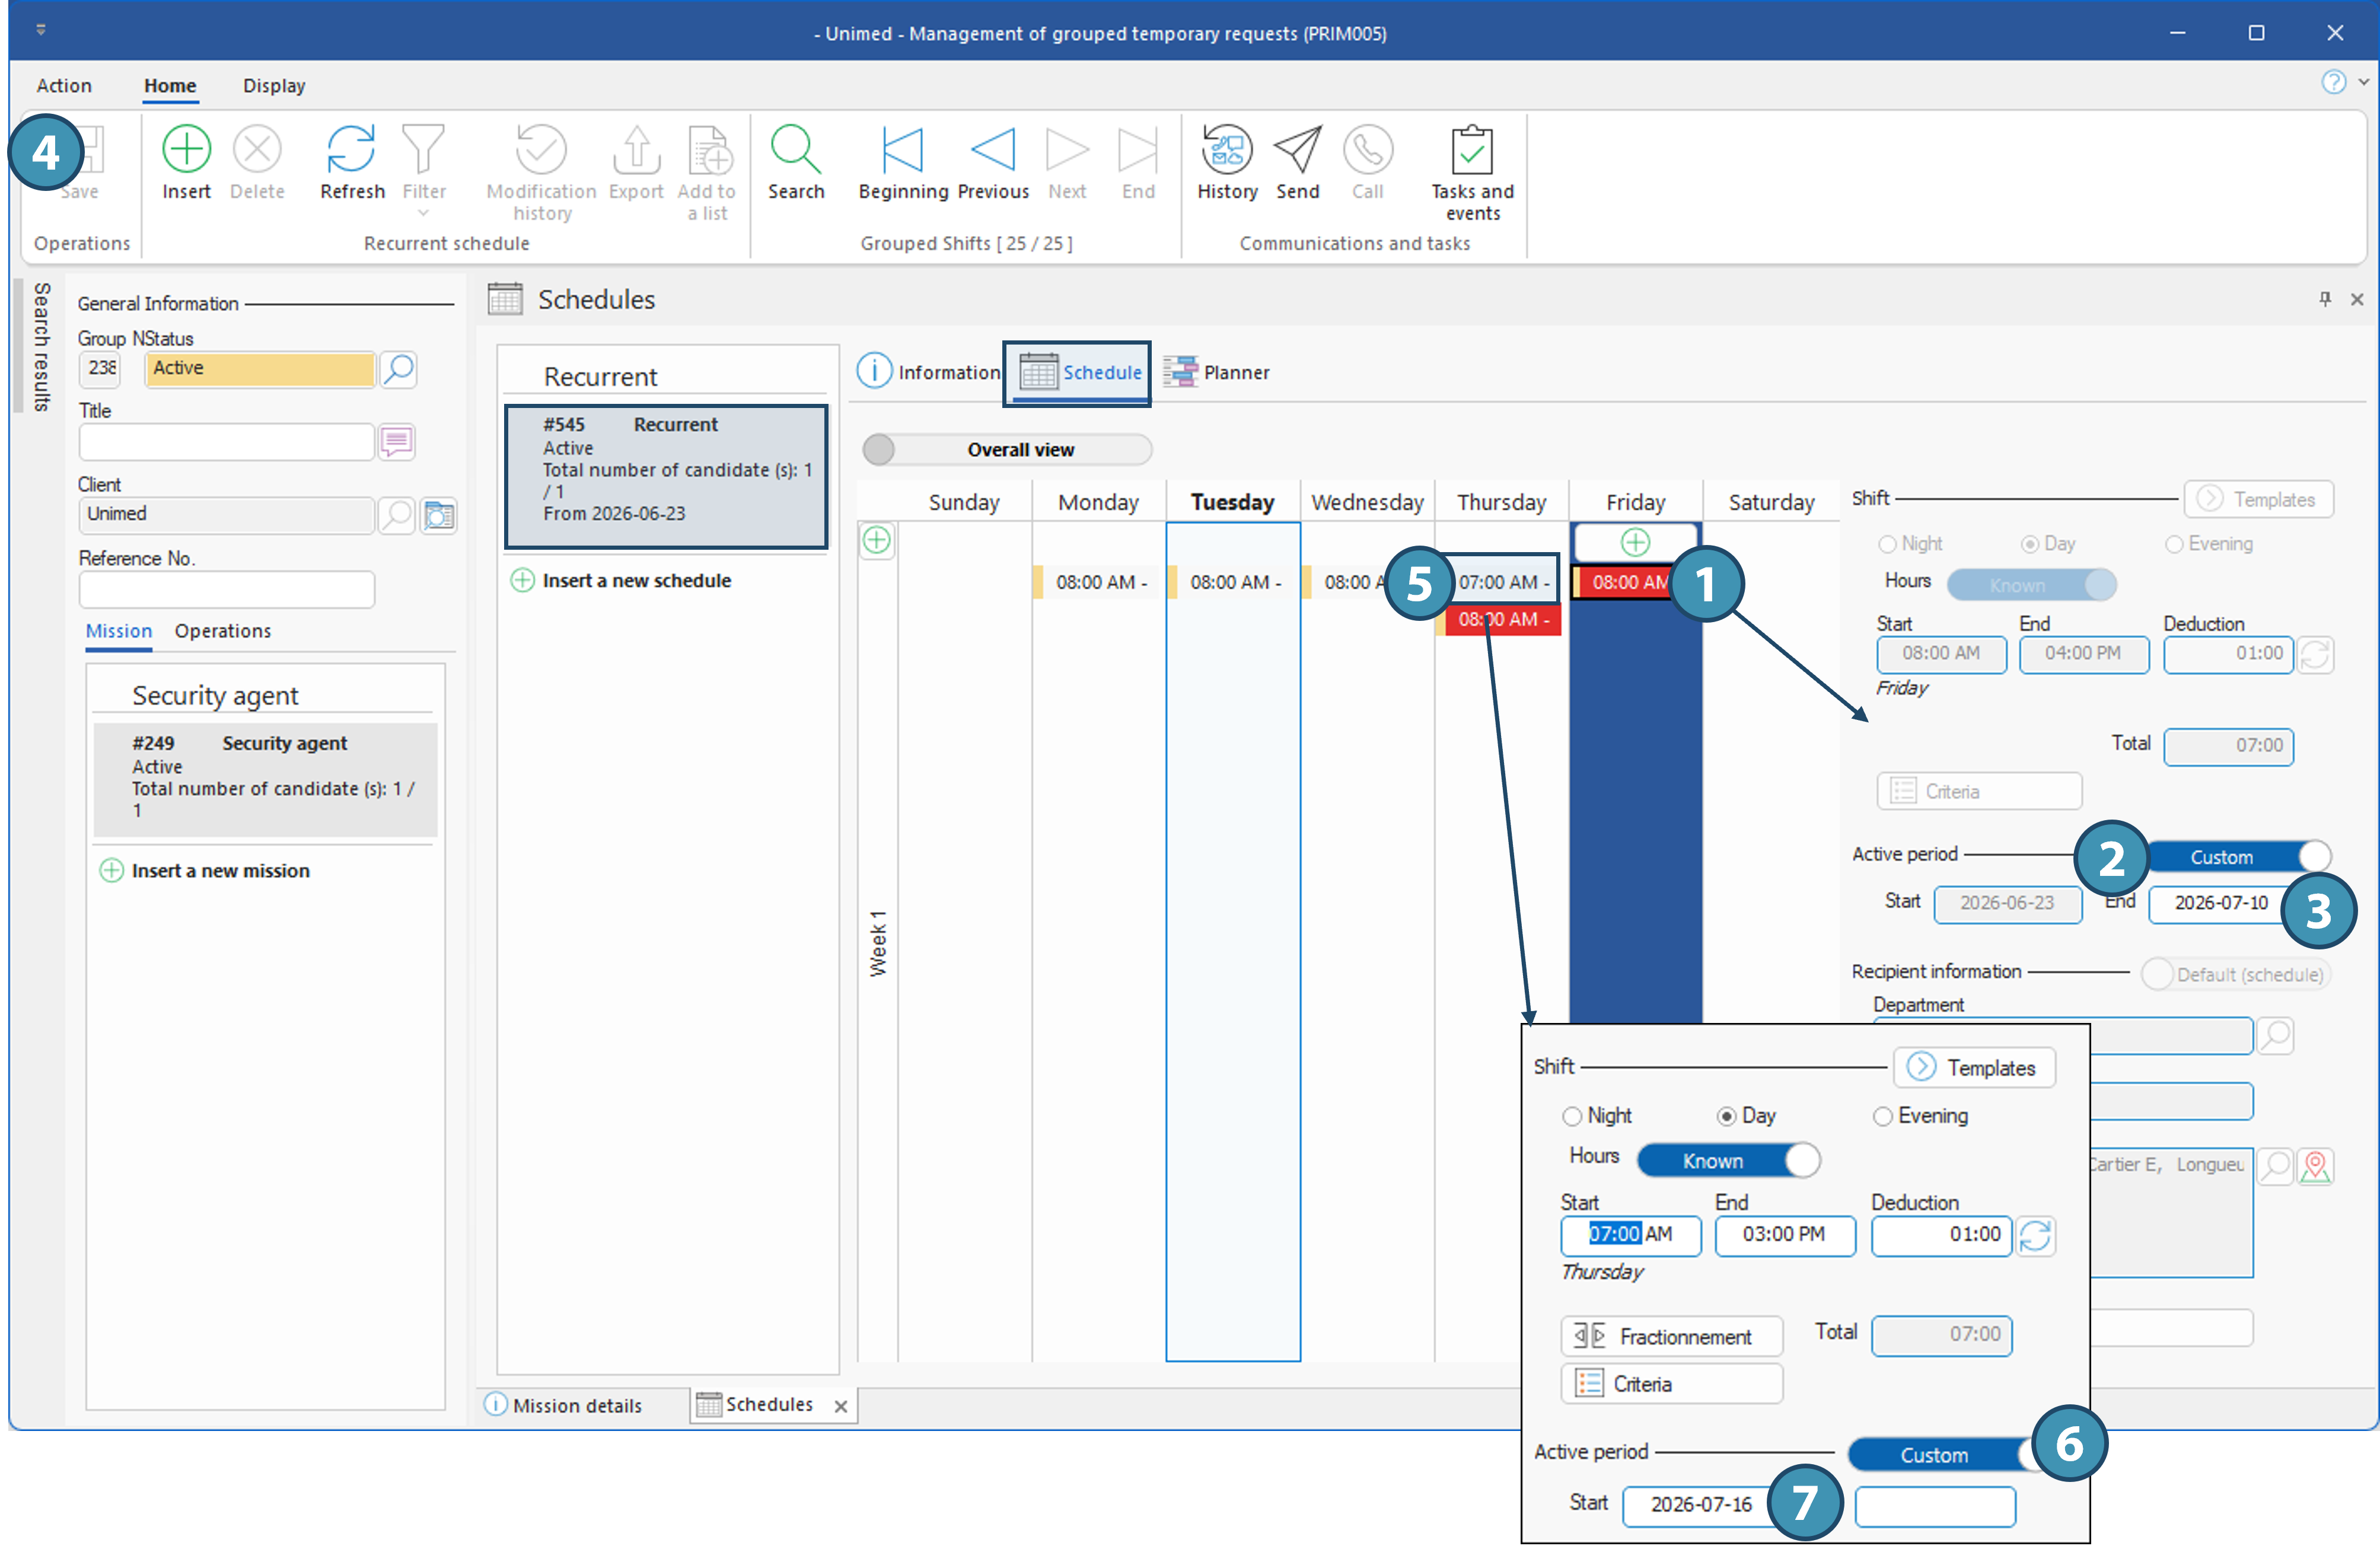
However, over time, changes may need to be made to this schedule. Here’s how to proceed if necessary, depending on the situation. Situation 1: Removing a day from the schedule.This does not refer to canceling a single shift - which is done in the Operations pane - but rather to completely removing a day from the recurring schedule. For example, when the schedule was first created, it ran from Monday through Friday. But at some point, the schedule changes to a 4-day schedule, running from Monday through Thursday. You must therefore remove Friday from the schedule. If shifts have already been created for Friday, you cannot simply delete the shift from the schedule. Instead, you’ll need to modify the time period and set an end date for that day only, as follows:
1.In theSchedules pane , select the relevant schedule, then in the tab where the schedule is defined, select the relevant day. 2.In the right-hand panel, click the toggle switch to the right of “Active Period ” to change it from “Default” to “Custom.” 3.Add the end date of the period for that day (the date of the last day worked). 4.Save.
!If some shifts have already been created in the system after the desired end date, depending on your configuration, you may first need to cancel those shifts before you can set the end date.
Scenario 2: Modifying a day’s schedule (for example, the original schedule was from 8 a.m. to 4 p.m., but is now from 7 a.m. to 3 p.m.)First, follow steps 1 through 4 described in Situation 1 for the day in question to end the schedule as of a specific date, then: 5.Add asecond day in the same schedule, with the new hours. 6.In the right-hand panel, click the toggle switch to the right of " Active Period " to change it from "Default " to " Custom." 7.In the Start field, enter the start date of the new schedule.
By performing these steps, the recurring schedule will be modified. In Situation 1, no more shifts will be created after the end date specified in the custom period for that specific day. In Situation 2, shifts will be created using the new schedule starting from the date specified in the custom period.
ⅰIn both cases, the “Canceled” day will turn red on the schedule after the end date of the period, making it clear which days are still active.
|
Created with Help+Manual 8 and styled with Premium Pack Version 4 © by EC Software