|
Navigation: Training plan > Section 12 – PRIMWEB : the Web portal > Client Web portal > The Temporary section Create, edit, confirm or cancel a temporary request |
Scroll Prev Top Next More |
Create, edit, confirm or cancel a temporary request
Depending on the agency's configuration, a client can create requests from his web portal and transmit them to the agency. It will also be possible to confirm a request, or cancel a vacant shift. Depending on the case, the requests created can also be modified as required.
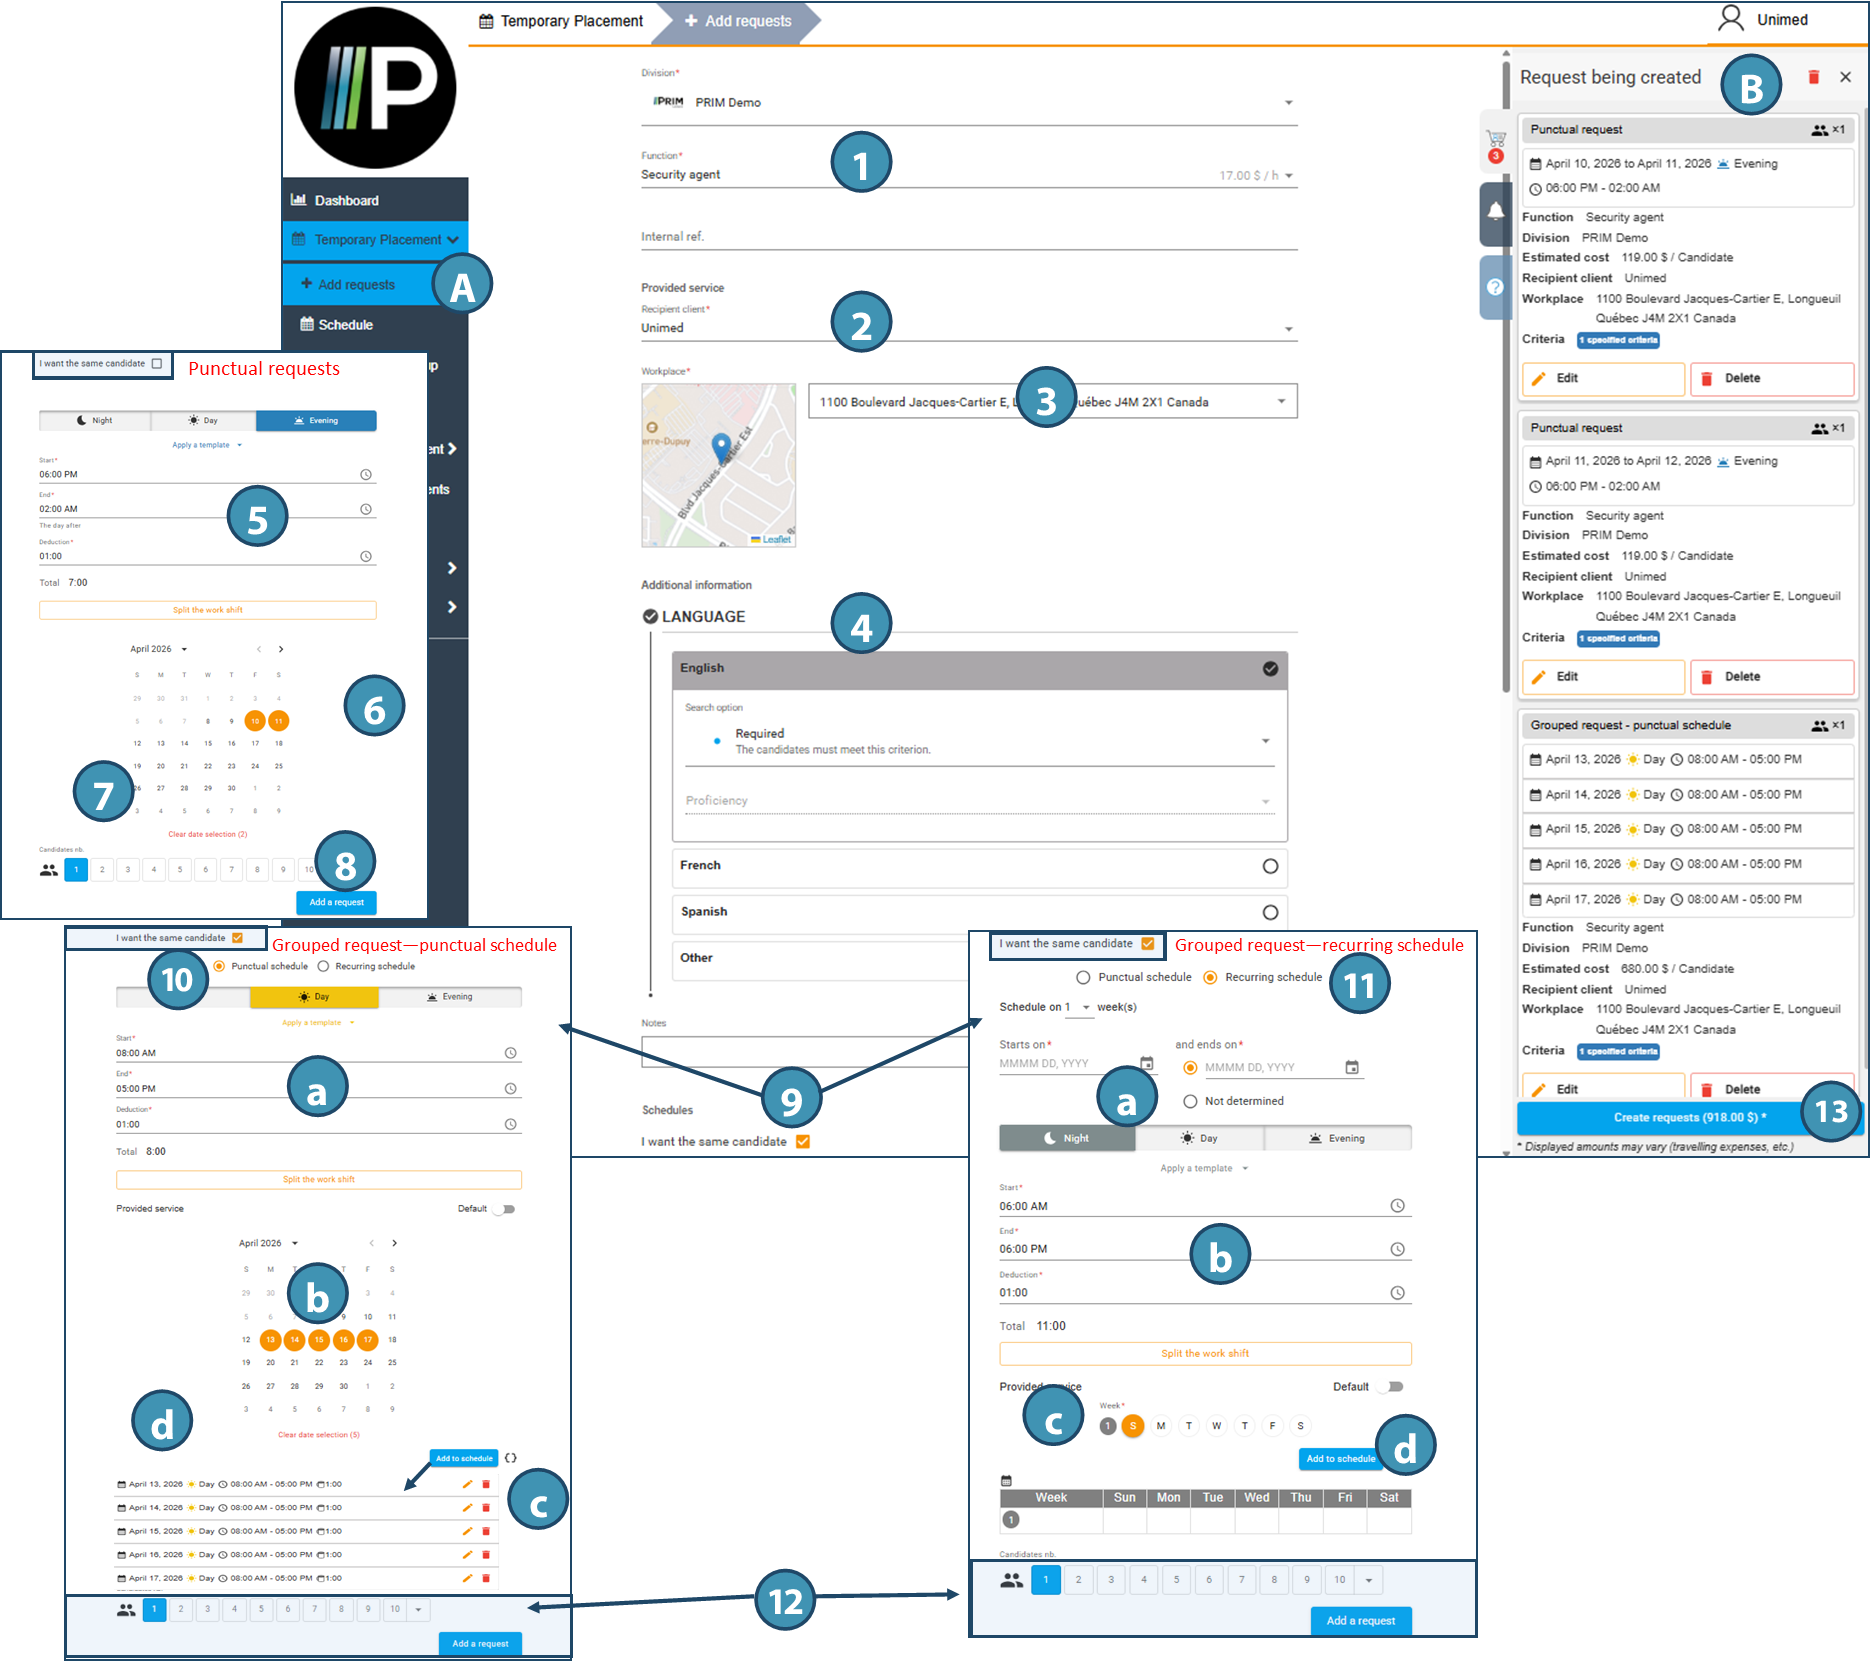
 Create a new request
To create a new temporary request, go to the Add requests(A) page, in the Temporary section.
To create a temporary request, the user must provide the following information: ⅰSome items may be selected by default depending on the client's configuration in PRIM: 1.Function required 2.Recipient client 3.Workplace 4.Requested criteria, if any
For punctual requests (one-off shifts) - bottom section (do not check the I want the same candidate box ) . 5.Indicate the type of shift and the hours to be worked, including deductions. 6.Add date(s) (one or more one-off shifts). 7.Specify the number of candidates required for these shifts. 8.Click on Add a request. Requested shifts are added to a list in the Requests being created pane (B). The user can add further requests, if required.
For grouped requests: 9.Check the I want the same candidate box, then indicate whether this is a one-off schedule (selected dates) or a recurring schedule (selected days, schedule repeating from week to week). 10.In the case of a one-off schedule, tick the corresponding box, indicate the type of shift and hours(a), specify one or more dates(b), then click on Add to schedule(c). Shifts are added to the Shifts section of the schedule(d). You can then add other shifts with different times, if required. 11.In the case of a recurring schedule, check the corresponding box, indicate a start and end date(a), the type of shift and hours(b), select one or more days of the week(c), then click on Add to schedule(d). The week is added at the bottom. If this recurring schedule is a multi-week rotating schedule, it is possible to add the other weeks in the cycle. 12.Whether the type is a one-off or a recurring schedule, enter the number of candidates required for this schedule and click on Add request.
When all the requests are ready, click on the Create requests button(13) create and send to the agency. Please note that if the user logs out before creating the requests, they will not be created.
|
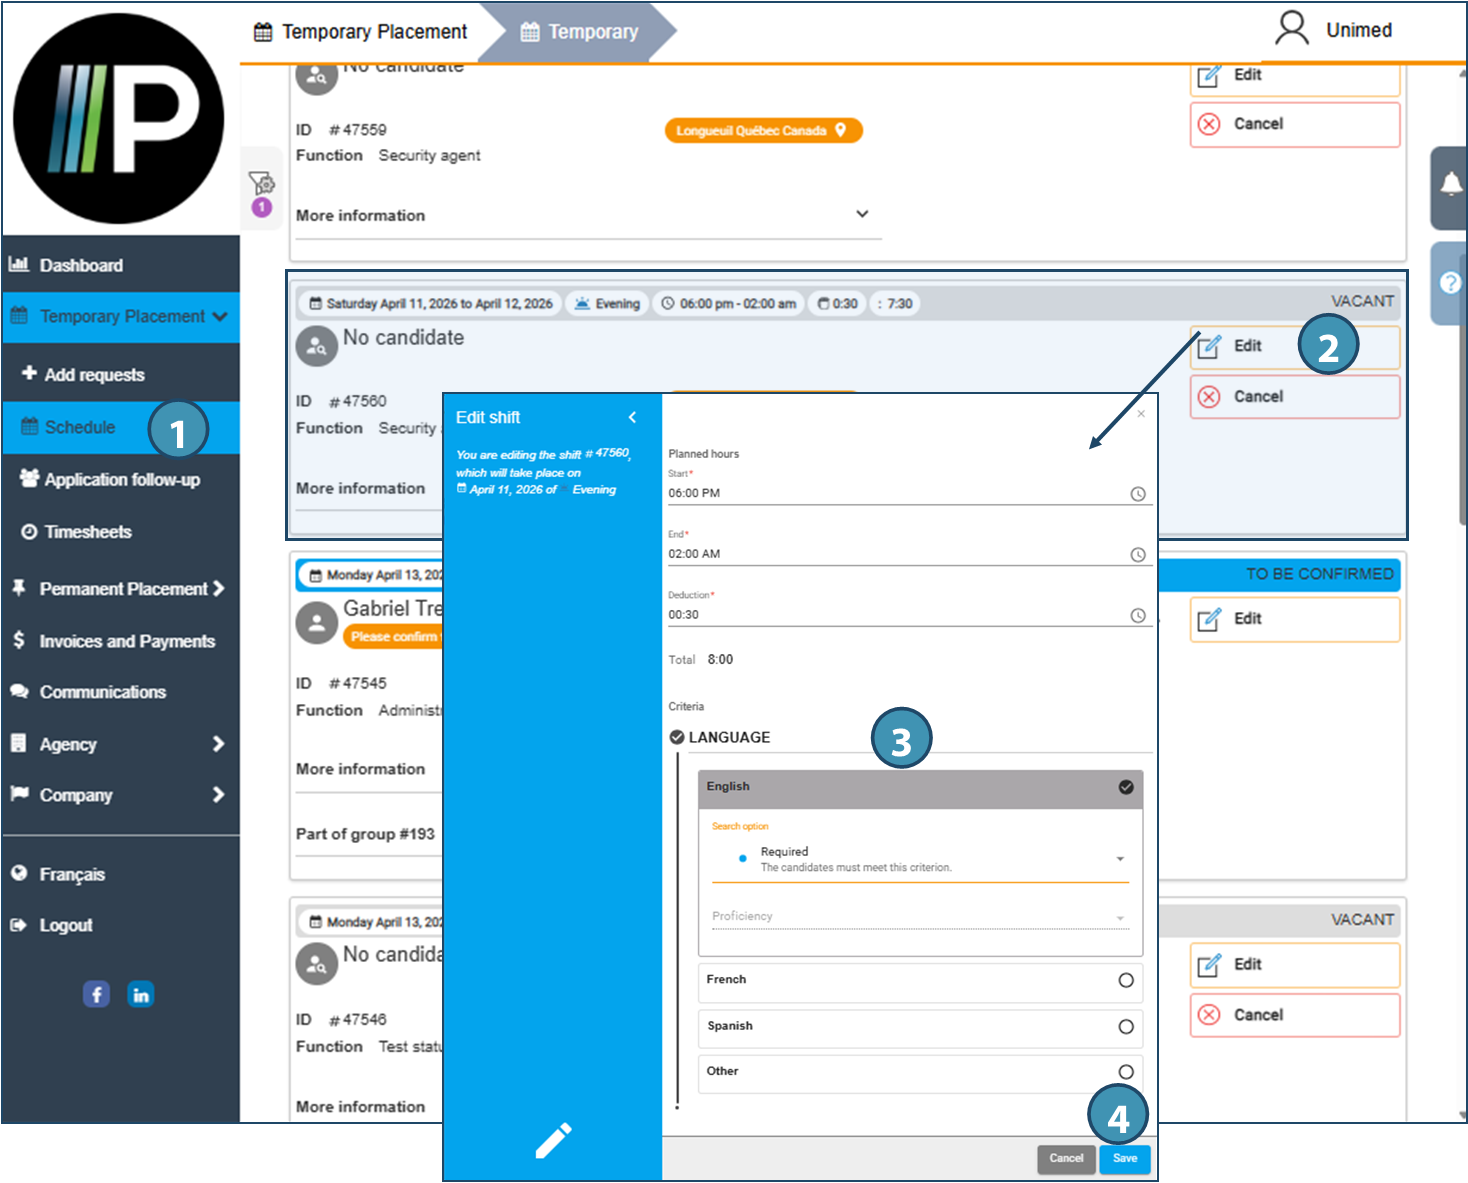
Edit a request
It is possible to edit a single shit request after it has been created, if the request status allows it. Depending on the basic configuration, the following statuses therefore allow modification •Shifts with status VACANT or TO BE REPLACED, regardless of assignment method. •Shifts with status TO BE CONFIRMED and FILLED, but only with Automatic pairing assignment method.
ⅰThe steps described and illustrated below have been carried out with a display in list mode, but the same options will be available whatever the display mode.
1.Go to the Schedule page. 2.In the list of requests, locate the request you wish to modify, then click on the Edit button. 3.In the window that appears, make the desired changes: start time, deduction, end time or criteria. 4.Click on Save. The request has been modified!
|
Confirming an assignment to a temporary request
Once an assignment has been made by the agency, the client can confirm it directly on the web portal. ⅰThe steps described and illustrated below have been carried out with a display in list mode, but the same options will be available whatever the display mode.
1.Go to the Schedule page. 2.Locate the shift to be confirmed, and in the tile, click on Please confirm this candidate.
3.When the confirmation prompt appears, click on Yes, I confirm. 4.The tile indicates that the candidate has been confirmed. ⅰThe status of the request (top right-hand corner of the tile) will change when the candidate has also been confirmed.
|
 For easier identification of shifts to be confirmed, click on
  to access the
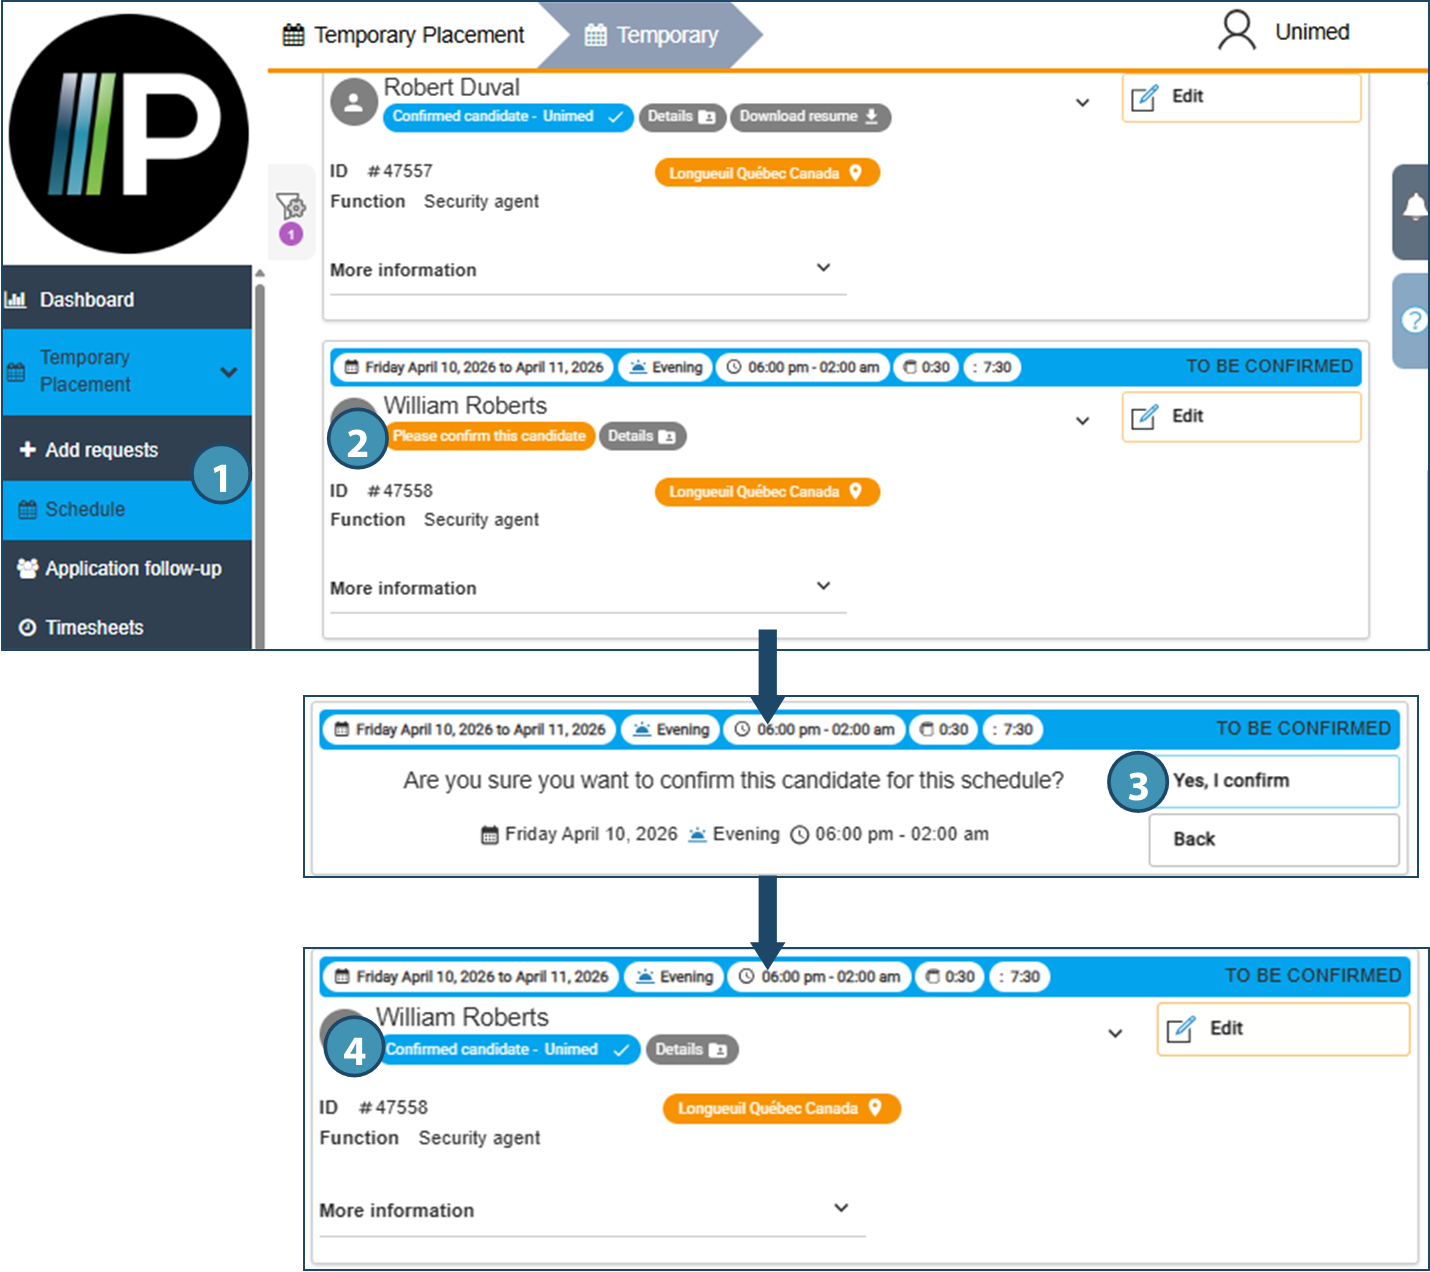
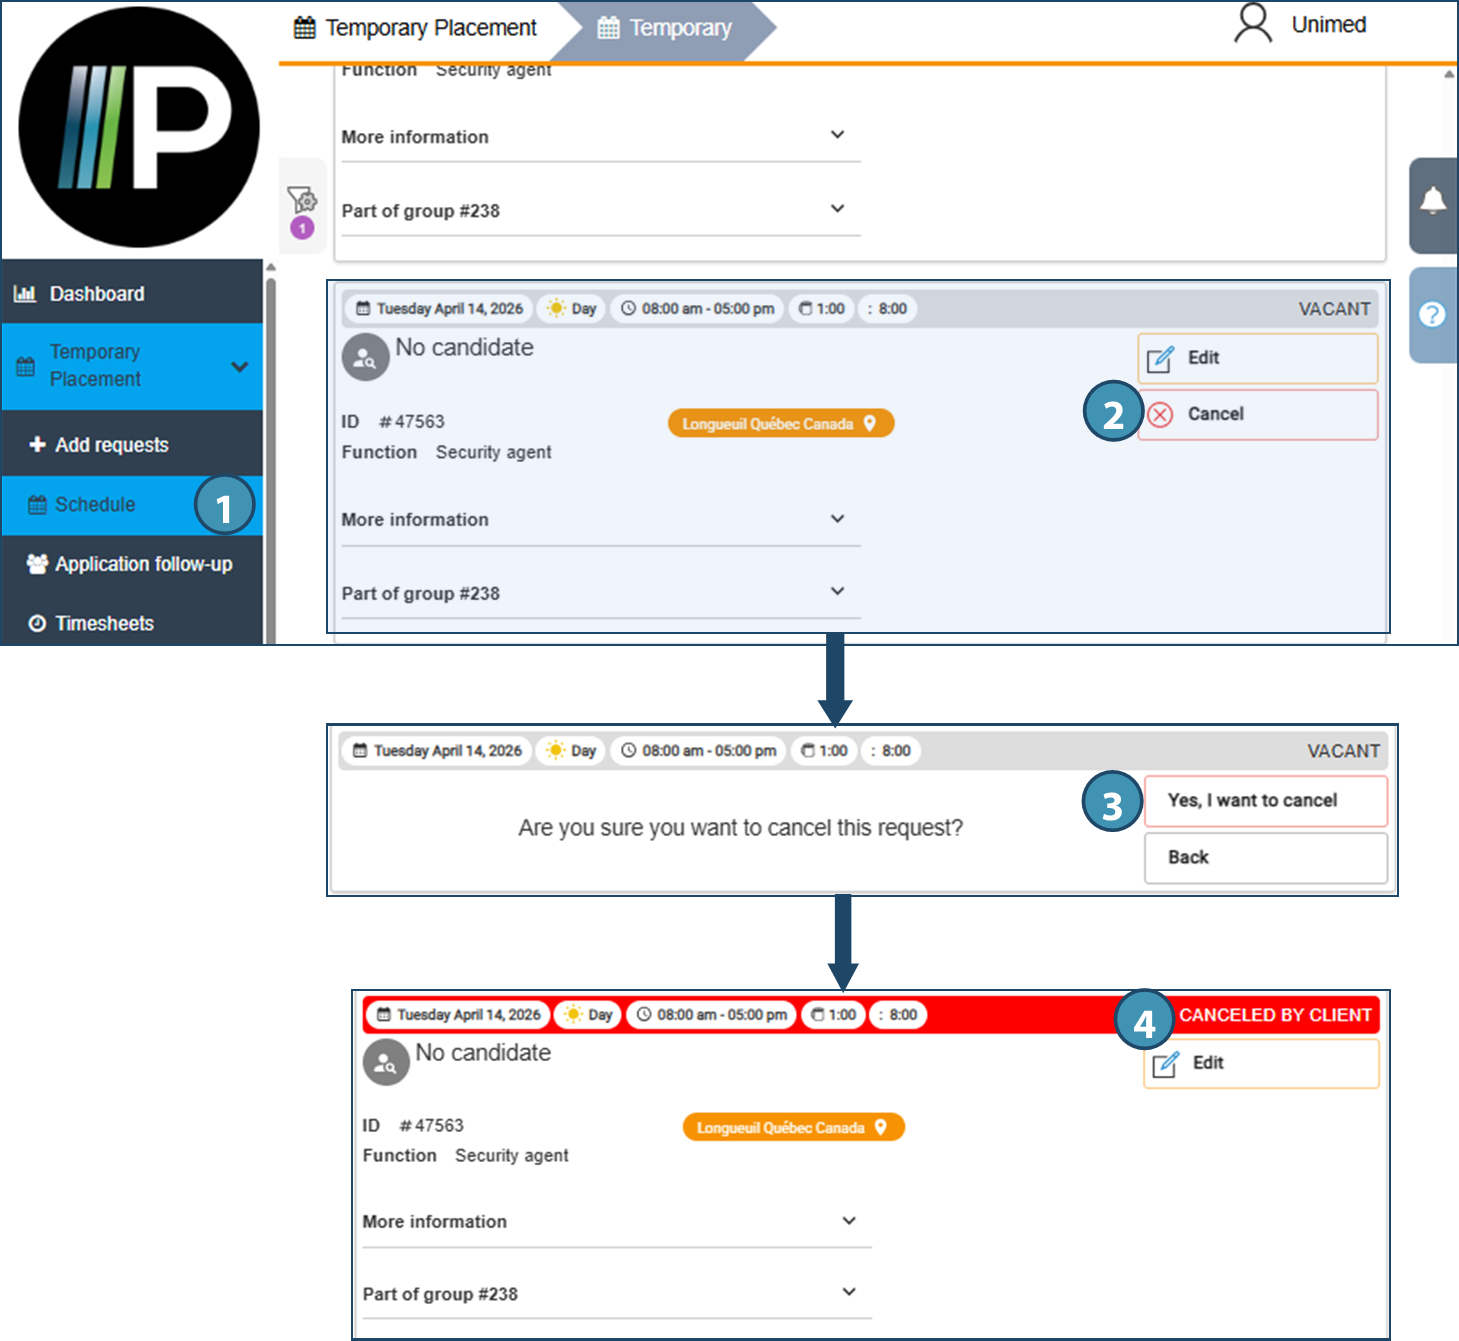
Cancel a shift
Clients have the option of canceling a vacant shift. ⅰThe steps described and illustrated below have been carried out with a display in list mode, but the same options will be available whatever the display mode. 1.Go to the Schedule page. 2.Locate the shift you wish to cancel, and in the tile, click on Cancel. 3.When the cancellation confirmation prompt appears, click Yes, I want to cancel. 4.The status of the tile now indicates that the request has been cancelled.
|
Created with Help+Manual 8 and styled with Premium Pack Version 4 © by EC Software