Confirm a grouped replacement

Contents
![]() Note that sending confirmation emails will not be possible if no email address has been registered in the file.
Note that sending confirmation emails will not be possible if no email address has been registered in the file.
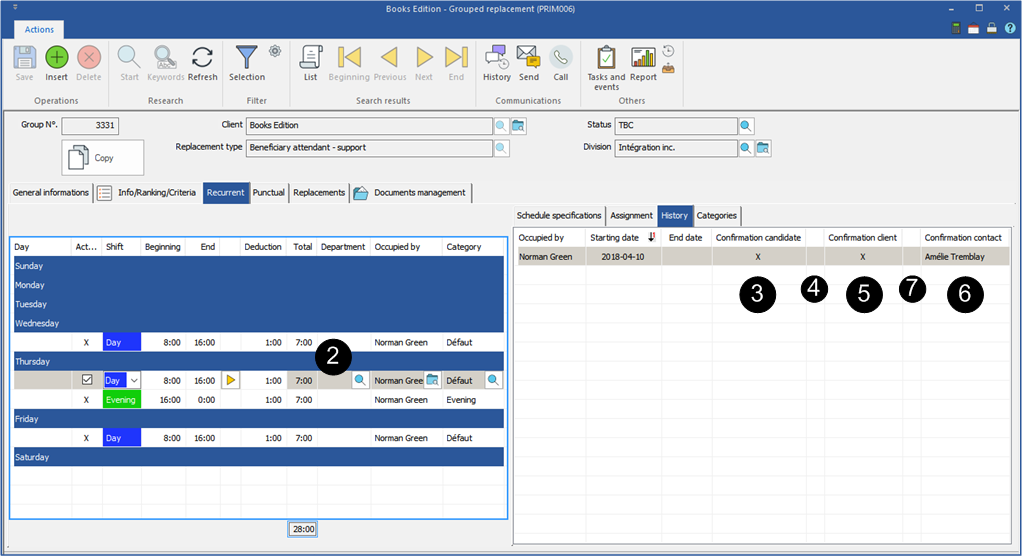
 Confirm a recurrent grouped replacement under the "Recurrent" tab
You are in the grouped replacement file under the "Recurrent" tab.
1.Move under the "History" tab. 2.Select a schedule which is part of the category to confirm.
To confirm to the candidate:
3.Check the box “Candidate confirmation". 4.Click on the icon
To confirm to the client:
5.Check the box “Client confirmation". 6.In the column "Contact Confirmation", select the contact to whom you want to send the confirmation. 7.Click on the icon
|
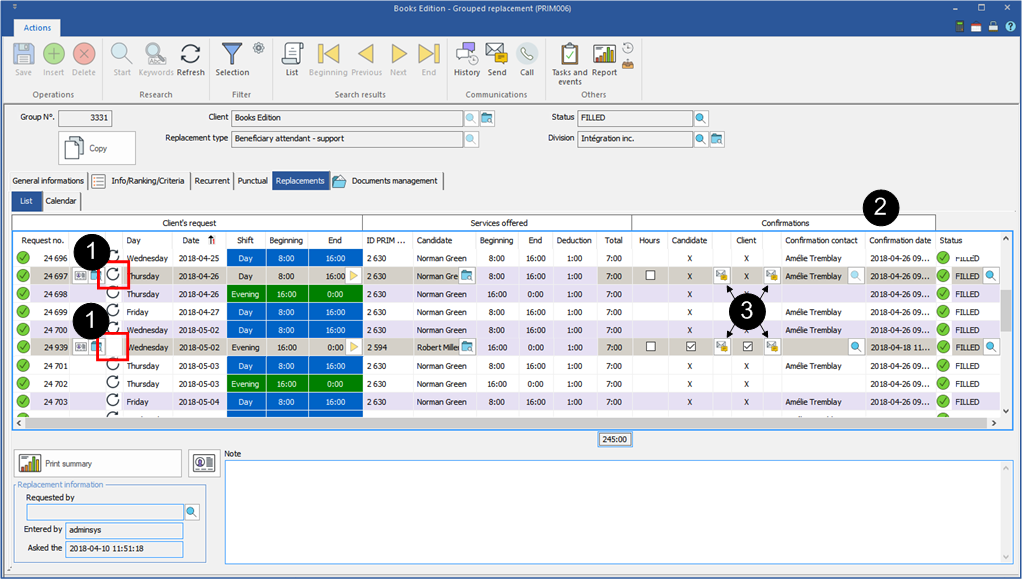
Confirm a recurring or a specific grouped replacement under the "Replacements" tab
You are in the grouped replacement file under the "Replacements" tab.
Sending confirmation email to candidate and client 1.Under the "List" tab, select a specific replacement or a recurring replacement which is identified by the icon 2.Move to the "Confirmations" area. 3.Click on the icon 4.The candidate will receive a confirmation message containing a list of all replacements to which he is assigned, specific or recurring. 5.The client confirmation contact will receive a confirmation message for the selected replacement.
•The following message will be displayed. According to your choice PRIM will apply the changes.
|