|
WARNING: This section is intended for advanced users and "Super users" of PRIM Logix.
The configuration items presented in this section may indeed have an impact on your operations.
If in doubt, consult your system administrator.
Please note that only users in the appropriate security groups can access the software configuration windows. |
Create a display
The display management allow you to decide which columns will be displayed or hidden on the screen and their size.
In a window that do not allow to set up a display, the button will be greyed out. To access display templates or create a display, first access the "General display configuration" window by clicking on  in the Search or Home ribbon, then on "Configure" and finally on "Manage Displays".

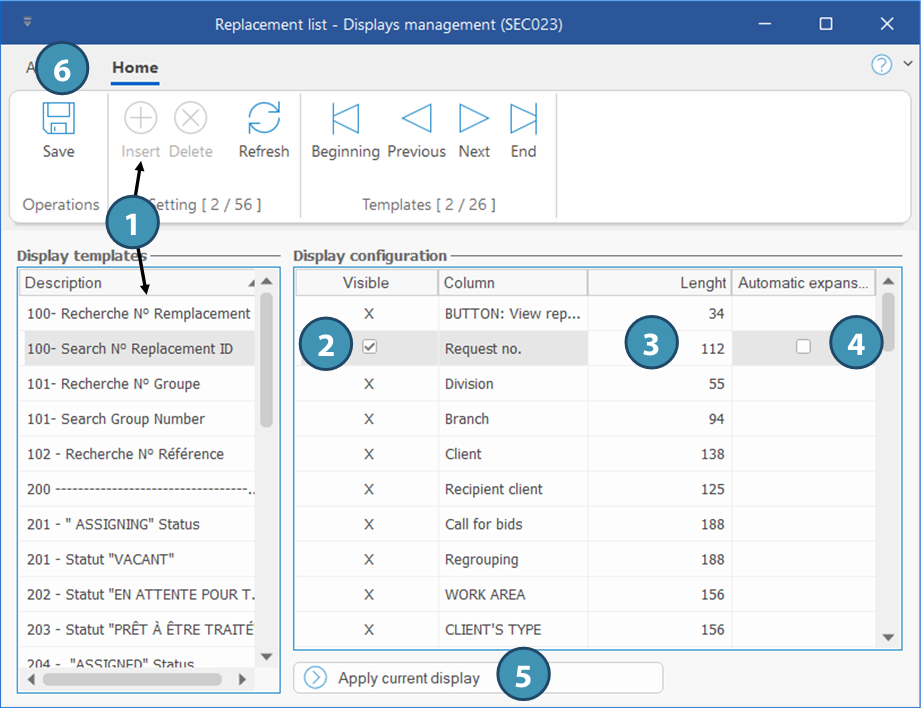
1.In the "Display templates" section, select an existing template or click on  (Insert) or on an empty line to add a new template to the list, and enter a meaningful name. Then click on
  (Save) (6).
2.In the "Configuration" section, check or uncheck the box in the "Visible" column to display or not the selected column.
3.In the "Width" column, enter the desired value.
4.If desired, tick the box in the "Automatic expansion" column: if the width of the selected columns does not add up to the entire width of the data grid, this checkbox allows you to increase the width of one or more columns in order to fill the space in the grid. This option is only useful when no horizontal scroll bar appears at the bottom of the page.
5.If desired, you can rather use the "Apply current display" button: when the display is created, this button copies the configuration currently applied to the window. In this way, the user could adjust the width of each of the columns according to their preferences, then open the window for creating a display and use the button to save the current display as a configured display.
6.Click on  (Save).

