|
WARNING: This section is intended for advanced users and "Super users" of PRIM Logix.
The configuration items presented in this section may indeed have an impact on your operations.
If in doubt, consult your system administrator.
Please note that only users in the appropriate security groups can access the software configuration windows. |

Create a recurrent filter
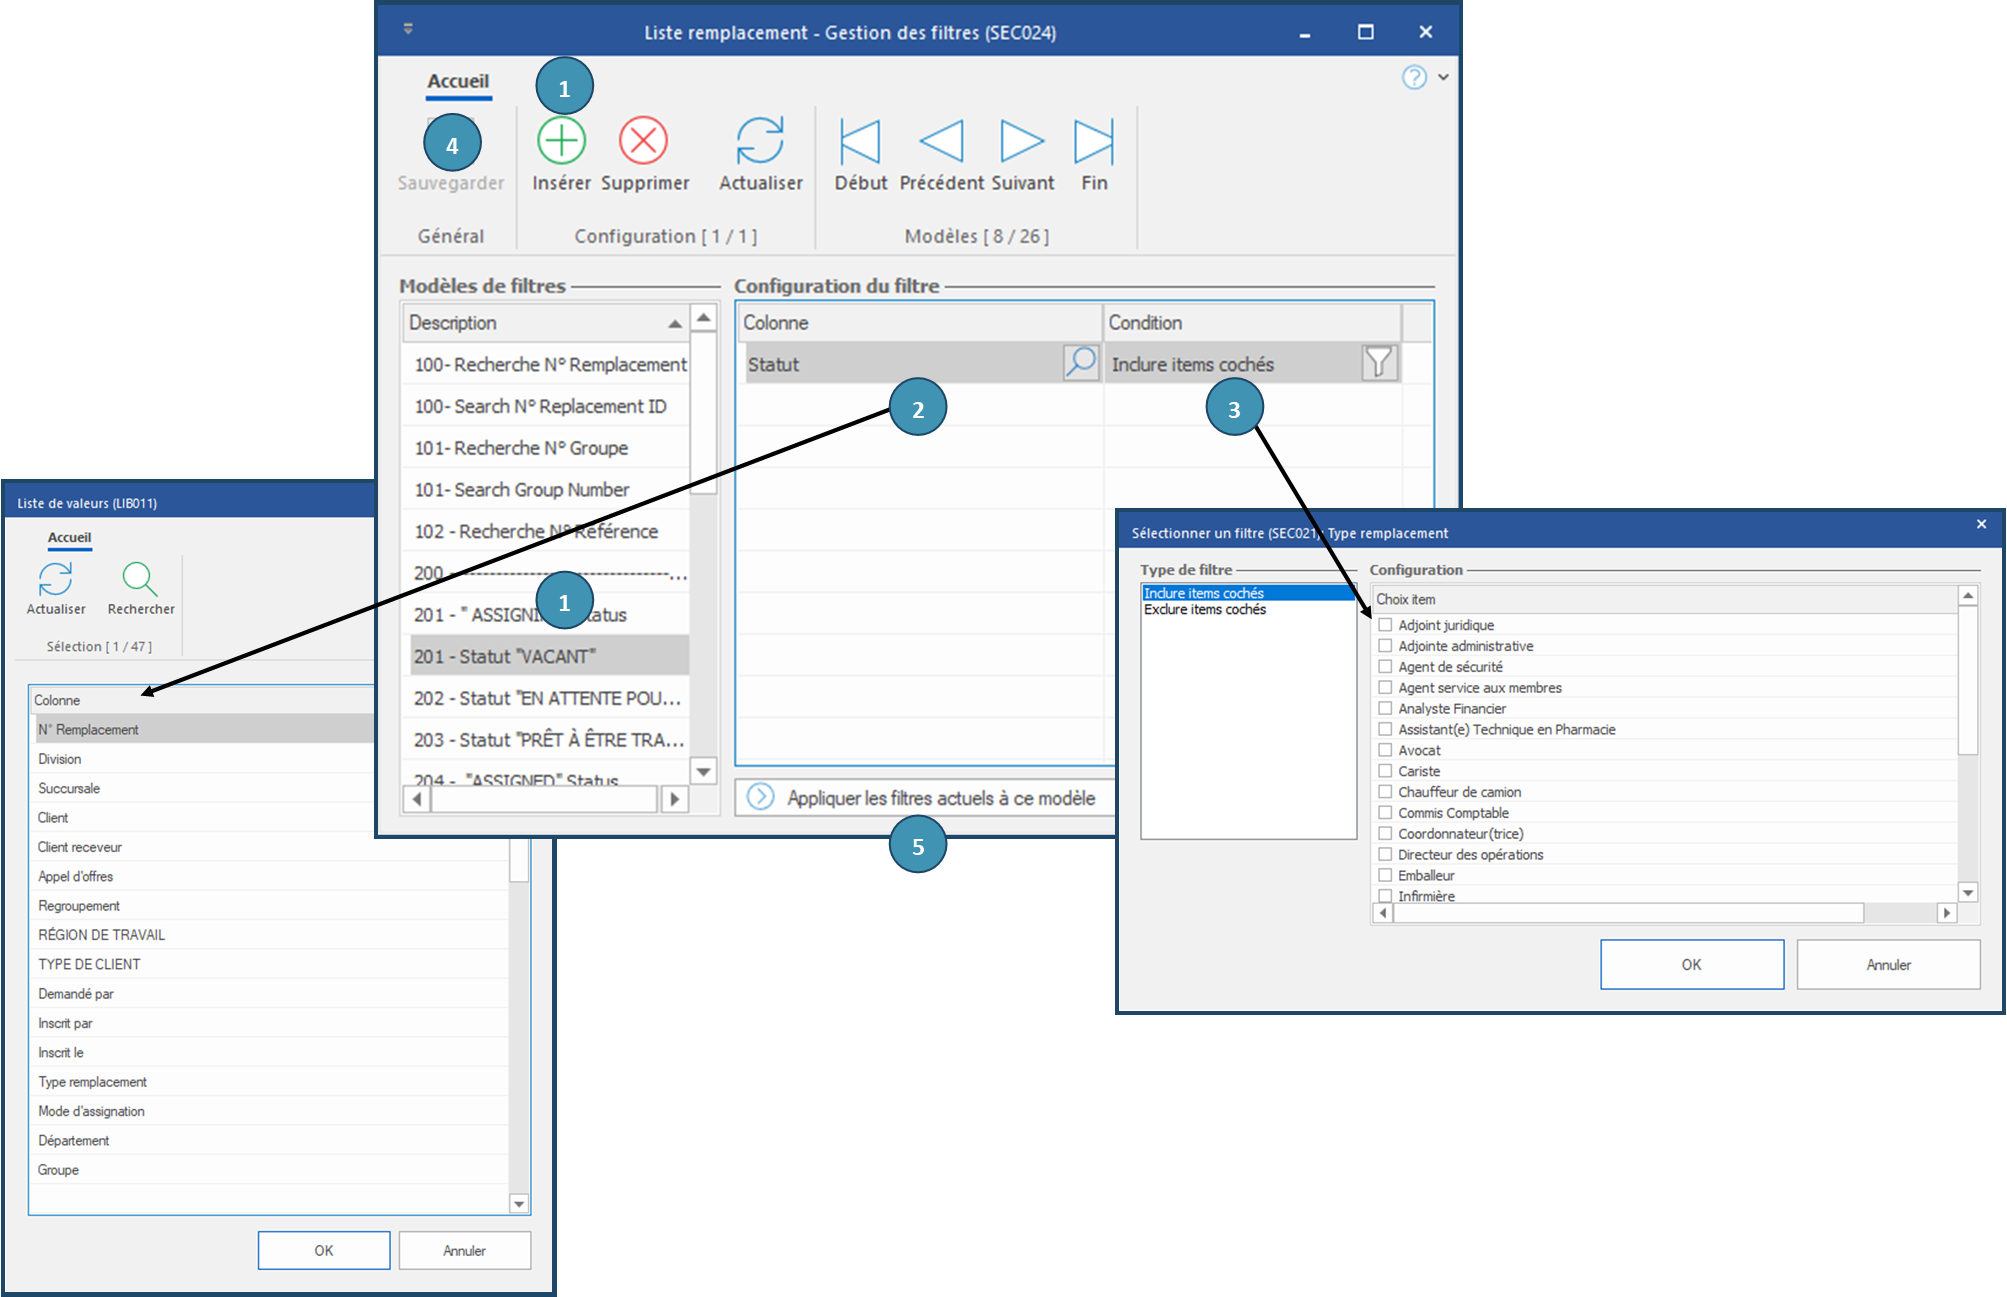
Management of filters allows to select and configure items for which a recurrent filter will be used.
1.In the "Filter models" section, click on  (Insert) or on an empty line to add a new model to the list and enter a meaningful name. Then click on
  (Save).
2.In the "Filter's configuration" section, click on (Insert) to open the window for selecting the available columns. Choose an item from the list.
3.The filter selection window opens, offering the choices that apply to the selected column. Select the type of filter you want and the items to filter, then click Ok. If needed, repeat the operation on other rows to add other columns and conditions.
4.Click on (Save).
5.Instead of previous steps (2-4), you can also create punctual filters on the relevant columns directly in the window for which you want to create a configuration, and use these filters to create the filter template. In the filters management window, once you have created, named and saved the filter template, click on "Apply current filters to this template".
 When creating the filter template, this button allows a copy of the filters currently applied to the window. In this way, the user could adjust the filter values of one or more columns until the desired data is displayed on the screen, then use the button to apply them to the new filter template. Any items added to the "Filter Setup" section before using this button will be lost. However, it is possible to add columns and conditions after using this button.