Display and modify availability on the Web portal
A candidate can indicate his/her availability to the agency using the Web platform.
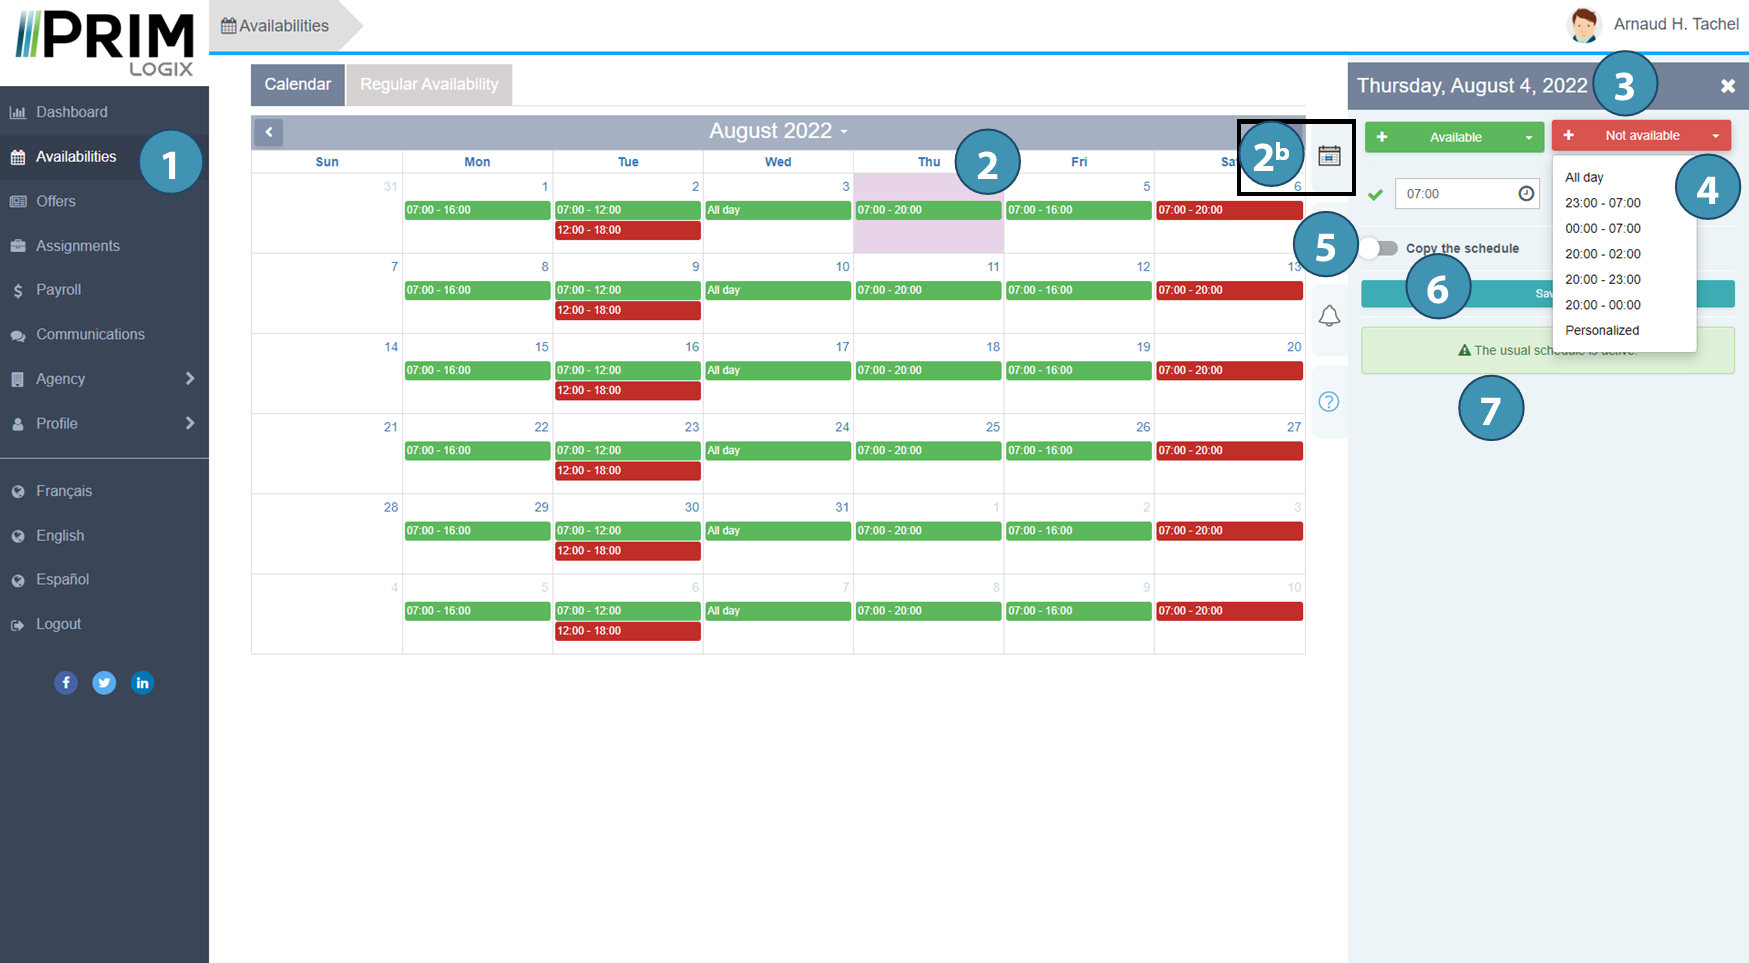
Indicate and modify usual availability
1.In the left menu, click on "Availabilties" (1) to display the calendar.
2.Click on a date (2) to open the availability management tab. Clicking on the calendar icon (2b) will have the same effect.
In this tab, you can:
-Add an information about your availability at a specific date that didn't have any.
-Modify or complete an information about your availability on a date that already has some information.
3.Use the buttons "+ Available" and "+ Not available" (3) to use templates that have been pre-configured by the agency.
OR
4.Fill out the fields below to customize the time range (4).
5.To repeat the same availability on another date, activate the option "Copy the schedule" (5) and select the desired dates.
6.Finally, save (6) your availability to communicate it to the agency.
7.If a regular schedule is set for the selected date, a message will be displayed to advise you (7).
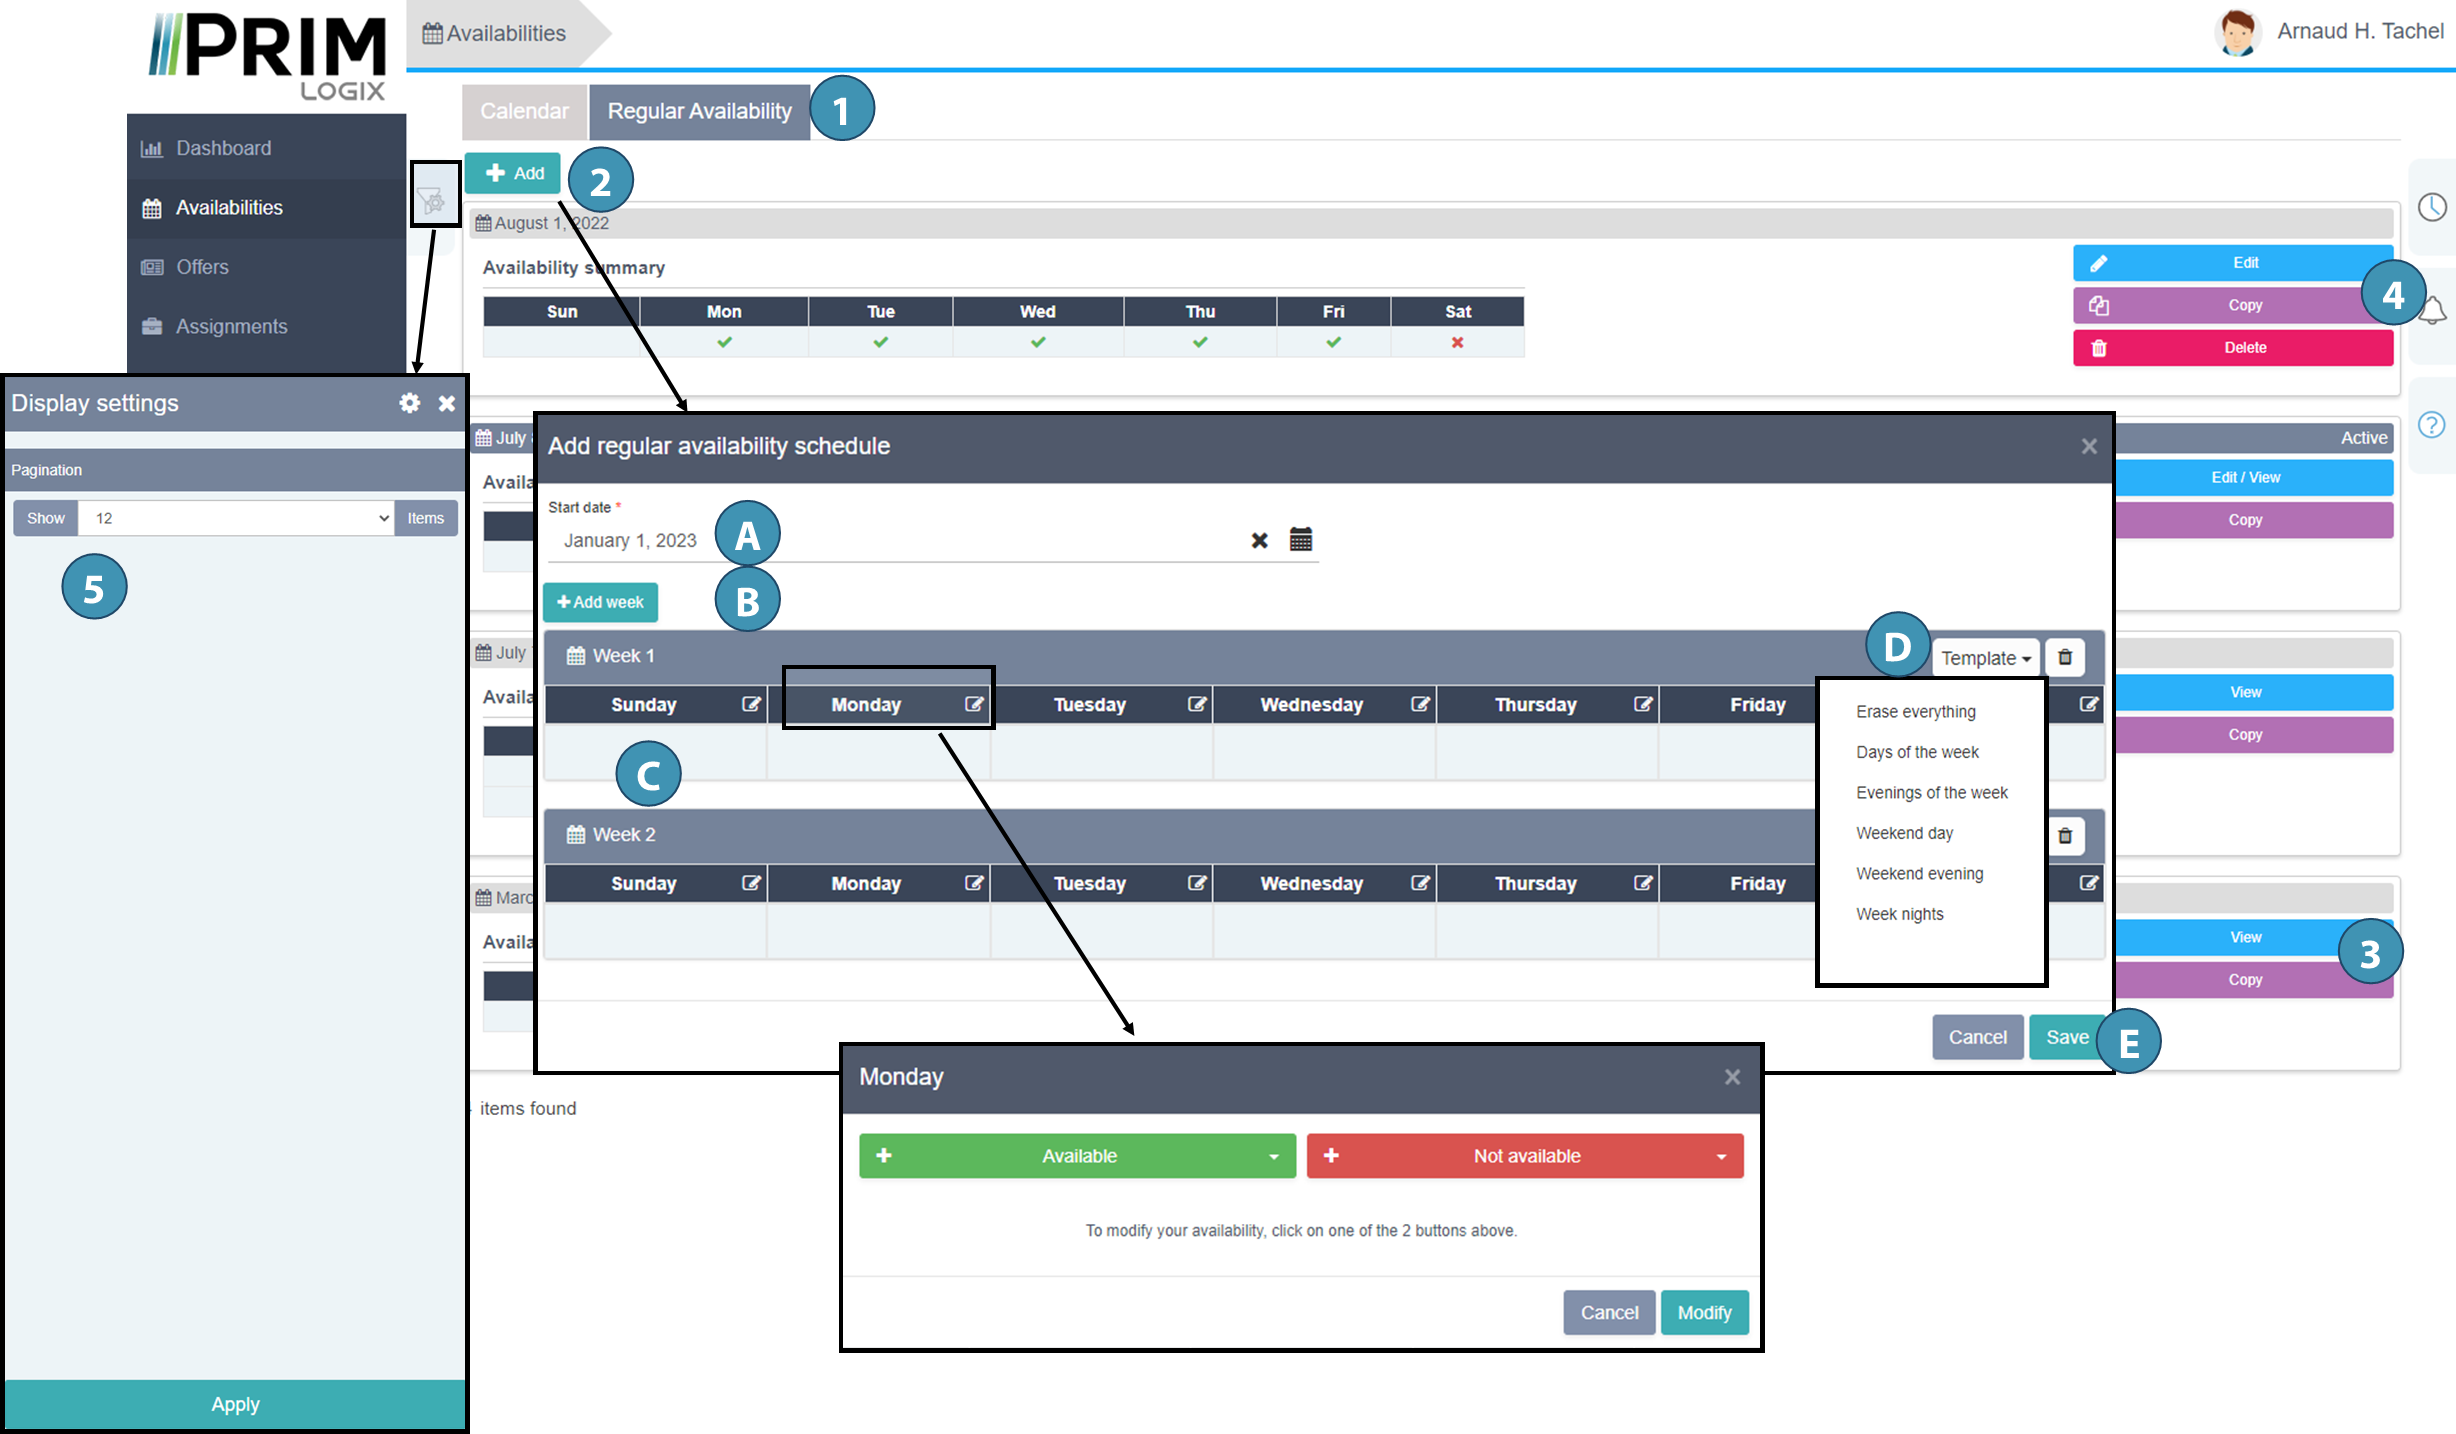
Manage regular availability
Regular availability of a candidate is recurrent schedules during which the candidate is or is not available to work.
A same schedule can count up to 4 different weeks before the cycle is repeated.
Example :
-Week 1 : available on week evenings, but not during the week-end
-Week 2 : available 3 evenings during the week, and 1 day during the week-end
-Week 3 : not available during the week, but available during the week-end
-Week 4 : available 3 evenings during the week, and 1 day during the week-end
-…at the end of week 4, schedule goes back to week 1.
1.In Availabilities from the left menu, go to the tab "Regular availability" (1).
2.The button "+ Add" (2) allows you to add a new cycle (1 to 4 weeks).
-Indicate the start date for the new cycle (A)
-Add as much weeks as you need, up to 4 weeks (B)
-Complete your schedule for each week in the cycle by clicking on the day (C). It is possible to use a template set up by the agency. Just click on "Template" (D)
-Save (E).
3.It is possible to view or copy a past schedule (3).
4.It is also possible to modify the current schedule (4).
5.The settings allow your to display the number of schedules you want (5).