|
Navigation: Training plan > Section 1 - Basic concepts, interface and common manipulations > Section 1 - Advanced Users Adding restrictions in a window |
Scroll Prev Top Next More |
Adding restrictions in a window
PRIM allows you to manage security more precisely, including to control access to some items in the window.
 Only users in the "ADMIN" security group will have access to this window.
 The procedure for adding restrictions is the same for all types of elements found in the "Security Settings" window. Some items will display different types of restrictions, while others will not allow restrictions to be added.
There are two types of windows in PRIM, so there are two ways to launch the "Translation and security" window.
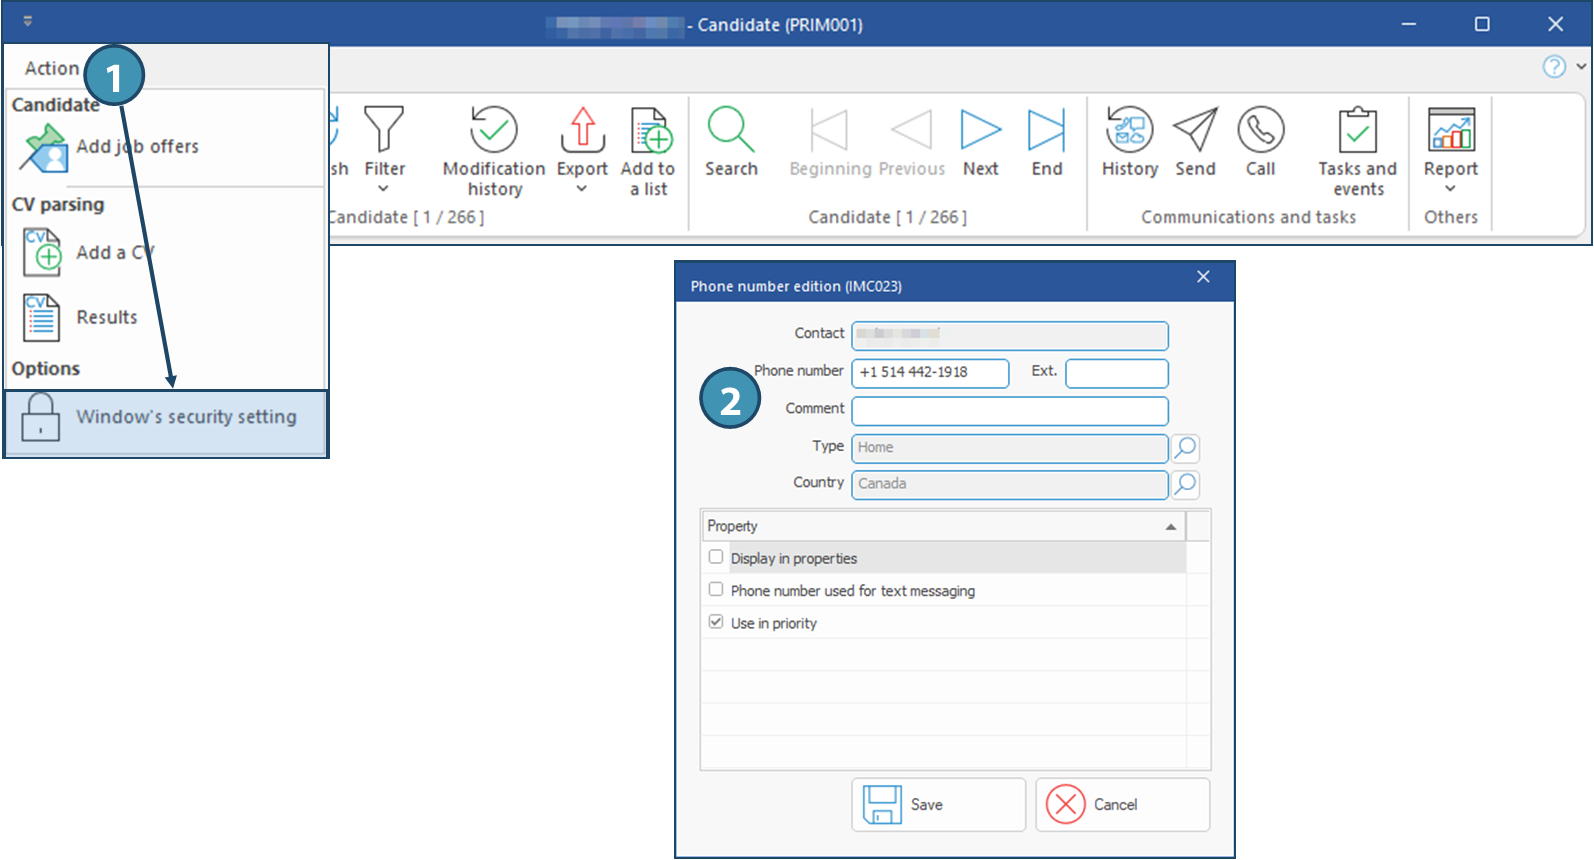
1.Windows with controls included in ribbons: click on Actions, then on Window's security setting. The window will be launched as a nested pane to the left of the window.
2.Windows without any controls or ribbon: press CTRL + Alt + S. The window will be a standalone floating window.

 Items of a window and restriction types
 Fields and "visal" type restrictions
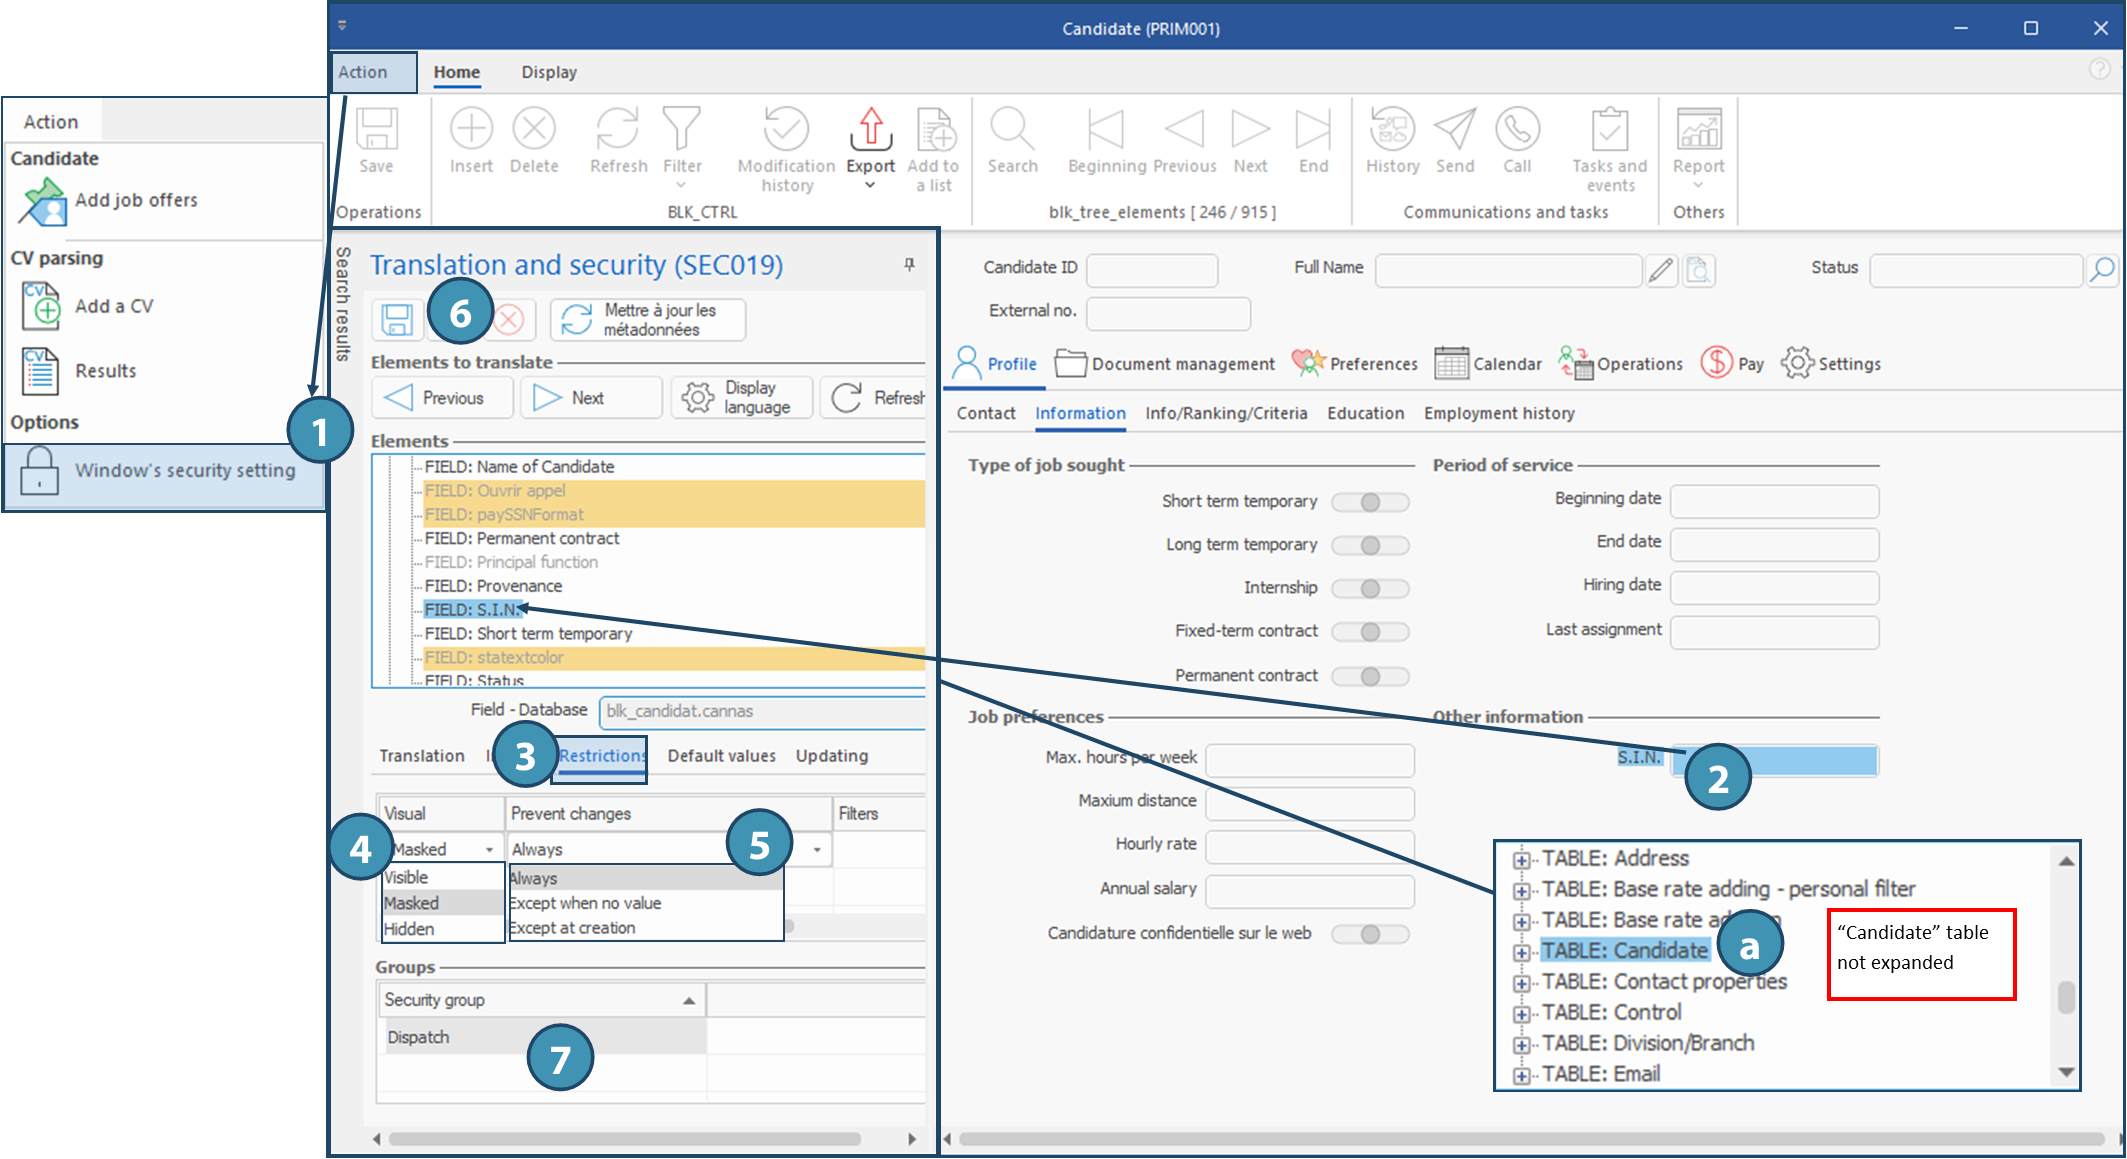
In the example below, some restrictions will be added to the Candidate window in order to prevent the group "Dispatch" to see and edit the candidate's social insurance number (SIN). .
1.Open a Candidate window, and from Action menu, click on Window's security setting. The Translation and security (SEC019) pane is launched. 2. In the list of items, or in the candidate window, locate and select the item to which you want to apply a restriction. In this case, it's the S.I.N. field.
3.Go to the Restrictions tab. 4.Under the Visual column, select the visual restriction to be applied. For our example, we selected Masked. Refer to the above table for more details on each restriction type. 5.Under the column Prevent changes, select the desired restriction for changes in the field. Refer to the above table for more details on other available options. 6.Click on 7.In the Groups section, click on an empty line. In the window that pops up, tick one or more security group(s) to which you want to apply the restriction and click on OK. For the example, we added the Dispatch group. 8.Click again on
The data entered in the S.I.N field will be replaced by ********* and will not be editable anymore by the users of Dispatch security group.
|
 A tab
A tab
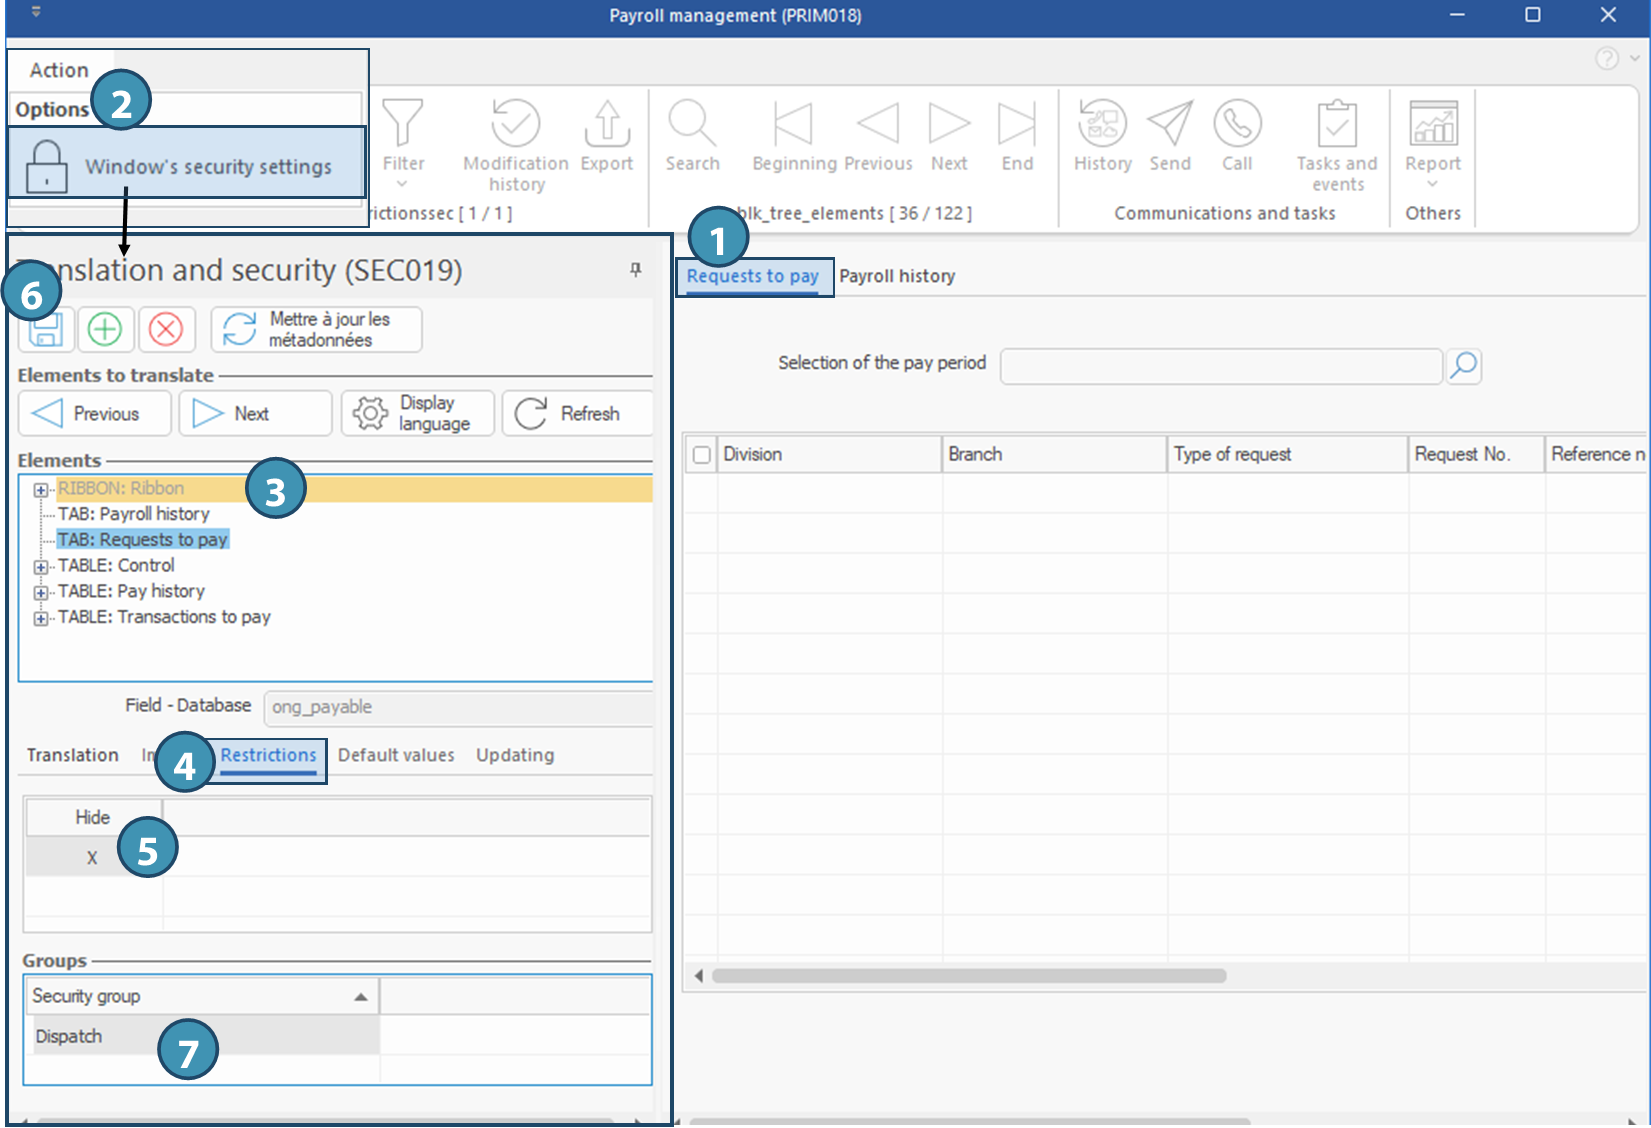
In the example below, a restriction will be applied to the Payroll management window to limit access to the Requests to pay tab.
1.Open the Payroll management window. The Requests to pay tab is accessible. 2.From the Action menu, click on Window's security setting. The Translation and security (SEC019) pane is launched. 3.In the Elements section, select the Requests to pay tab.
4.Go to the Restrictions tab. 5.Tick the check box in the Hide column to block access to this tab. 6.Click on 7.In the Groups section, click on an empty line. In the window that pops up, tick one or more security group(s) to which you want to apply the restriction and click on OK. For the example, we added the Dispatch group. 8.Click again on
The tab Requests to pay is not available anymore for the security group added!
|
 A table
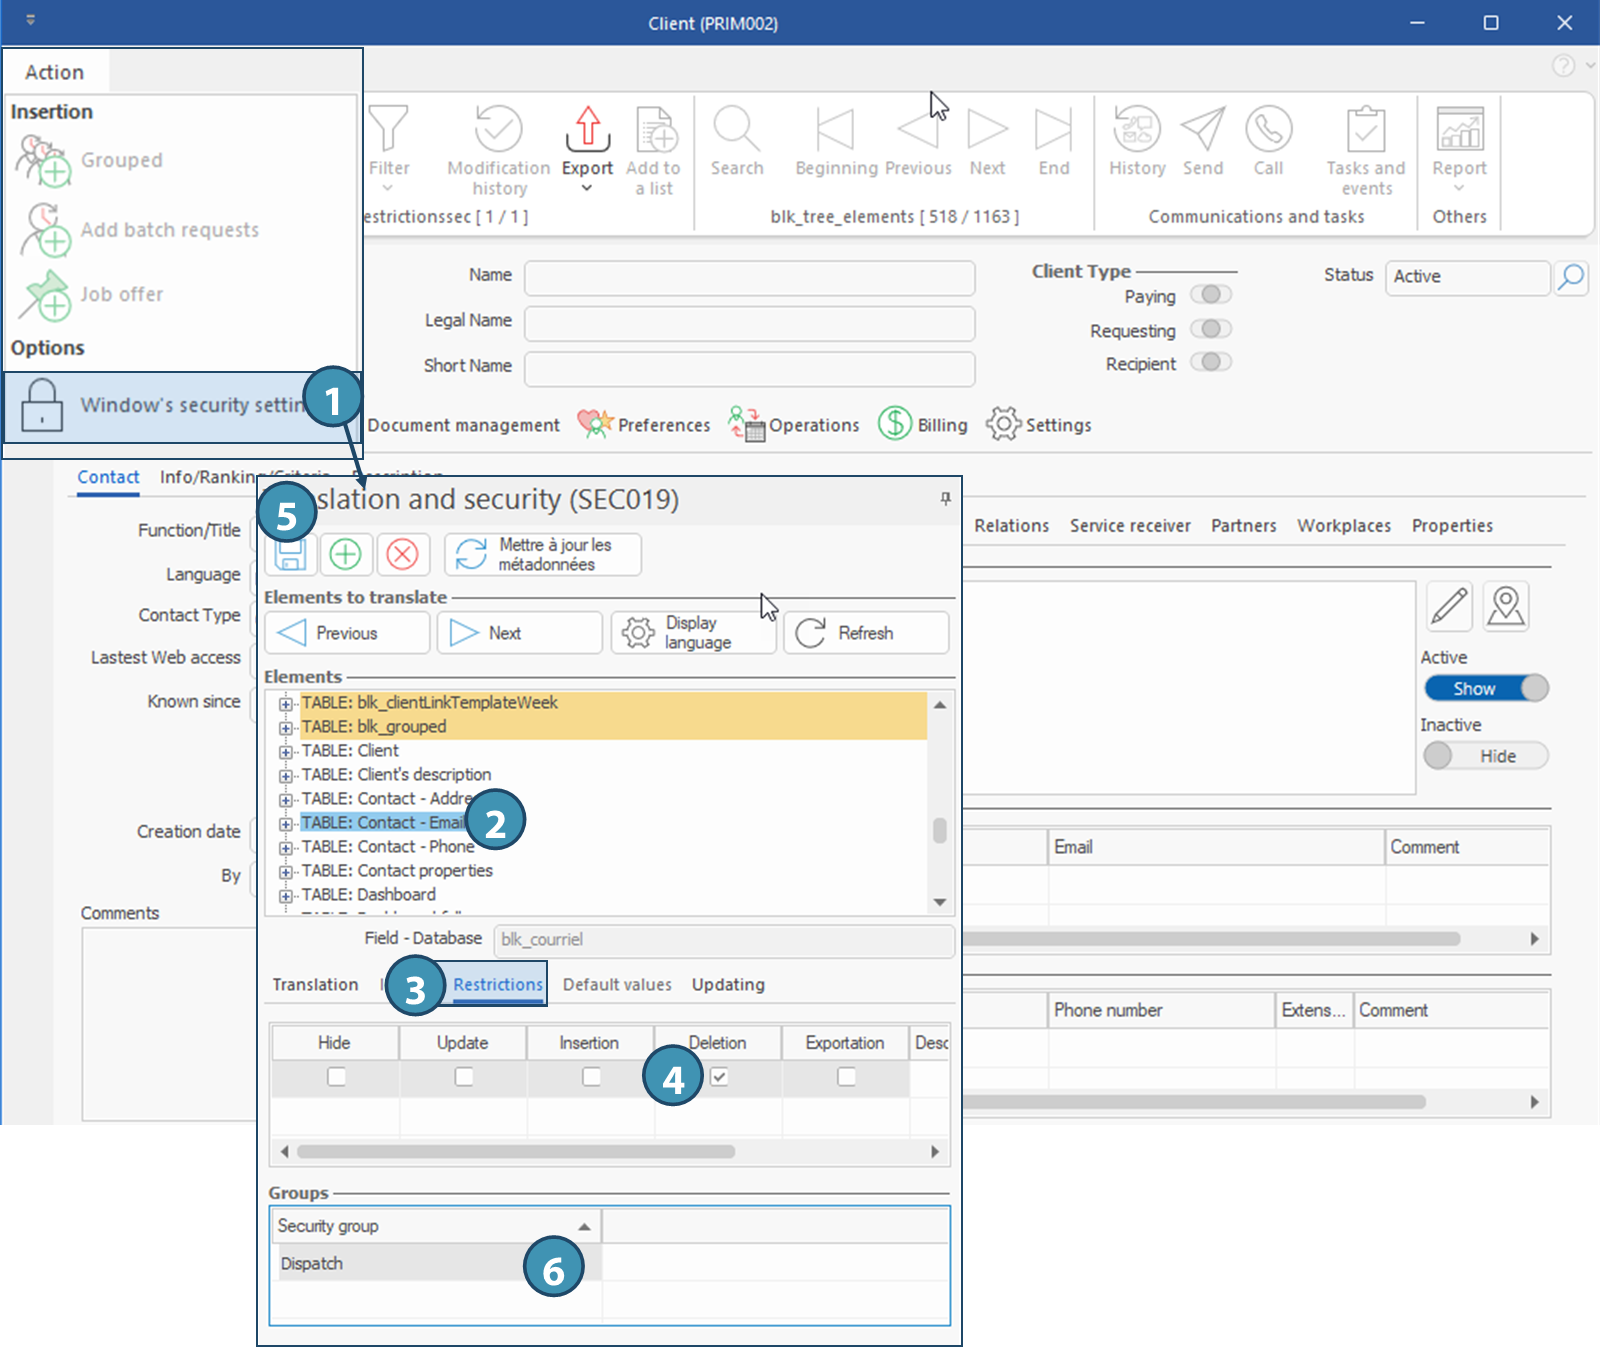
In the example below, a restriction will be applied to the Contact - email table of the Client window for the Dispatch security group.
1.Open the Client window. From the Action menu, click on Window's security setting. The Translation and security (SEC019) pane is launched. 2.In the Elements section, select the relevant table. Here we selected TABLE: Contact - email 3.Go to Restrictions tab. 4.Depending on the desired result, tick the proper check boxes. Refer to the above table on restriction types for more details on the effect of each option. 5.Click on 6.In the Groups section, click on an empty line. In the window that pops up, tick one or more security group(s) to which you want to apply the restriction and click on OK. For the example, we added the Dispatch group. 7.Click again on
Users of the Dispatch security group will not be able anymore to delete an email from the Contact tab of the Client window.
|
Created with Help+Manual 8 and styled with Premium Pack Version 4 © by EC Software

 in the

