Window - Division
Depending on your customized configuration, you company can count one or more division. This window display all the information regarding each of these division, such as contact information.
In Home ribbon, click on  (Division).
• It is possible to navigate through the records using the following icons (


 ).
).
•By default, the search results pane available on the left of the window shows the list of all divisions set up, making it possible to access them from the list.
• To find a specific division and refine the results click on
  , enter a keyword in the fields in green and click on
  (Execute search).
Presentation of the window
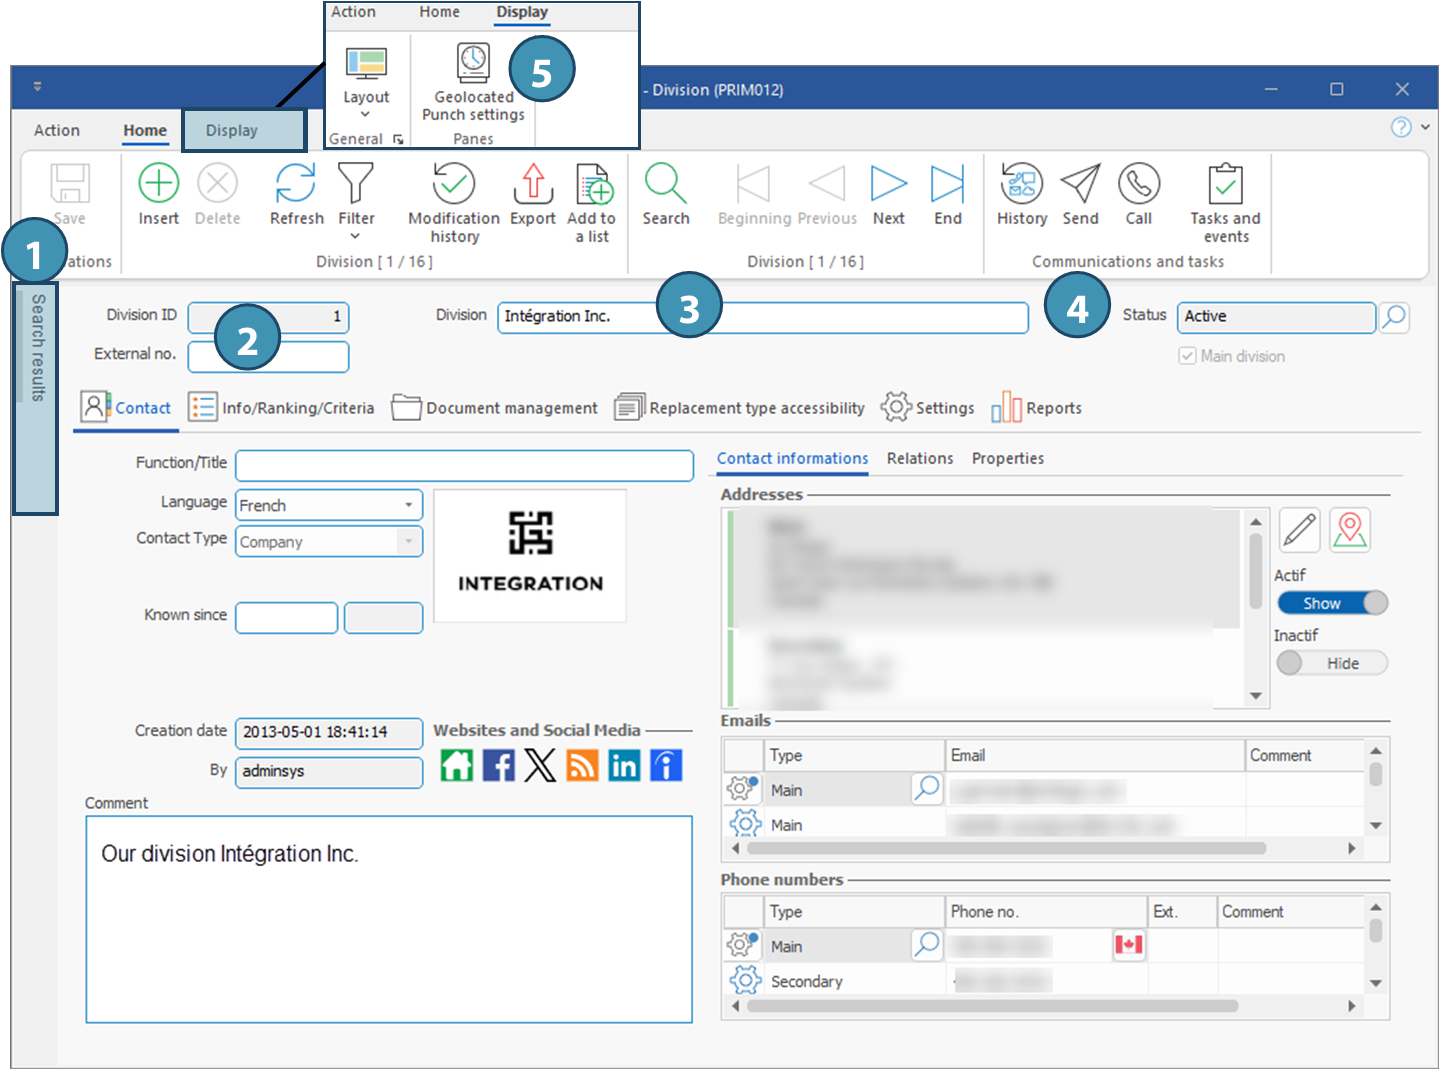
1.Search results: Search results pane. click to display the list of all your divisions, or result of your search.
2.Division ID: Unique identification number generated by PRIM
| External no.: Identification number for the division entered by the user (optional). It could be the division number used in the accounting system. l peut par exemple s'agir du numéro du division tel qu'utilisé dans le système comptable. |
3.Division: Name of the division
4.Status: current status of the division.
| Main division (checkbox): Tick this box for the main division in yoru company. |
 When PRIM has to display the company's contact details, the main division's information will be used.
 Only one division can have this check box ticked. Furthermore, it will not be possible to disable the main division.
5.Display > Geolocated punch settings: The Display ribbon provides access to the Geolocated punch settings. By default, the geolocated punch is set up in the division, but also available in the client window is settings need to be different for a specific client.
In addition to these fields that are always displayed in the top section, the window shows additional information in the various tabs, as described below.
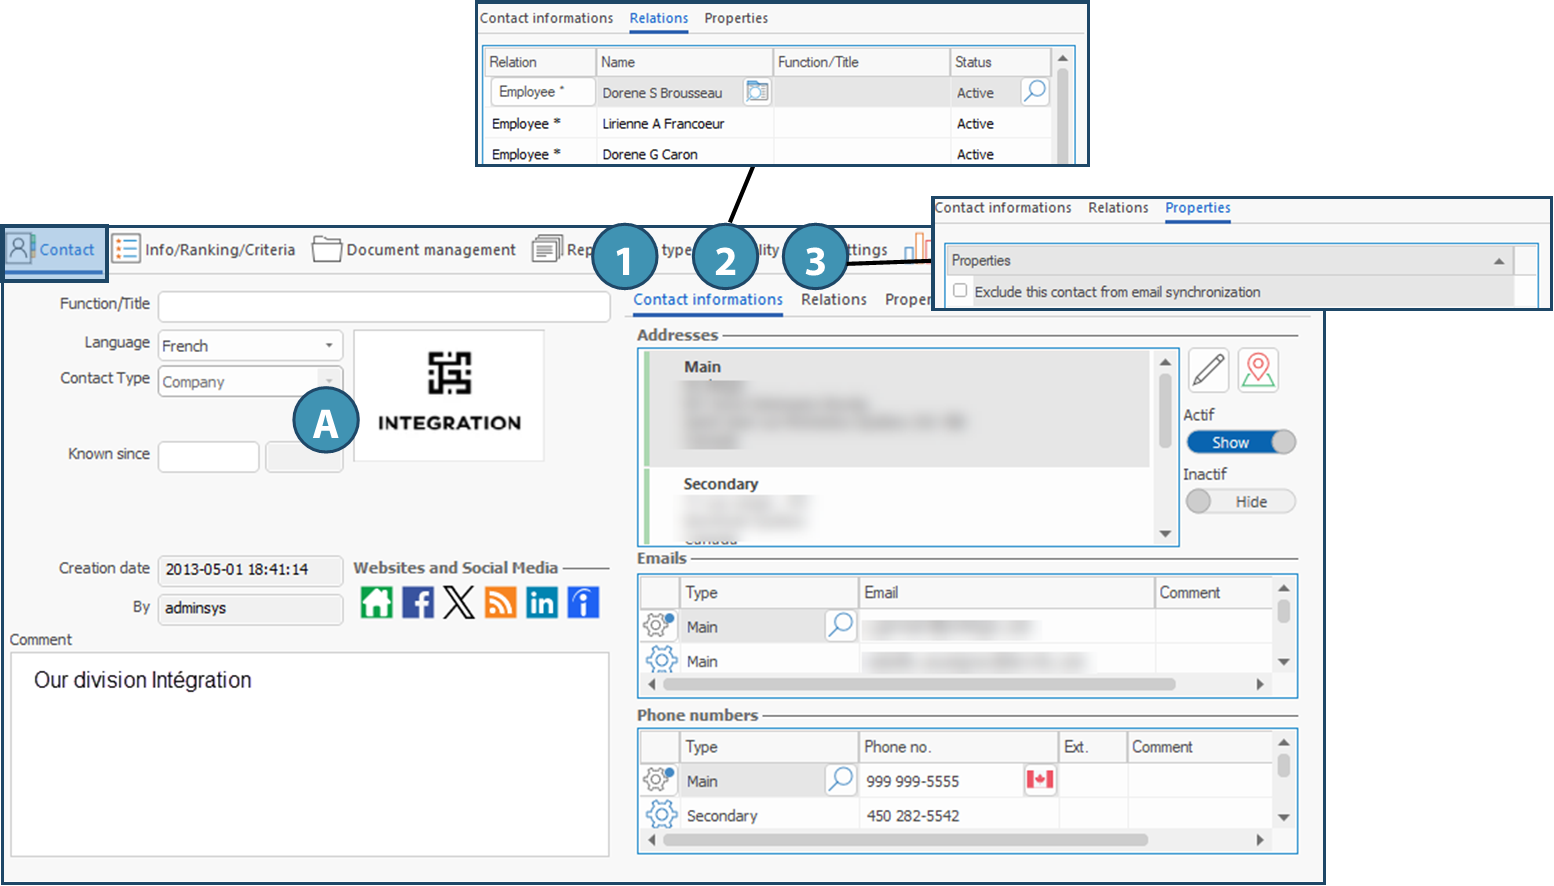
This tab contains the main information about the division, it's logo (A), link to social media pages, as well as the various contact information for the division. It is comprised of 3 sub-tabs:
1.Contact information: all street addresses, emails and main phone numbers for the division.
2.Relations: all contacts in the division, such as the employees.
3.Properties: properties for main contacts in the division.
|
|
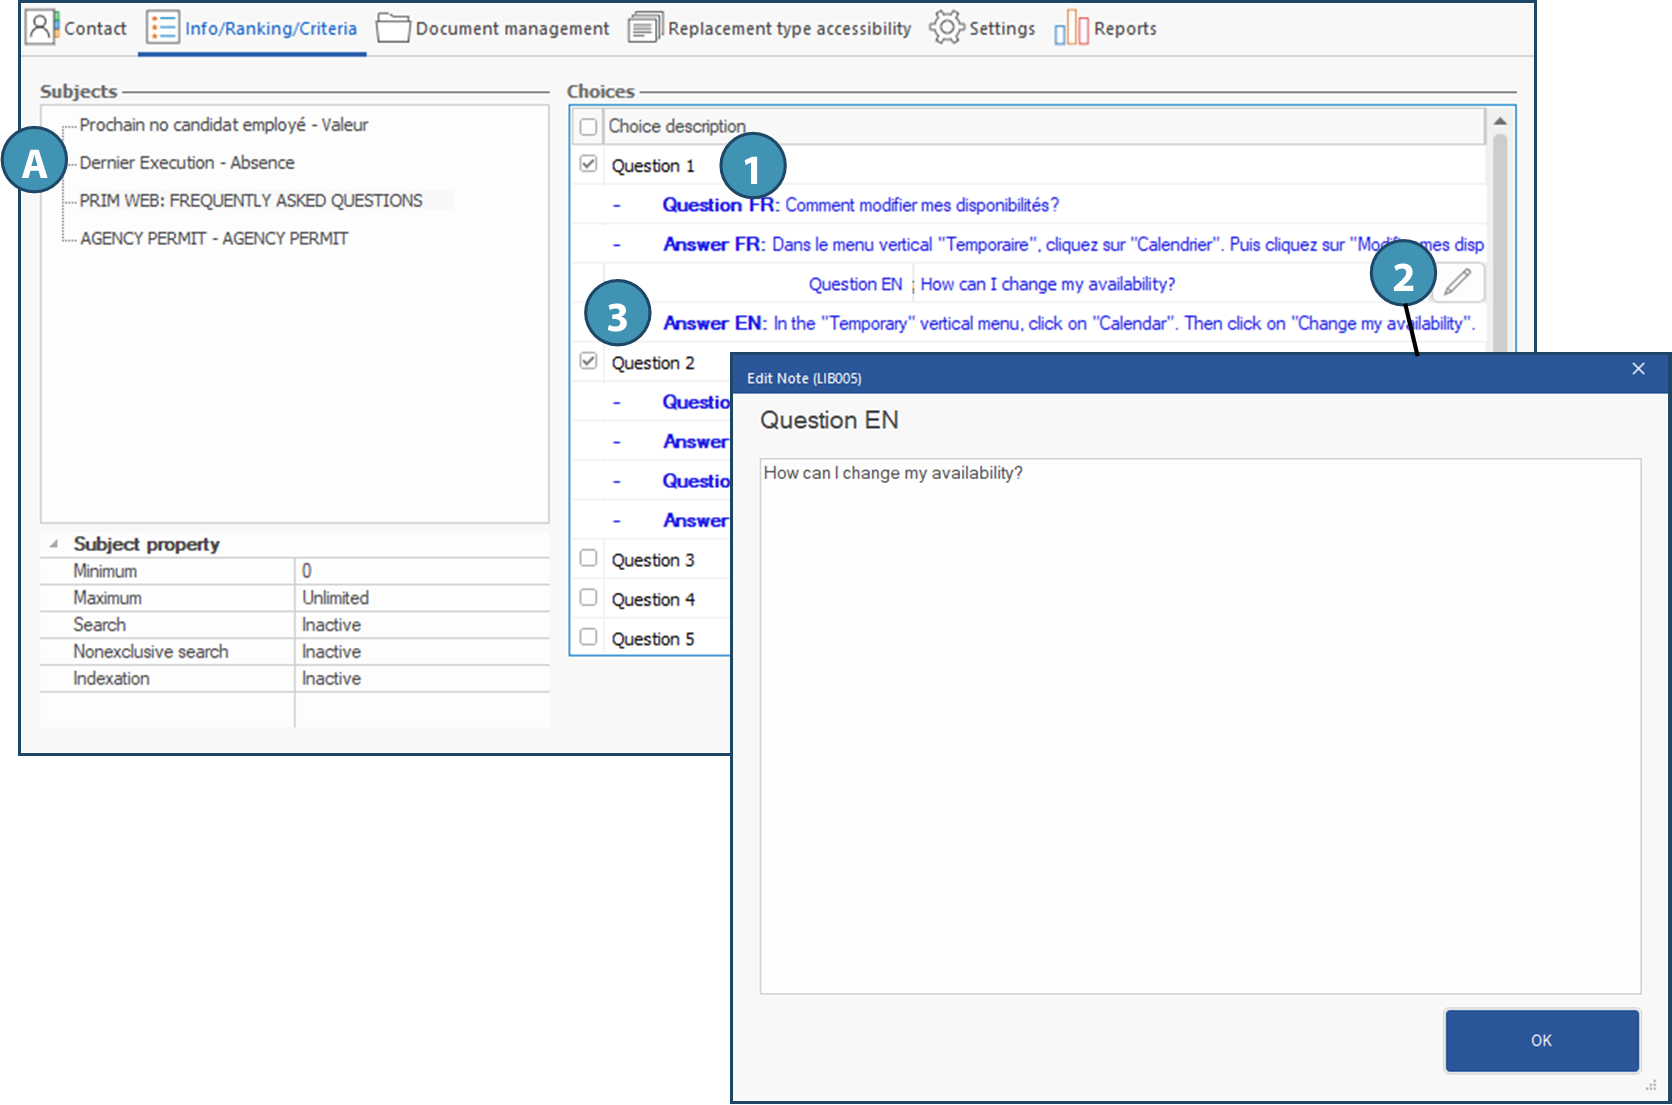
This tab includes the various criteria and information relating to the division, such as frequently asked questions displayed on your Web portal.
 Depending on your configuration, other subjects may be displayed in this section. Depending on your configuration, other subjects may be displayed in this section.
Add or modify a question and answer
1.Tick and select the question or answer for which you want to add a description.
2.Click on  (Edit), the fenêtre Edit Note window is displayed. Enter your question or answer and click on OK. (Edit), the fenêtre Edit Note window is displayed. Enter your question or answer and click on OK.
3.Repeat the operation for any other language if applicable.
 To learn more about the possibilities in this tab, see the page Tab - Info/Ranking/Criteria in section 1. To learn more about the possibilities in this tab, see the page Tab - Info/Ranking/Criteria in section 1.
|
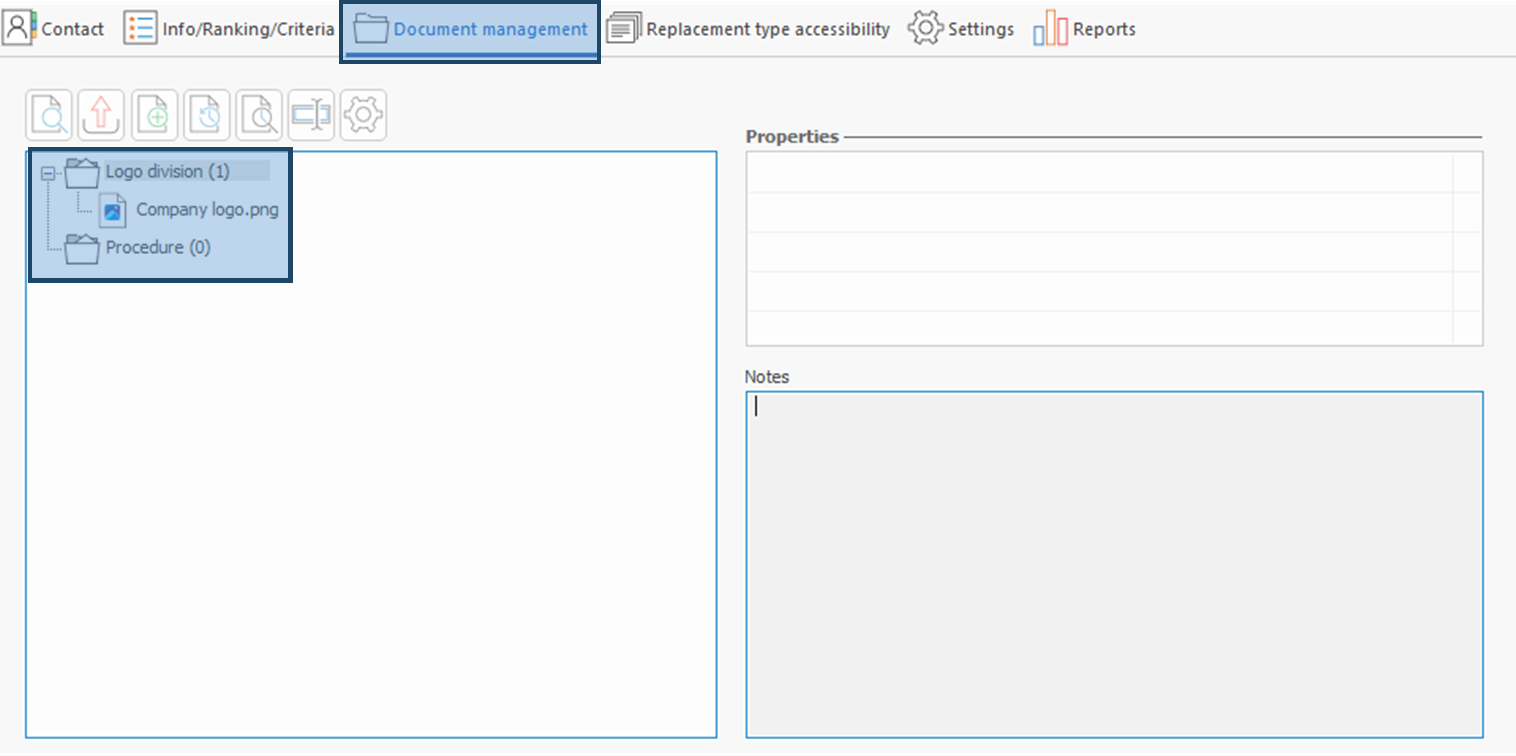
This tab contains all the documents added to the file. To learn more about this tab and adding documents, see the page Tab - Document management in section 1.
|
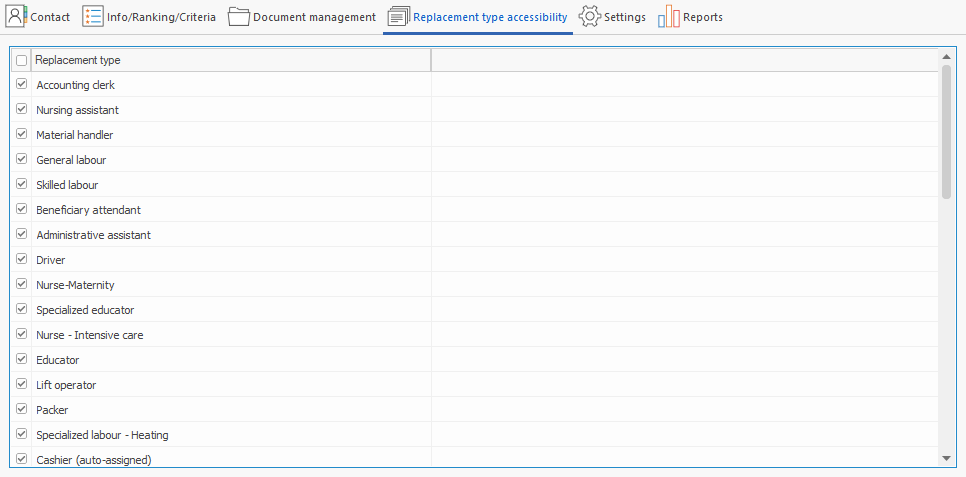
This tab contains the list of request types to associate with the selected division.
In the list, select and check the request types that should be available for the future requests of this division.
|
This tab allows you to set up some specific configurations for the various divisions in your company. It is divided in several sub-tabs described here. However, to learn more about these settings, refer to the page Division settings.
•General: This sub-tab contains some financial settings.
•Shifts: Minimum start time and maximum end time authorized for each shift type (night, day, evening), for clients in this division.
•Authorizations: This sub-tab contains the list of clients and candidates authorized to deal or work with this division.
•Exports: This sub-tab contains the settings for exporting your data
•Calendar: This sub-tab allows you to quickly add your pay periods for the upcoming year.
•Web portal: Settings for the division's Web portal, if they are different from settings of the company's Web portal.
•Help desk: The PRIM Logix Help desk allows task creation automation when receiving an email for a support request. Only super users are allowed to set up the help desk. To learn more about the help desk, refer to Helpdesk.

|
 (Division).


 ).
). To find a specific division and refine the results click on
  , enter a keyword in the fields in green and click on
  (Execute search).
 When PRIM has to display the company's contact details, the main division's information will be used.
 Only one division can have this check box ticked. Furthermore, it will not be possible to disable the main division.


 (Edit), the fenêtre


