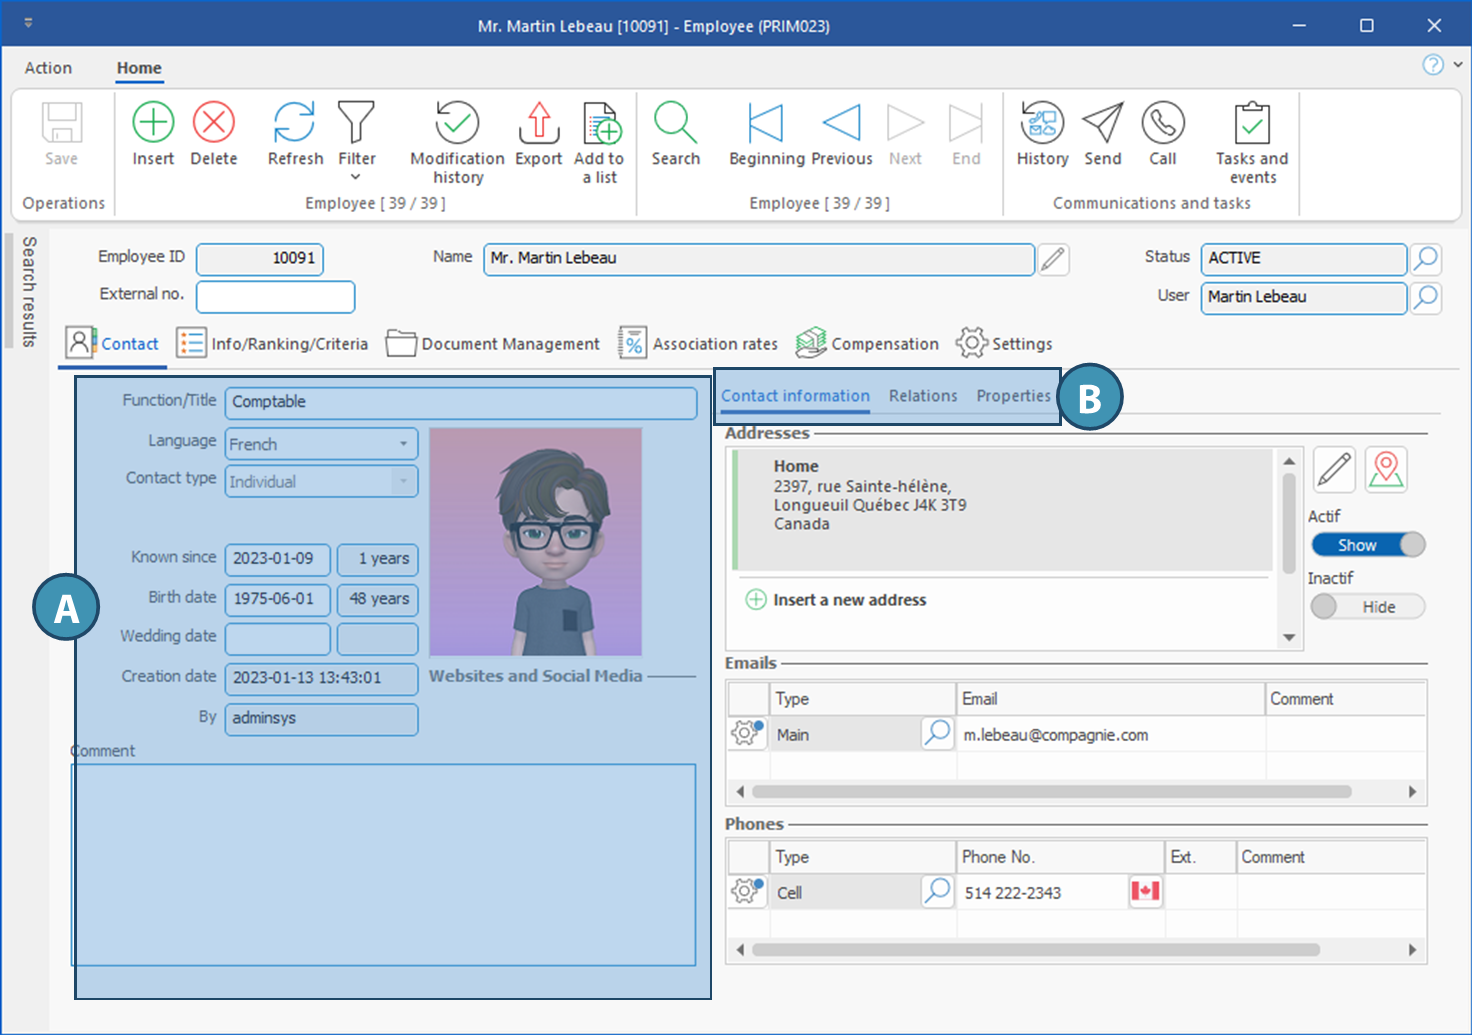
Tab - Contact
The Contact tab displays general information about the employee, such as contact information an relations. The tab includes a general section (A), and 3 sub-tabs (B): Contact information, Relations and Properties.
 For details on adding and managing relations, see Sub-tab - Relations in the corresponding page of the "Client" window
The "Property" tab allows you to exclude the employee from email synchronization.
Fields in the main section (A)
Function/Title: You can register the function or position of the employee.
Language: You can select the main language in a drop-down menu.
Contact type: For an employee, Individual is automatically selected.
Known since: Date entered manually. You can put the date of the first interview with the employee, the hiring date or other.
Birth date : Date entered manually for employee's birth date. Age of the employee is calculated automatically.
Wedding : If applicable, you can enter manually the wedding date of the employee.
Creation date: Date automatically populated when the employee is created.
By : PRIM Logix user who created the employee's file
Web and social media: You can add the URLs of employee's social media pages, such as Indeed, LinkedIn, Facbook Twitter, d'ajouter les URL des réseaux sociaux de l'employé, notamment Indeed, LinkedIn, Facebook, X, RSS flow or Web site. To add an URL, click on the pen and add the URL on the proper line.
Comments: You can add any relevant comment about the employee
Profile picture: A profile picture of the employee can be added here.
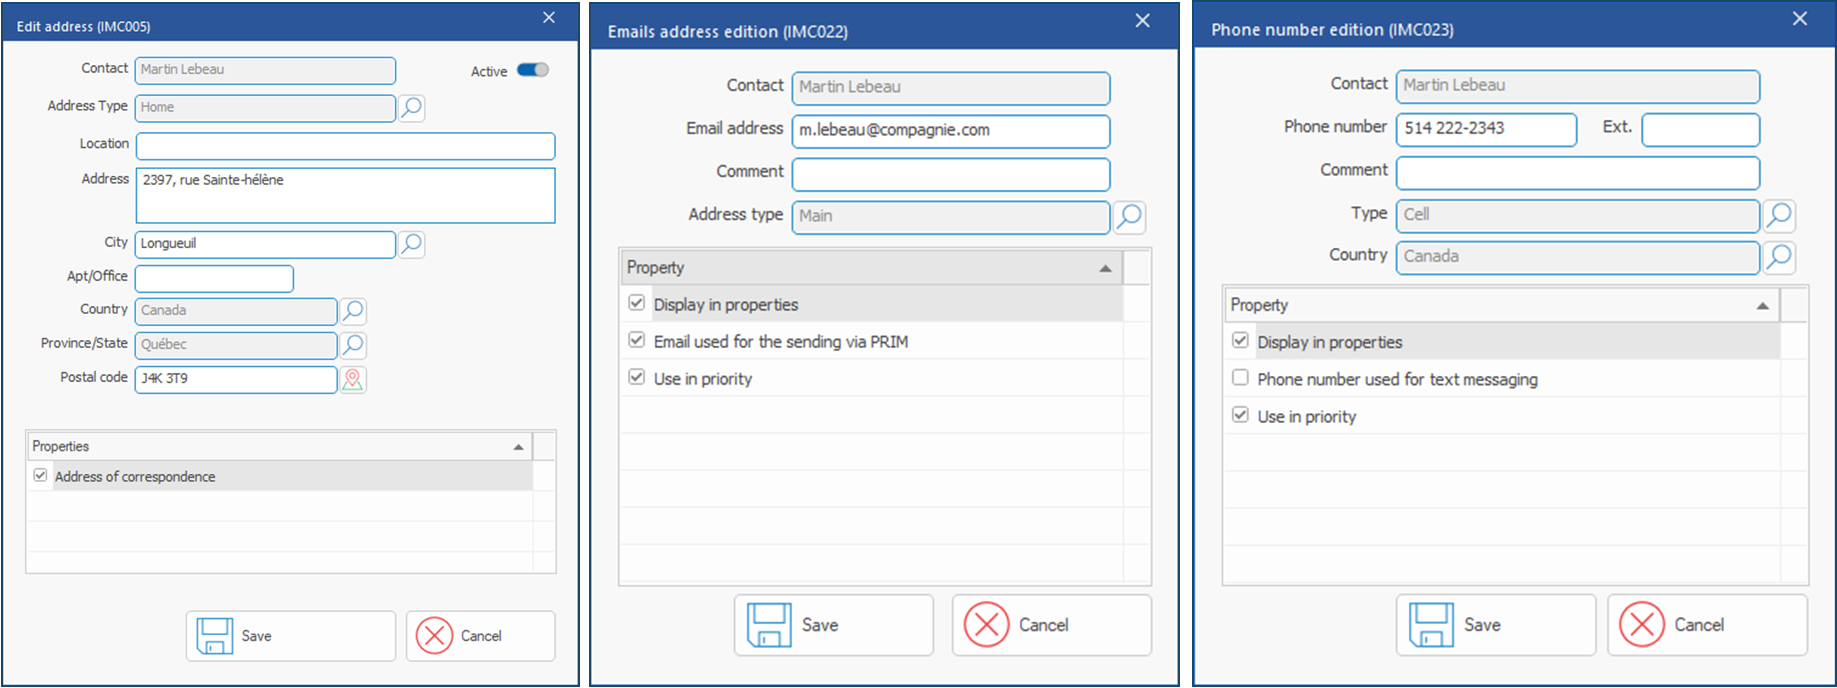
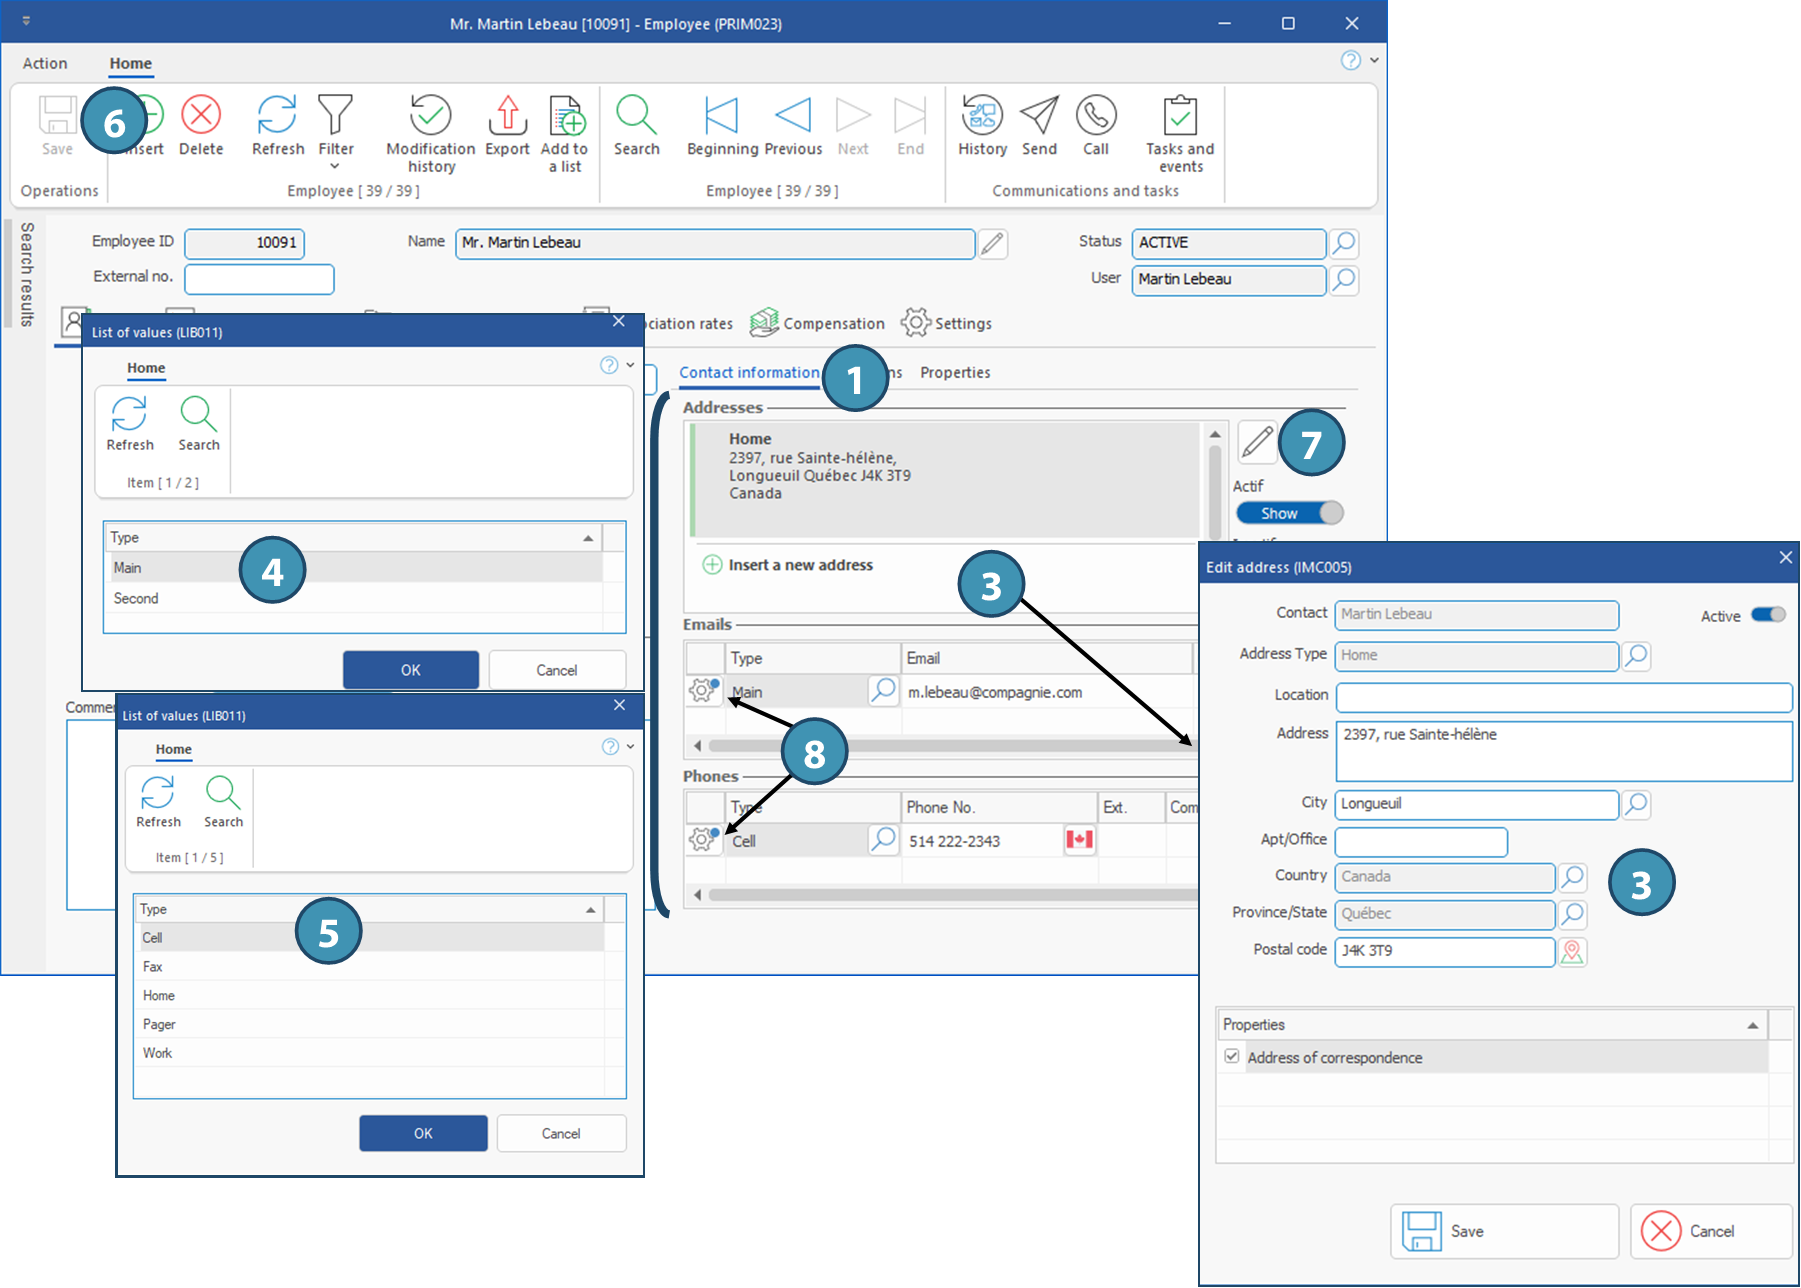
Add and edit contact information
Add new contact information
1.Go to Contact information tab.
2.Select the area in which you want to add or modify a contact information, either Addresses, Emails or Phones
3.To add a street address, click on Insert a new address. The Edit address window is displayed. Enter the information and save.
4.To add an email, click on an empty line in the Emails area. In the window that pops up, select Main or Secondary. Click on OK and enter the email address on the line.
5.To add a phone number, click on an empty line in the Phones area. In the window that pops up, select the phone type. Click on OK and enter the phone number on the line.
The default country code will be populated. If the country should be different, just click on the flag displayed to the right of the phone number.
6.Click on  (Save) to save your changes in the file.
Edit a contact information or specify properties :
7.Address: Select the address and click on  to the right of the address area. The edition window will be the same as when you create the address.
8.Phone number and email: Click on  in the left column on the relevant line. The edition window will be slightly different, allowing you to tick or untick the properties.
Contact information edition windows