Window - Division (PRIM012)
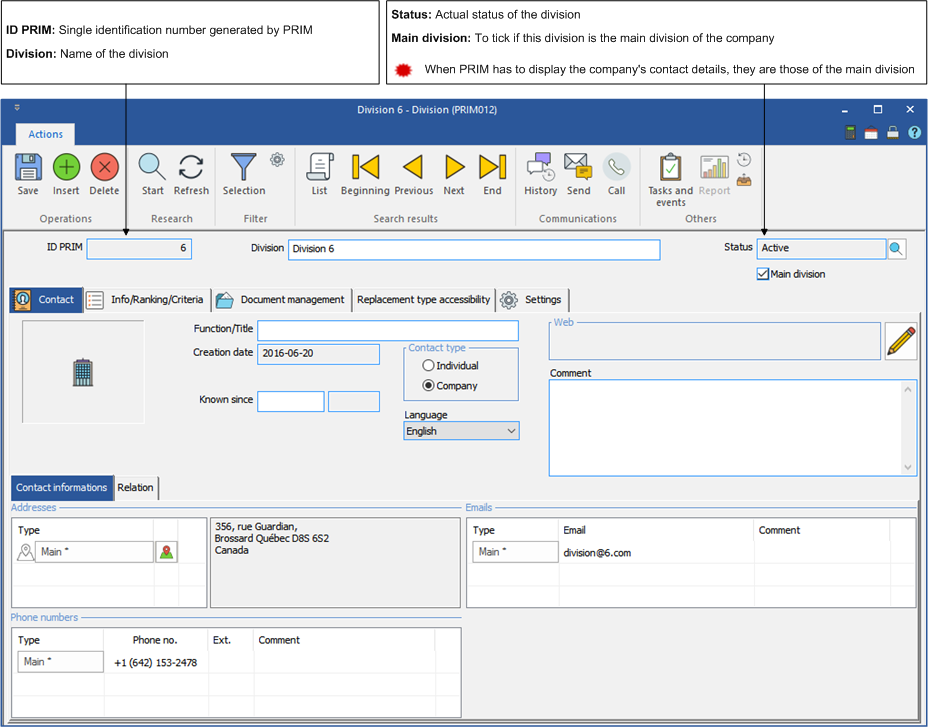
According to your configuration, there can be one or more divisions in your company. This window contains all the information regarding each of these divisions.
Tab - Contact
This tab contains the details of the division and the relations added to the file.
 Info/Ranking/Criteria - Tab
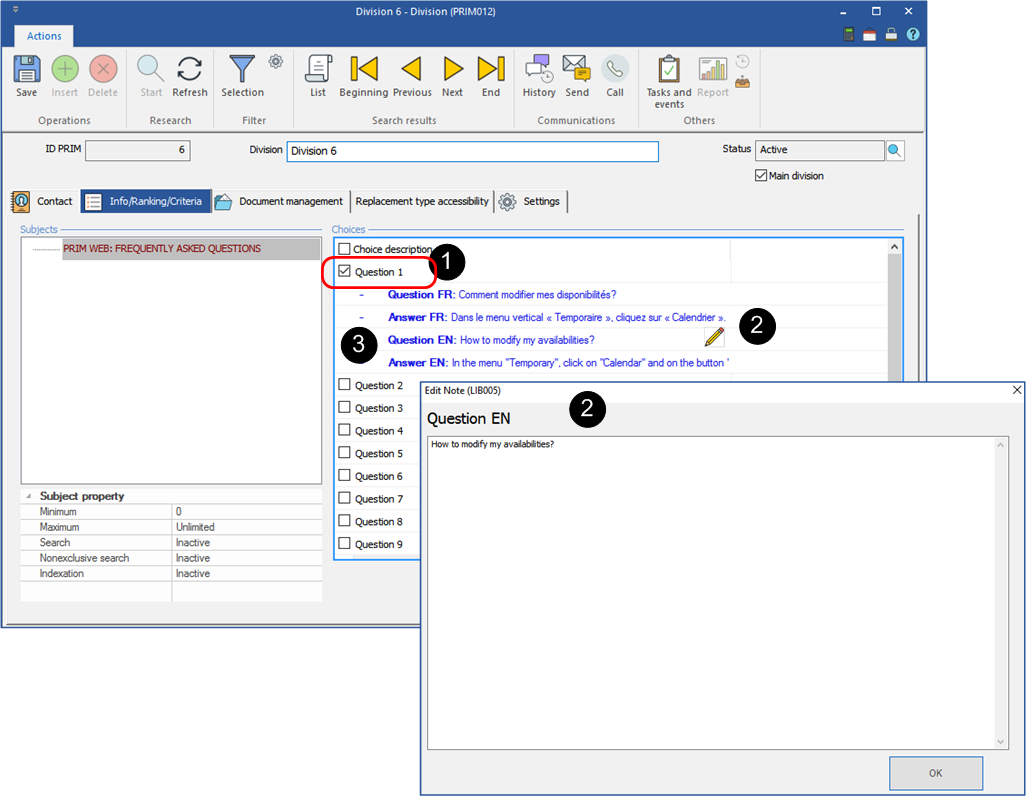
This tab contains the questions and answers posted on the Web platform in the "Frequently asked questions" section.
Add a question and an answer
1.Select the question for which you wish to add a description. 2.Click on the icon 3.Repeat the operation for the french version of your questions and answers, if needed.
|
 Document management - Tab
This tab contains all the documents added to the file, see ''Add a document / file''.
|
 Replacement type accessibility - Tab
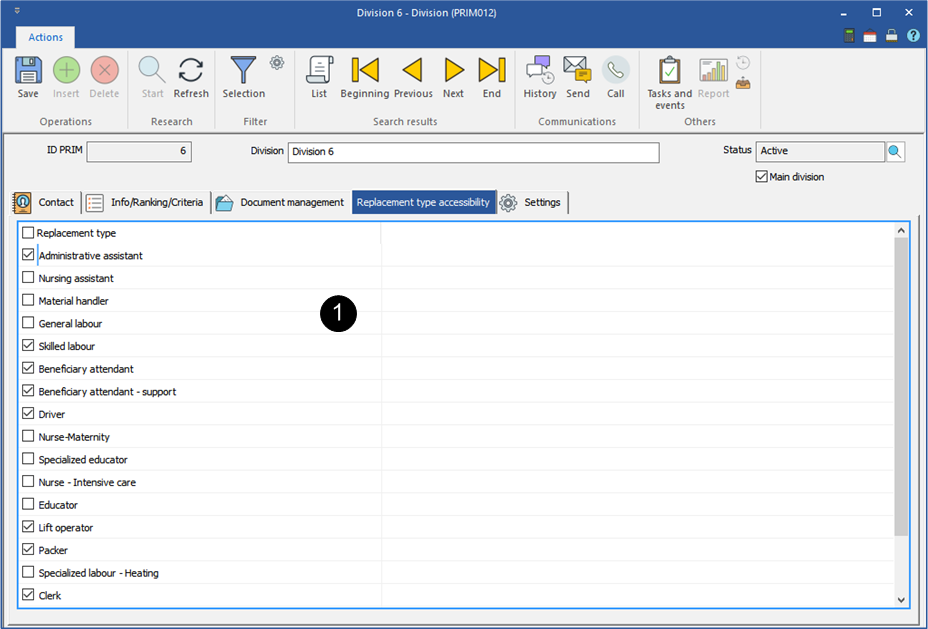
This tab contains the list of the available replacement types to associate with the selected division.
1.In the list, select and check the replacement types for the future requests of this division.
|
 Settings tab / Sub-Tab - General
This tab contains some configuration items of your divisions.
1.Section - Financial settings •Rate DAS: Rate to be registered manually for the deductions at source. •Bank code (PAB): Code to select in a list, for the preauthorized withdrawals. •Division for invoice numbers: If this field is empty, the division will have its own range of invoice numbers. If another division has been selected, PRIM will use the invoice numbering of this other division
•Next invoice number: The next invoice will be assigned with the number displayed in this field. •Enter the taxes registration numbers here, if this division holds different taxes numbers.
2.Section - Pay exportation settings
•Division for the pay If a company has several divisions, it is possible to specify which division will be responsible for paying the candidates' pay. If a division is responsible for its own payroll, leave this field blank.
•Calculate an average rate If this box is checked, the rate displayed on export will be the average hourly rate paid to the candidate. For example, for a pay period, a candidate worked 10 hours at an hourly rate of $20 and 10 hours at an hourly rate of $30. The export data will display 20 hours at an hourly rate of $25. Otherwise, the data will display 10h at an hourly rate of $20 on one line and 10h at an hourly rate of $30 on the next line.
•Group per week If this box is checked, the export data will be displayed for each week of the pay period. For example, for a 2-week pay period, a candidate worked 35 hours each week at an hourly rate of $20. The export data will display 35 hours at an hourly rate of $20 on one line and 35 hours at an hourly rate of $20 on the next line. Otherwise, the data will display a total of 70 hours at an hourly rate of $20.
•Keep the work period If this box is checked, the exported dates will be linked to the pay period. For example, payroll for period 10 includes a correction for a request worked in period 7, and the export data will display the correction in payroll period 7. Otherwise, the correction will be included in pay period 10.
•Negative period not authorized If this box is checked, negative corrections will be included in the current pay period. For example, in period 10, which is the current period and has a total payable of $500, there is a negative correction of $50 related to a request worked in period 7, which will be applied to period 10, for a total of $450. Otherwise, the negative correction of $50 will be applied over period 7.
•Authorize several pays for the same period (division selected for payroll) If this box is checked, it will be possible to add several payrolls in the same period. The payroll(s) in a period must have the status "Completed" in order for PRIM to add new payrolls, otherwise the items will be added to a payroll with the status "In progress".
•Group by export code description (division selected for payroll)
If this box is checked, the export function will add up the amounts that must be transferred in the same transfer code.
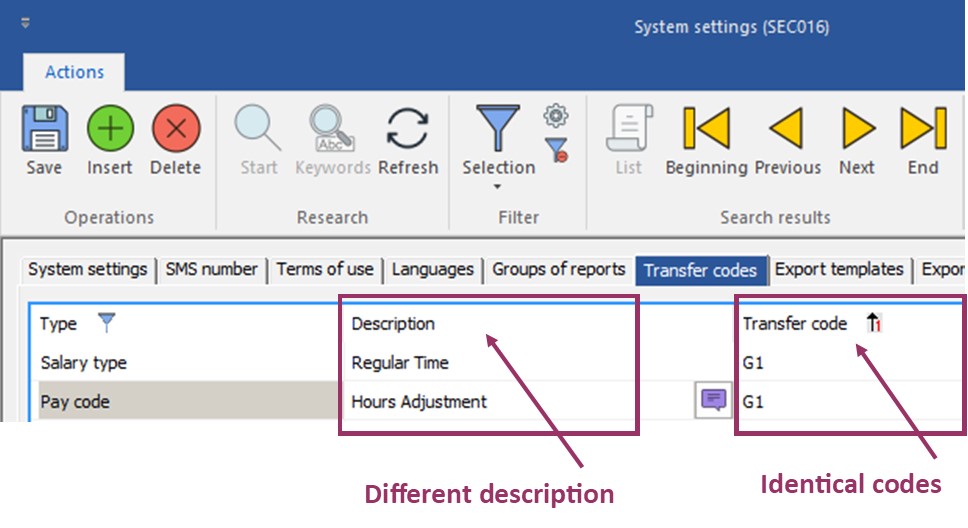
Example: In this example, we will take the code G1 - Regular time:
▪In the System parameters window (SEC016), in the "Transfer codes" tab, we create 2 lines in the transfer codes that bear this code, since they are all regular hours (the hours worked in the request + d '' any corrections to hours worked added to the bottom list in the "payroll and invoicing" tab of the request.)
▪In the case of a request that contains 8 hours worked + 1 hour end of daylight-saving time:
The standard export behavior (if the box is not checked) will be as follows:
PRIM exports 9 hours with the code G1 (on a single line):
By checking the box "Group by description of export code", we therefore modify this behavior:
PRIM exports 8 hours with the G1 + 1 hour in the G1, as long as 2 different descriptions have been put in the list of transfer codes within the division:
|
 Settings tab / Sub-Tab - Authorization
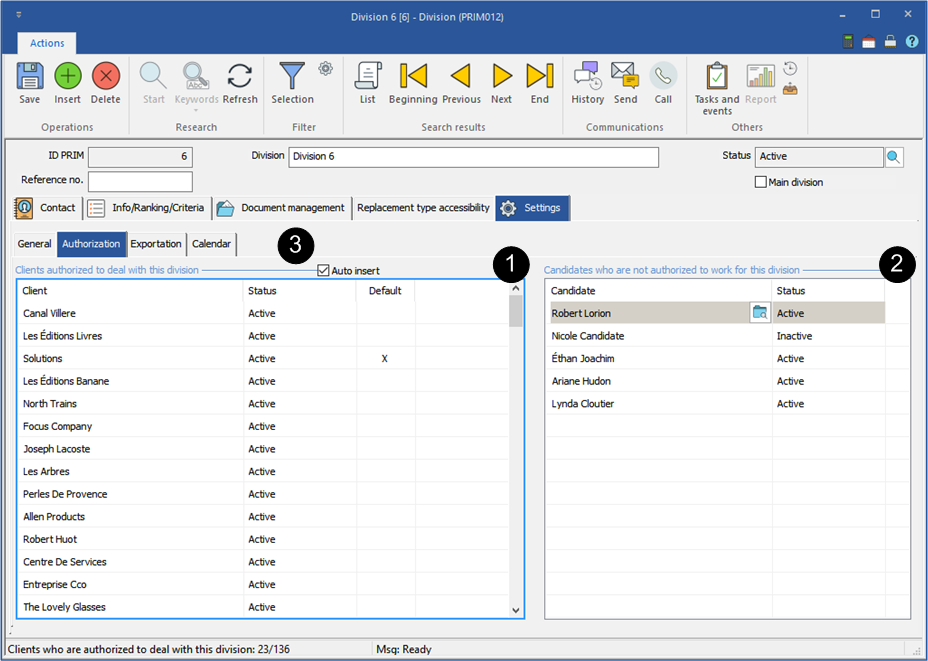
This sub-tab contains the list of clients and candidates authorized or not to deal with this division.
1.Add a client to the list of clients authorized to deal with this division. •Click on an empty line or on the icon •Click on the icon •Select the client to add to the list and click on •You can also add a division from a client's file, under the "Settings" tab, sub-tab "Billing" the procedure is the same.
2.Add a candidate to the list of candidates who are not authorized to work for this division. •Click on an empty line or on the icon •Click on the icon •Select the candidate to add to the list and click on
3.If the "Auto Insert" box is checked, this division will automatically be added to the clients and candidates file, you will not have to add them manually in each of the files. 4.Click on
|
 Settings tab / Sub-Tab - Exportation
This tab contains the configuration items for exporting your data.
|
 Settings tab / Sub-Tab - Calendar
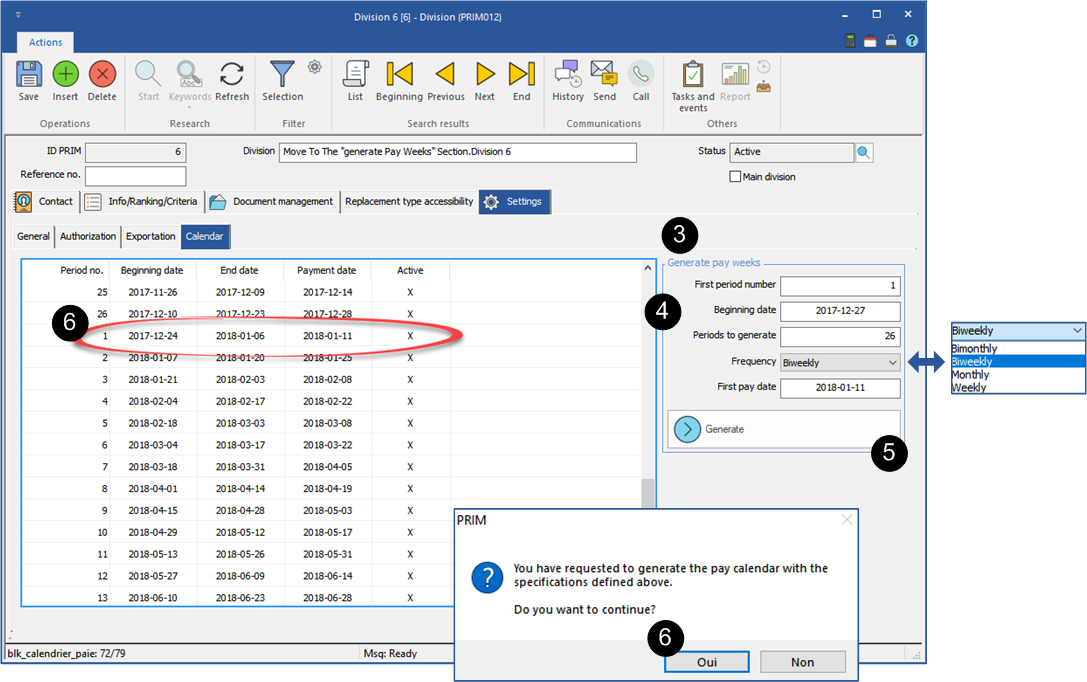
This sub-tab allows you to quickly add pay periods to your calendar for the following year.
1.Move to the "Calendar" tab. 2.Make sure that the pay periods for the following year are not included in the list. 3.Move to the "Generate pay weeks" section. 4.Enter the new data in each field using the data from the last pay period of the current year. 5.Click on 6.Click on
|

