Send an email

Contents
You can send emails from all windows where the icon ![]() (Send an email or a SMS) is available, or from the icon
(Send an email or a SMS) is available, or from the icon ![]() (Action), that is available from the sidebar "List", see “Launch an action from a list".
(Action), that is available from the sidebar "List", see “Launch an action from a list".
A list of choices appears to offer you several options depending on the window where you are positioned. The procedure is similar from one window to another.
![]() The property "Email address used for sending via PRIM" must be checked in the file of the contact.
The property "Email address used for sending via PRIM" must be checked in the file of the contact.
![]() When sending an email to a contact, PRIM will by default select all email addresses of the contact for which this property is checked. Thus, to have only one email address per contact, the property "Email address used for sending via PRIM" should only be checked for one email address.
When sending an email to a contact, PRIM will by default select all email addresses of the contact for which this property is checked. Thus, to have only one email address per contact, the property "Email address used for sending via PRIM" should only be checked for one email address.
 Send an email
1.On the main toolbar of the window in which you are positioned, click on the icon 2.The “Sending of the message” window is displayed. 3.If a default template is configured, you will be positioned directly under the "Individual preview before sending" tab.
With a template 4.Click on 5.Go under the "Individual preview before sending” tab and ensure that the content of the message is appropriate. 6.If not, click on 7.Click on
Without a template 8.Go under the "Individual preview before sending” tab and click on 9.Add a subject in the ''Custom object'' field. 10.Write your message, check the sending options and click on
|
 . A list of choices will be displayed for you to select the appropriate template.
 to send your message.
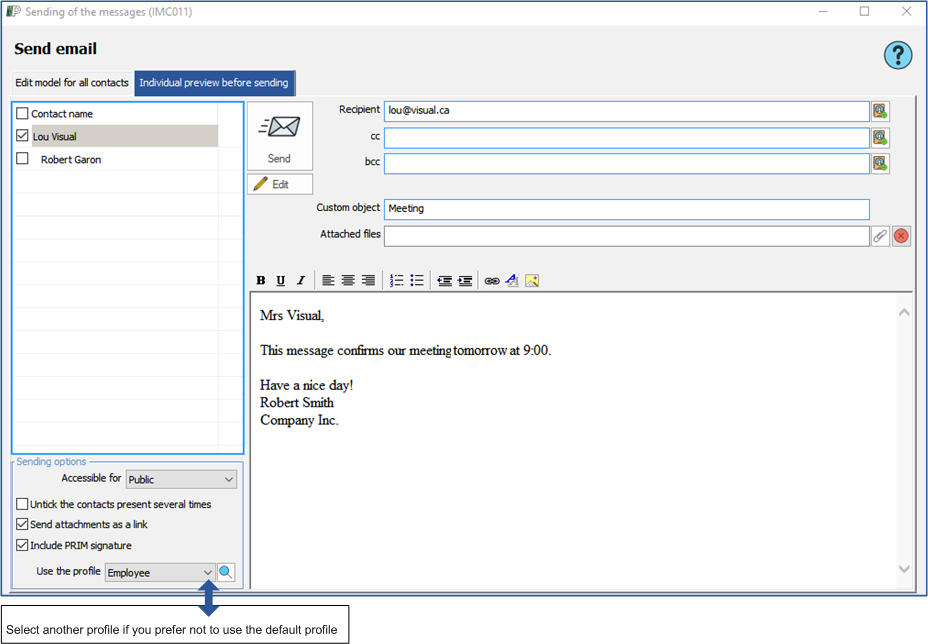
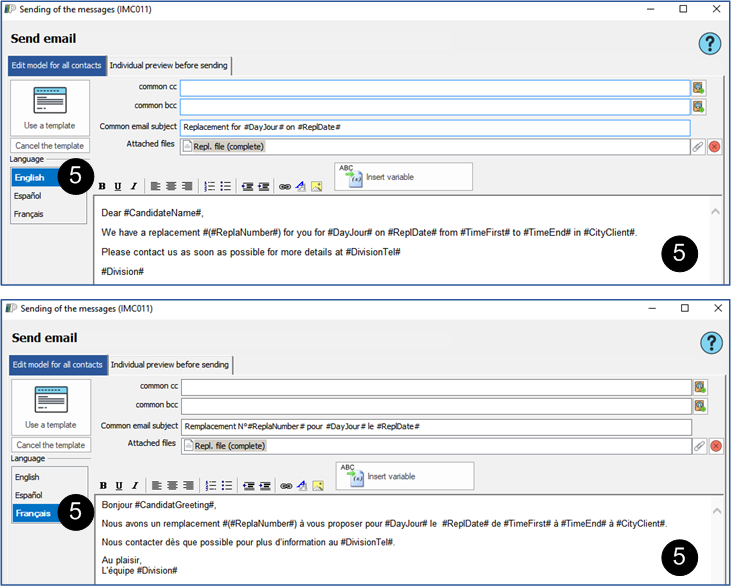
Send an email using a template in the candidate's language or correspondence
In the example below, a replacement proposal email will be sent to many recipients. An email template has been configured for this communication context, you will not have to select it and the message will be sent in the candidate's language of correspondence.
1.Open the "Replacement management" window. 2.Select a replacement in the list. 3.In the "Communications" section of the main toolbar, click on 4.In the "Sending of the message" window, move under the "Edit model for all contacts" tab. 5.Choose a language, the text of the message is displayed in the selected language.
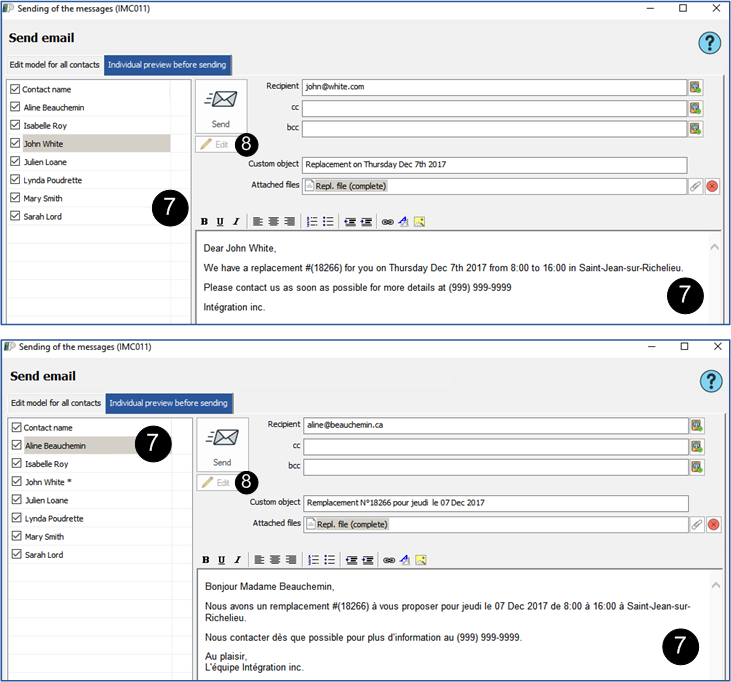
6.Move under the "Individual preview before sending" tab. 7.The variables used in the template were replaced by the associated values, in the language of the candidate. 8.If needed, and for each of the contacts, click on 9.Click on
|
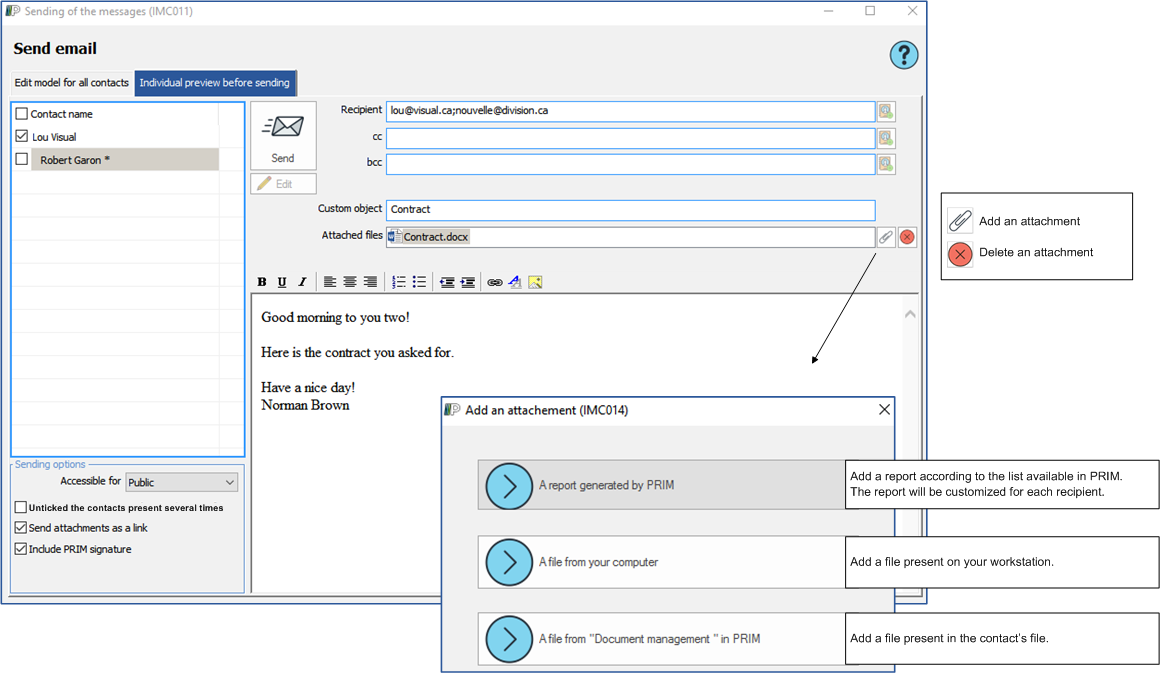
Send an email and insert a file
1.On the main toolbar of the window in which you are positioned, click on the icon 2.The “Sending of the messages” window is displayed. 3.To add an attachment, click on the icon 4.To delete an attachment, select the file you want to delete and click on the icon 5.Fill in the fields and click on
|
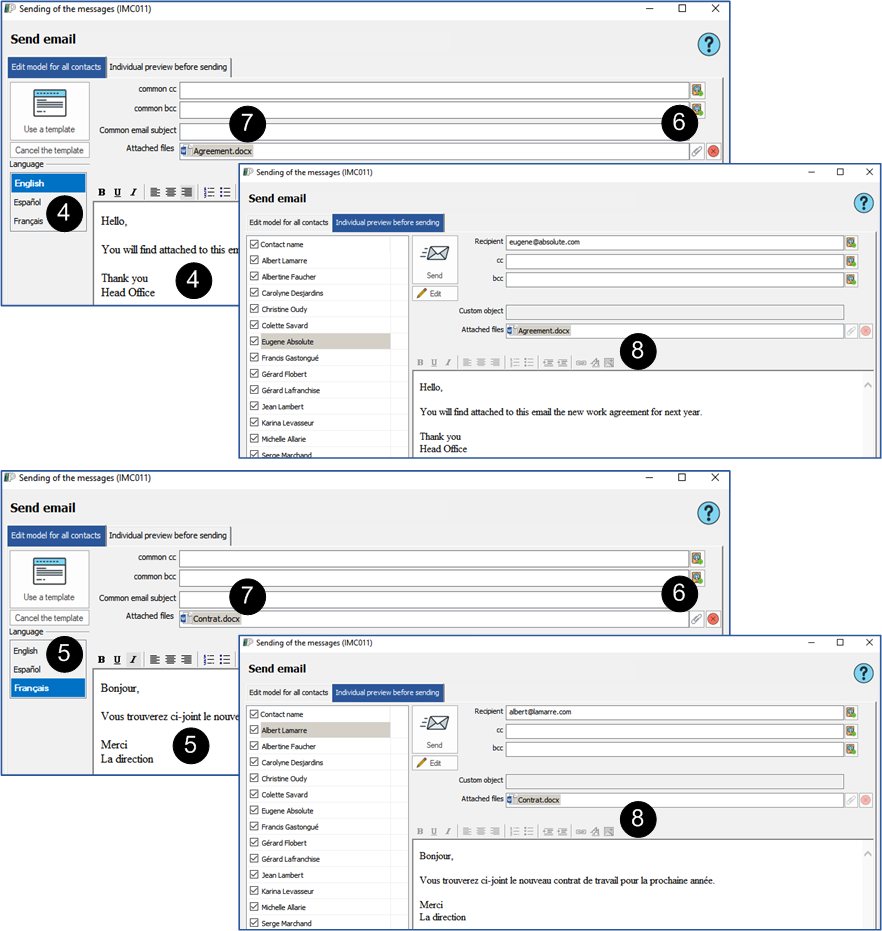
Insert an attachment in an email in the recipient’s language
The procedure of addition of an attachment in a email for only one recipient was explained above, we will see here how to attach a document in the recipient's language.
In the example below, we will use the saved list "Active employees" to whom will be sent the new working agreement. The procedure is similar for all types of list.
Consult unit 2 for procedures of creation and management of the lists.
1.From the sidebar "Lists", select "Active employees". 2.Click on 3.Under the "Edit model for all contacts" tab. 4.Select "English" and type your message in English in the edition zone. 5.Select "French" and type your message in French in the edition zone. 6.For each of the contacts, click on the icon 7.According to the selected language, select the file on your workstation. 8.According to the contact, the attachment and the email will be in the contact's language.
|
Reply and forward an email
The procedure to transfer and to reply to an email can only be done from a message received in PRIM.
When needed, apply the email synchronization procedure, see "Email synchronization".
1.Open the file of the contact for which you must ensure an email follow-up. 2. Click on 3.In the list, select the message among the emails received, identified by the icon 4.Click on the message, the "Communication details" window is displayed. 5.Click on 6.Depending on the option selected, the "Sending of the messages" window will be displayed to allow editing of the message. 7.Click on
|