|
WARNING: This section is intended for advanced users and "Super users" of PRIM Logix.
The configuration items presented in this section may indeed have an impact on your operations.
If in doubt, consult your system administrator.
Please note that only users in the appropriate security groups can access the software configuration windows. |

Modify translations and security
The "Translations and authorizations" menu allows you to modify all the labels visible on the Web portal, except those that come directly from the PRIM Logix software (for example: the title of a replacement or a list of criteria).
The menu is divided into 7 sections, matching the sections of your agency's portal:
1. Home page
2. Candidate registration page
3. Client registration page
4. Candidate space
5. Client space
6. Job board
7. A "Global" section that includes messages from system components as well as error messages related to the Web portal.
 Each section may also have sub-sections, which are selected in the left pane
* The specific elements of the application procedure for a candidate are found in job board section (6), in the sub-section "Application page". The latter is active as of PRIM Logix version 5.00.
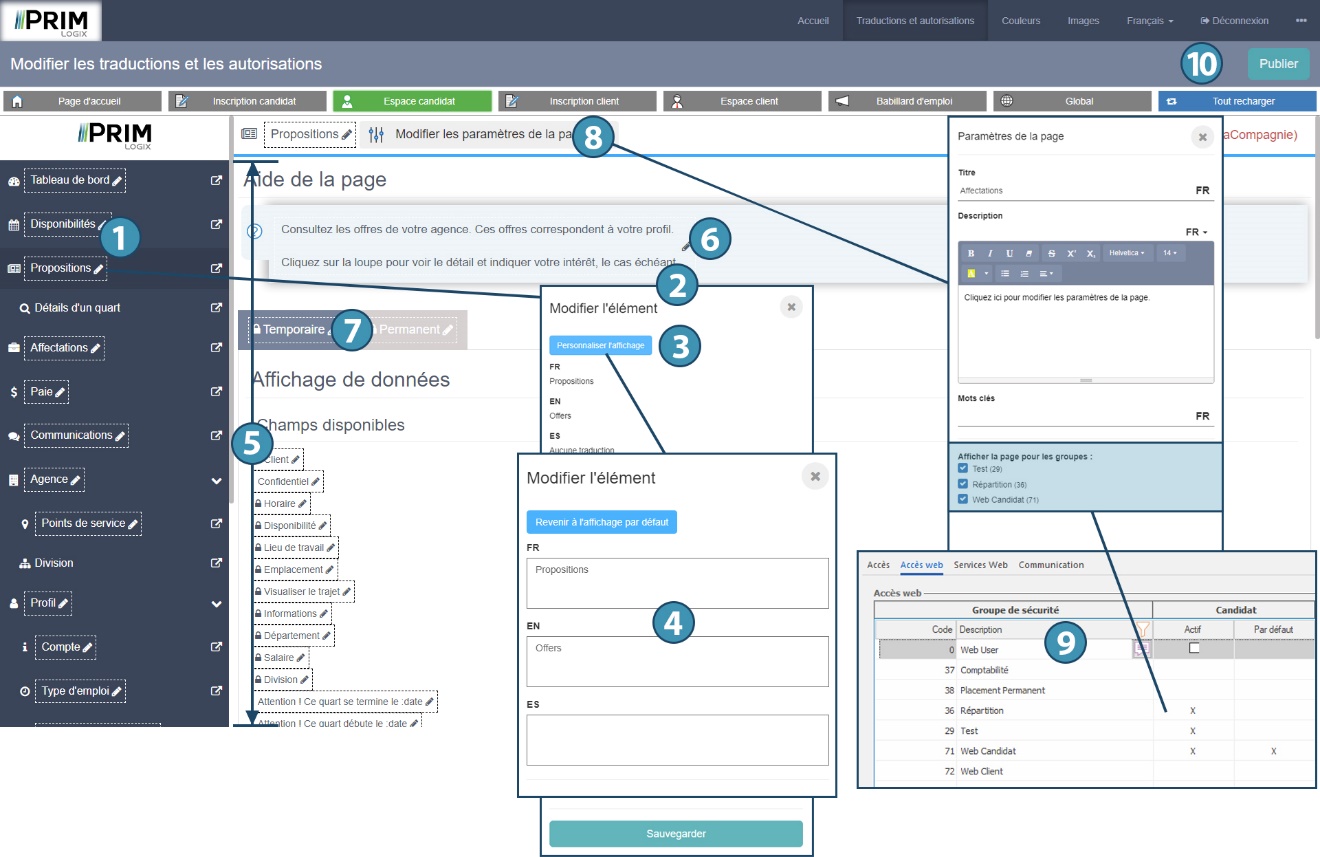
The "Publish" button (8) allows you to publish on your web portal the changes made and saved in each section in the back office.

Modify translations and page visibility
Each section shows the items that can be customized with a pencil (1). Clicking on an item that can be modified opens the corresponding customization pane (2).
After clicking on a customizable item, click on the customize button (3) to change the wording and/or the indicated translation (4) and save.
When a section has several pages, you can navigate between pages using the vertical menu on the left (5).
the top of each page displays the Help contextual menu, that can be customized (6). Below it you can find the possible tabs on the page (7). Finally, each item that can be modified is classified according to it's role.
Using the button Modify page parameters (8 - on picture below, not above), you can restrict the visibility of the selected page depending on the security groups set up in the Web Access tab of the Manage security groups » window in PRIM Logix (9). If a group is not ticked there (8), users in this group will not be able to access the selected page, but will still have access to other pages in this space.
The security group is a setting defined for each contact (candidate and/or client), in "Settings – Web » tab of the concerned file in Prim Logix. The common configurations for all members of the security group "Web user" can be viewed and modified in the "Manage security group" window of the software.
It is also possible to restrict the visibility of some items in a page. Just click on the item to open the customization pane (2), an uncheck the concerned groups. If a restriction is possible for the selected item, the security groups will be displayed at the bottom of the pane, exactly as it was for page parameters, allowing you to uncheck them and save. the items will then not be displayed anymore only for the selected groups.
This more specific restriction is only available for items showing a padlock ( ) on the left.
When all your modifications have been made and saved, click on « Publish » (10) to update the page(s).
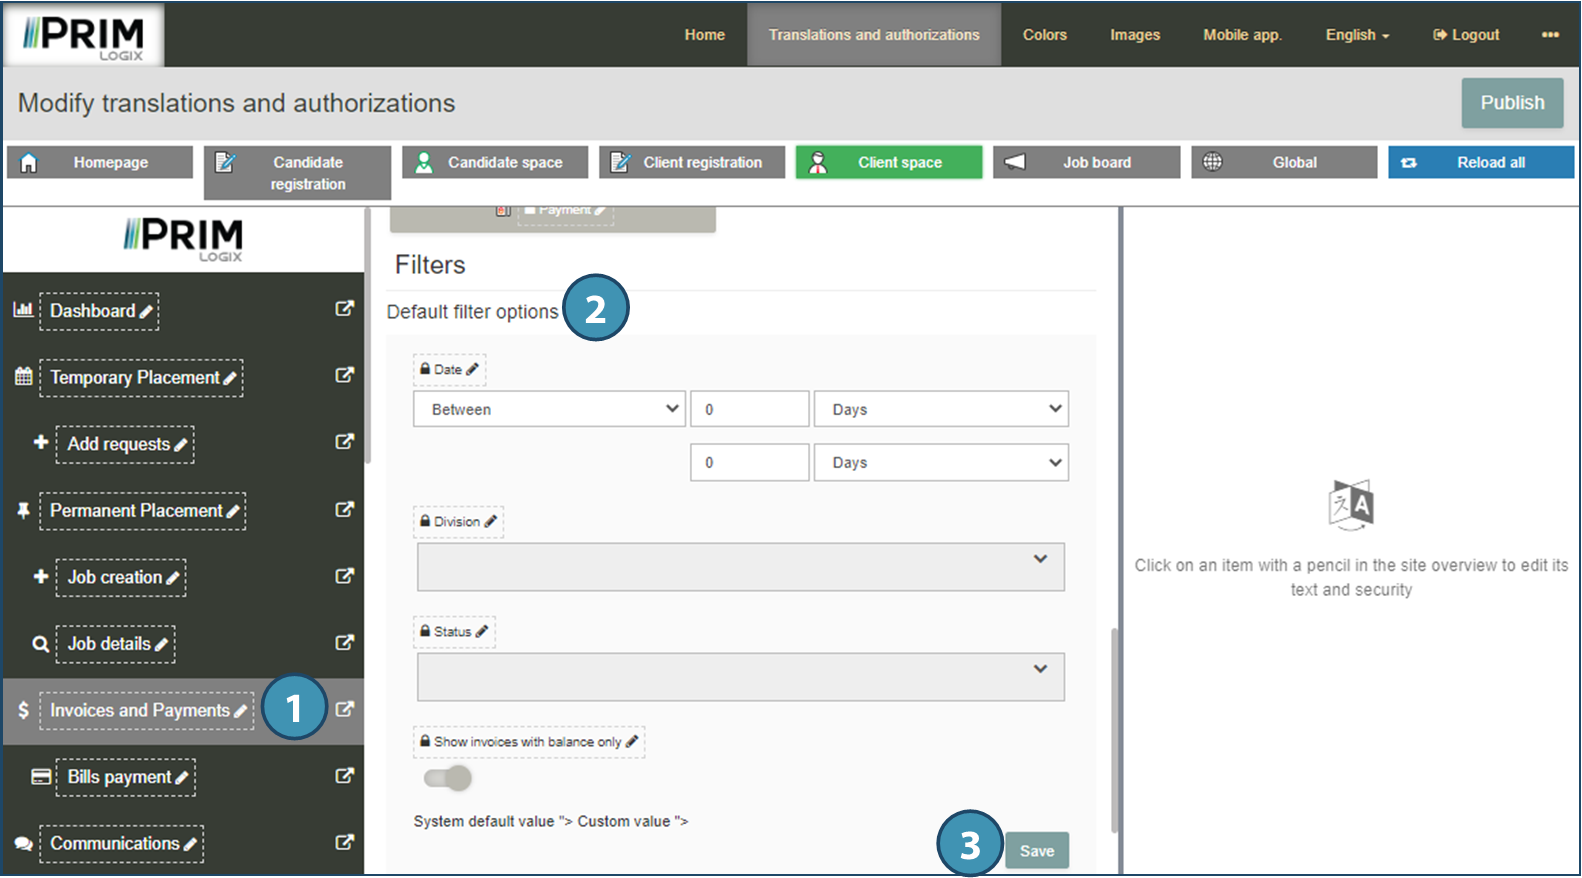
Modify default filters on a page
For some pages of the Candidate and Client spaces, it is possible to define and modify the default filters when users load a page and has not defined filters themselves:
1.In the left pane, select and open  the page for which you want to define or modify default filters.
2.Scroll down the center section until you see Filters / Default filter options, and modify the filters in this section.
3.Save your modifications and publish.