Schedules pane
This tab allows you to add a schedule to the mission. It is volet permet d’ajouter un horaire à la mission. It does include 3 tabs.
Information
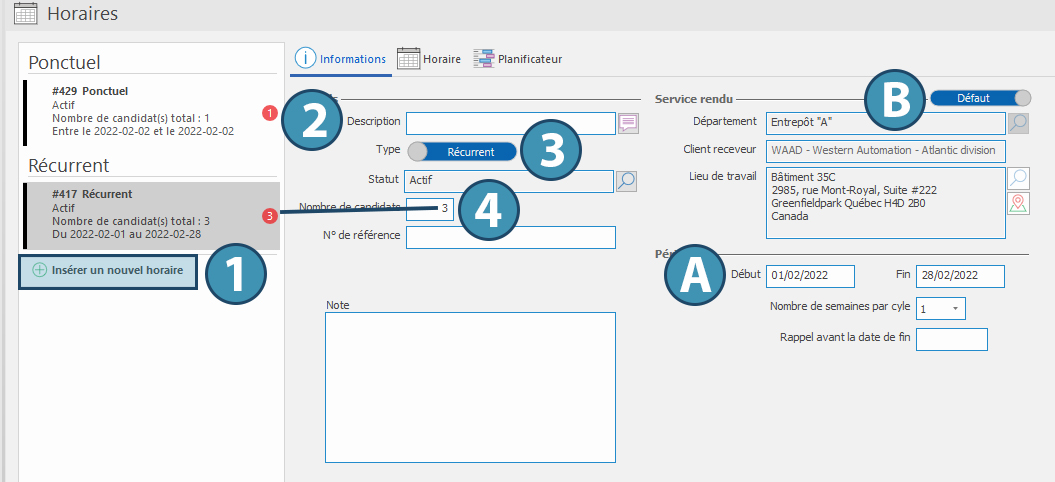
This tab allows you to edit the information about the selected schedule.
1.Click on "Insert a new schedule" to create a new schedule.
2.If needed, enter a description for the schedule. Use the translation button to edit the title that will be displayed on the Web platform.
3.Use this button to define the type of schedule: punctual or recurrent.
 To create a recurrent schedule, you must specify a start date (A). You must then also specify the number of weeks included in each cycle.
4.It is possible to look for several candidates for a same schedule. The number of candidates sought will be shown as a tag in the thumbnail of the schedule until all candidates have been found. In the same manner, the number of candidates required for all schedules of a mission is shown in the thumbnail of the mission.
It is possible to customize the information about the service provided for each schedule (B).
Schedules
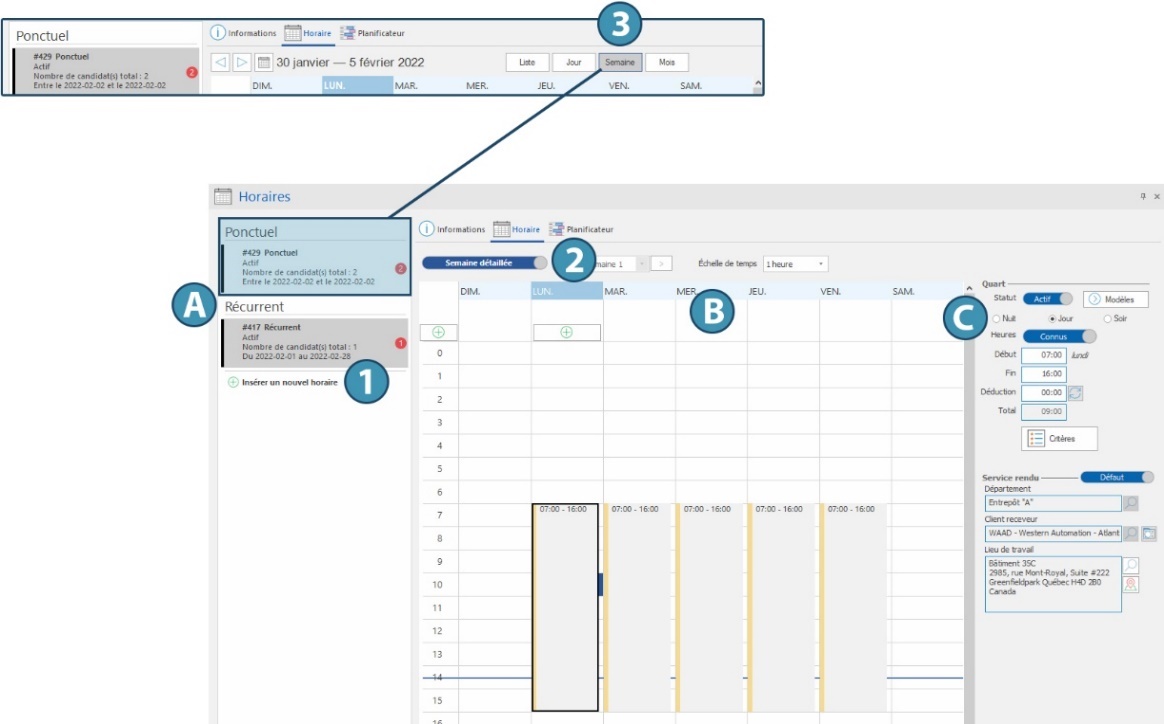
This tab allows you to define and modify the selected schedule.
Schedules linked to the mission will be displayed in the left menu (A). Click on the corresponding button to add a schedule to the list (1). Schedules are classified according to their type. Each schedule is detailed in the central calendar (B). Finally, when selecting a shift in the calendar, the information about it is displayed on the right (C).
In a recurrent schedule, you can switch between an overall view and a detailed week view, showing each weeks in a cycle (2).
In a punctual schedule, you can switch view between day, week or month, as well as a list view (3).
To create and modify a schedule, see « Define a schedule for a mission ».
Planner
This tab allows you to assign candidates to the schedule.
See corresponding page for more information on how to use the planner.