|
Navigation: Training plan > Section 9 - Accounting > Invoicing Create and manage the invoicing |
Scroll Prev Top Next More |
Create and manage the invoicing
In this section, you will find the procedures and information about managing the invoicing.
 Make sure that all invoicing steps have been completed so that the requests are found in the tab "billable items" tab.
 Create an invoice - "Invoicing management" window
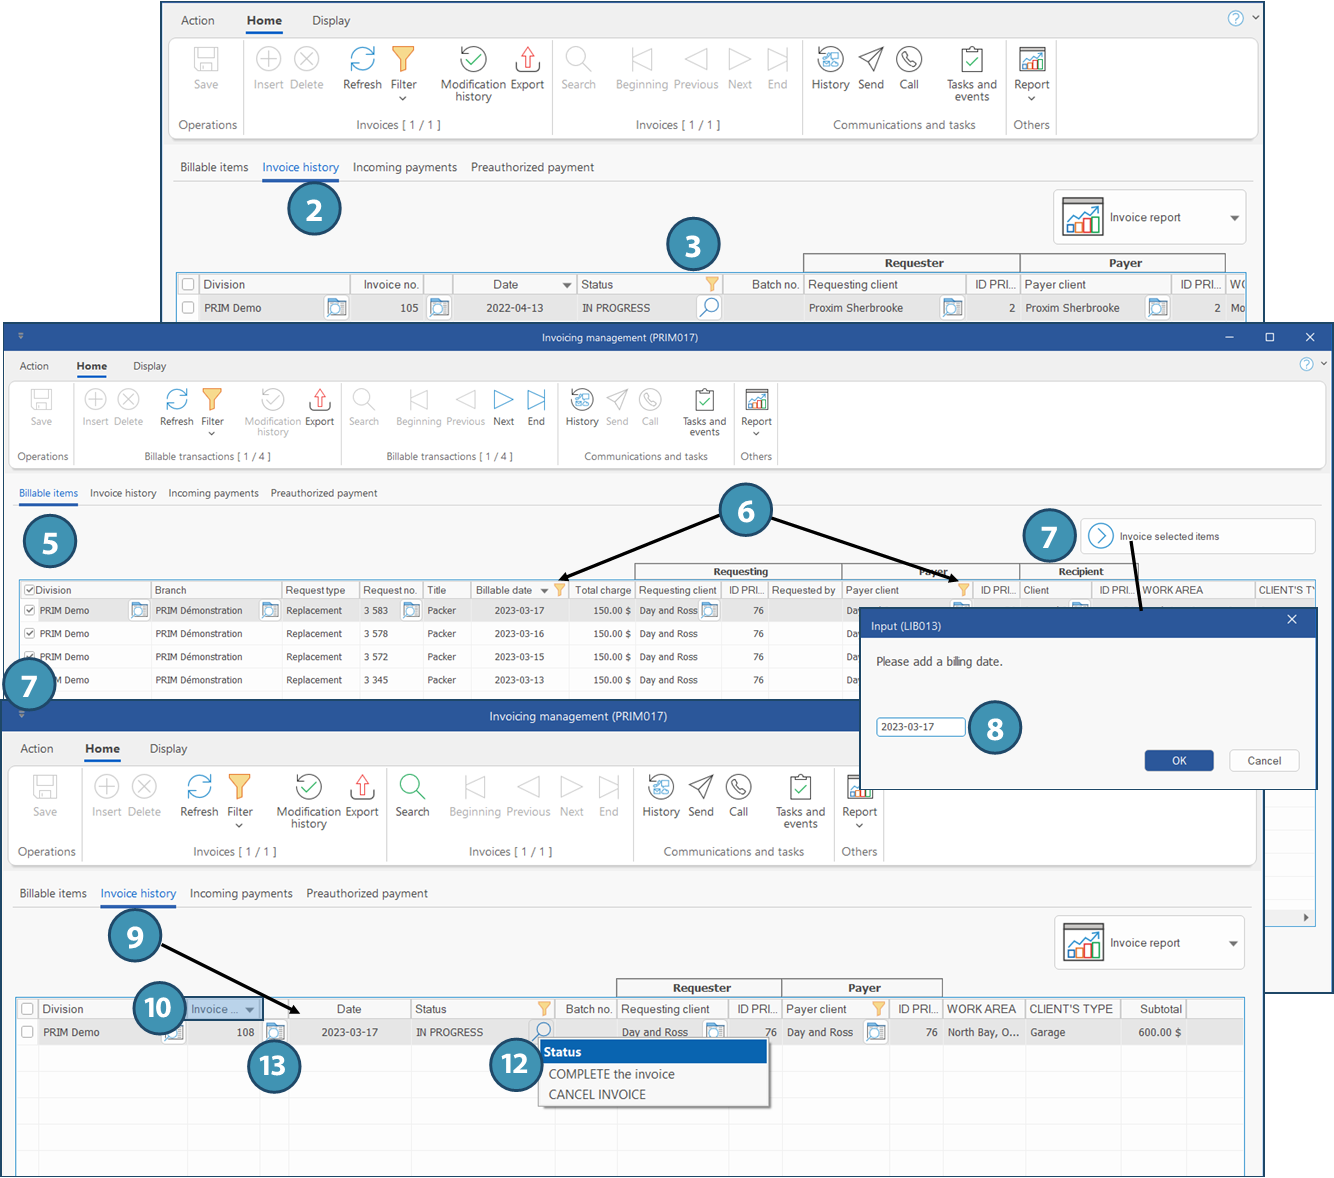
Step 1 - verify invoices in progress 1.Open a "Invoicing management" window. 2.Move under Invoice history tab to check the invoices with status In progress, and make sure not to add new items to an existing invoice if you want PRIM to create a new invoice for your client. 3.In this list, apply a filter in order to display only the invoices with status In progress. 4.If needed, select the invoices to complete and change the status for Completed to avoid additions to these invoices. (See step 3).
Step 2 - create the invoice 5.Go back to Billable items. 6.If needed, apply a filter on some columns to display only the items you want. For example, requests to be billed after a date or for a specific client.
Remplacement : date du remplacement Poste : date d'embauche
7.Tick one or more items to be added to an invoice and click on 8.A window is displayed : enter the invoicing date and click OK.
9.The selected items will be added to a new "In progress" invoice with the date entered under Invoice history. 10. Apply a sorting on the column Invoice no if you want to display the new invoices at the top of the list.
11. If there is no more items to add, you can complete the invoice. 12. Select a record and click on
13. Click on
|


Create an invoice - "Client" window
For example, following the departure of an employee at a client, you can reopen the job offer and proceed with a new posting.
An invoice of the type Extended job posting will be added from the file of this client.
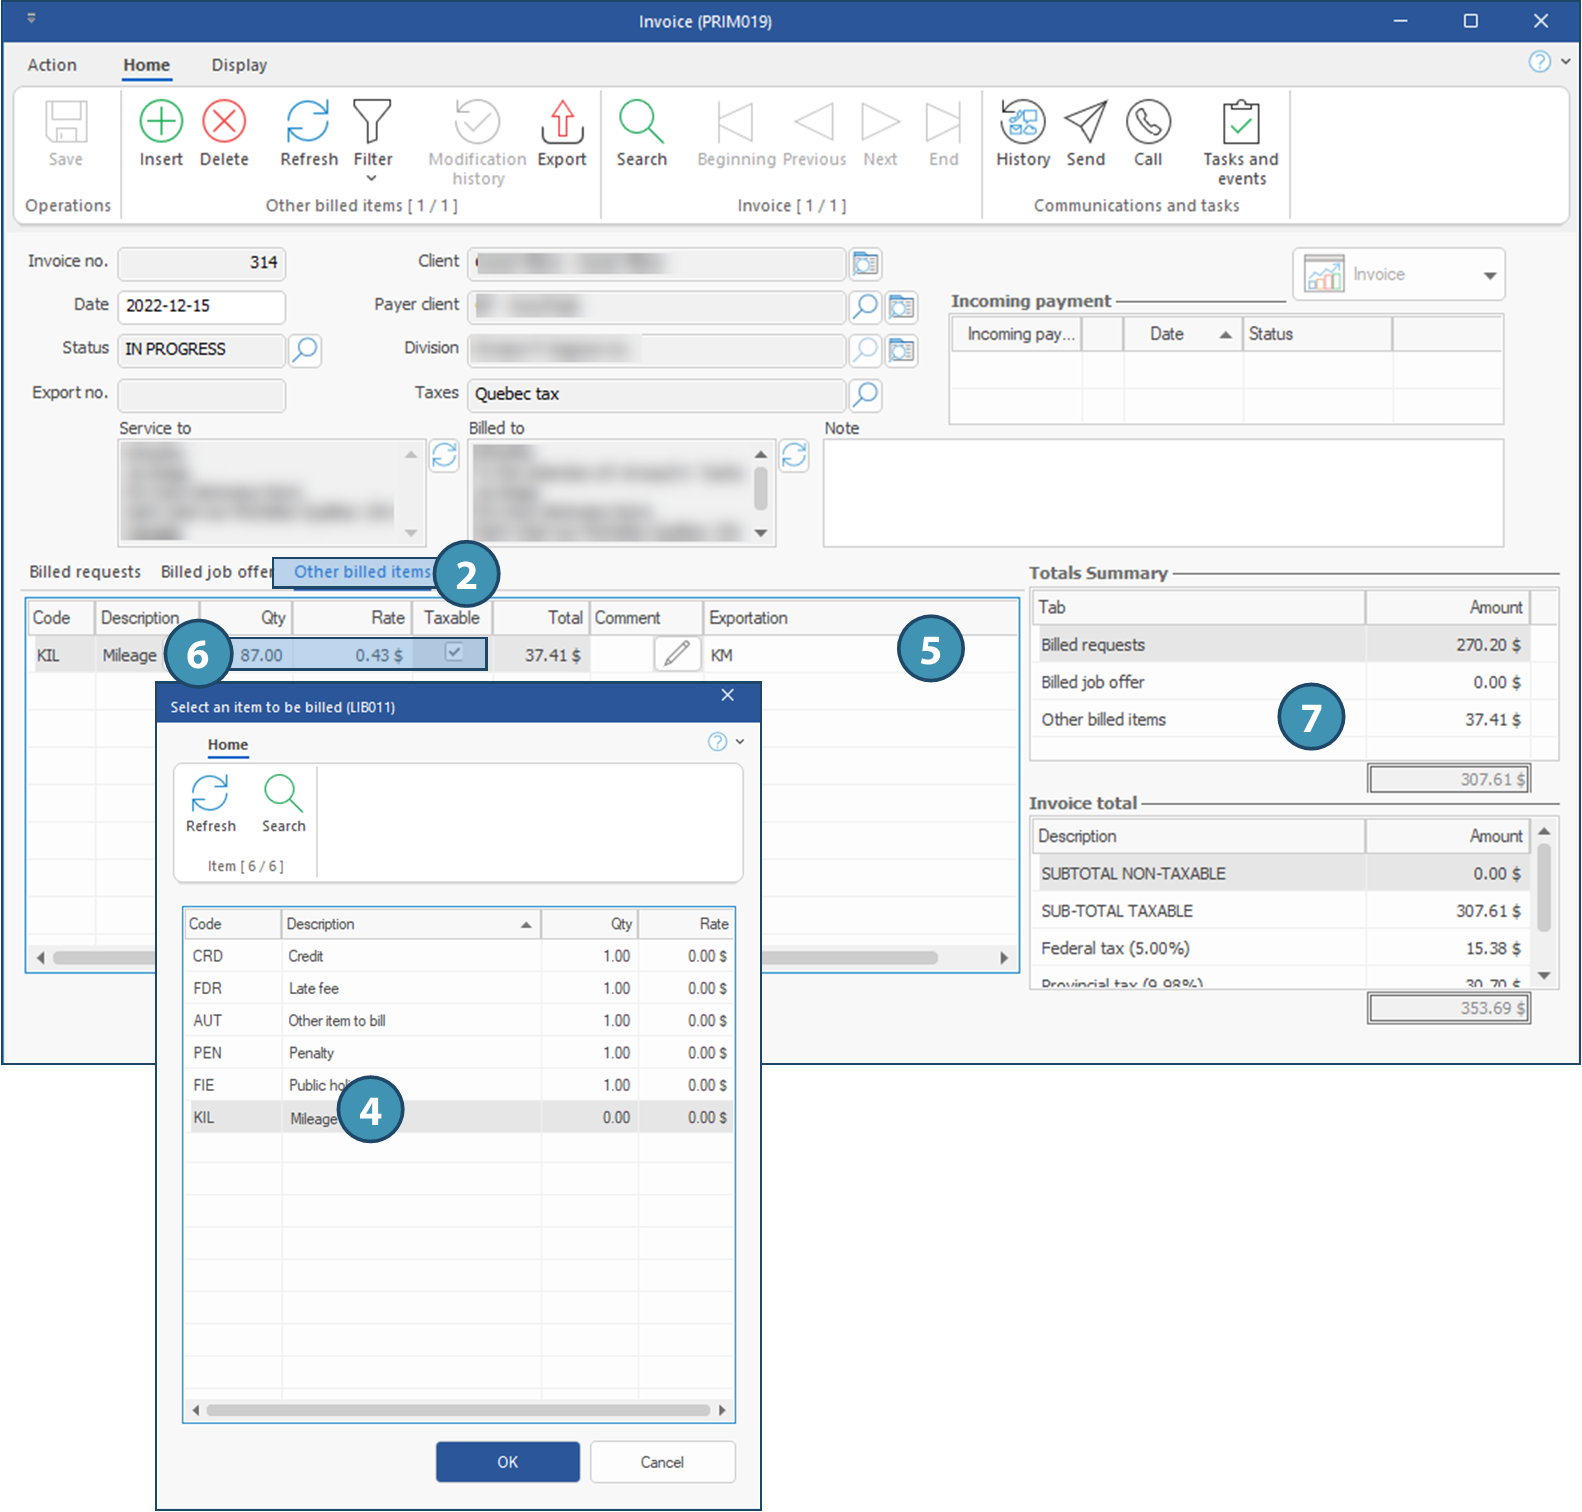
1.Open the client's file. 2.Move under the Billing" tab and to the sub-tab "Invoice history".
3.Click on a blank line of the main area or on 4.Fill in the requested information (Division) in the selection window. 5.The invoice is added to the list, with status In progress. 6.Click on 7.Move to the tab Other billed items. 8.Click on a blank line of the main area or on 9.If applicable, select an export code. 10. If needed, change the quantity, the rate or uncheck the box "Taxable". 11. Click on 12. The invoice will also be found under the Invoice history tab of the "Invoicing management" window, with the status In progress.
|


 (Save).
Add items on an invoice
To add a new item in an existing invoice, the status must be In progress.
1.Open the Invoice. 2.Move to the tab Other billable items. 3.Click on the main area or on 4.The list of values window is displayed. Select an item to add among proposed items and click OK. 5.If applicable, select an export code. In some cases, the code will be added by default. 6.Fill in the information in the columns Qty and Rate, and if applicable, check or uncheck the box Taxable. 7.Click on
|

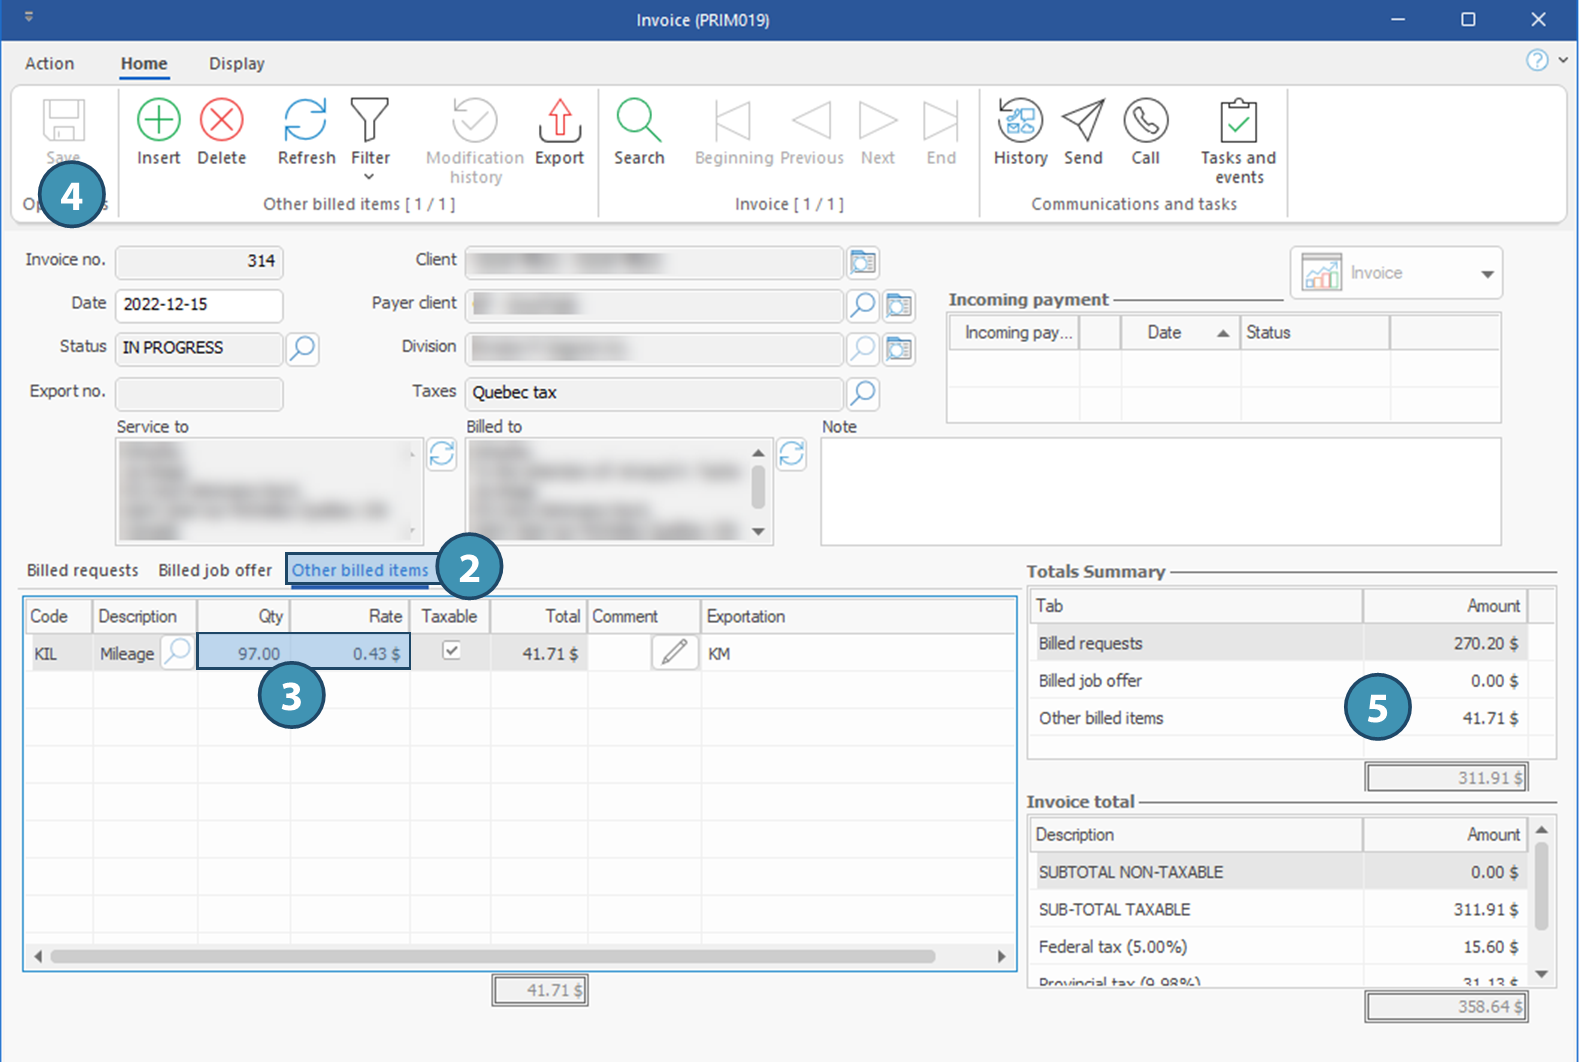
Make a modification on an invoice
To modify an item in an existing invoice, the invoice must have the status In progress.
1.Open an Invoice. 2.Move to the tab Other billed items. 3.Select the record to modify in the list, and modify the information in the columns Qty and/or Rate. 4.Click on 5.The item and the total amount of the invoice will be adjusted.
|
Print, view or send an invoice by email
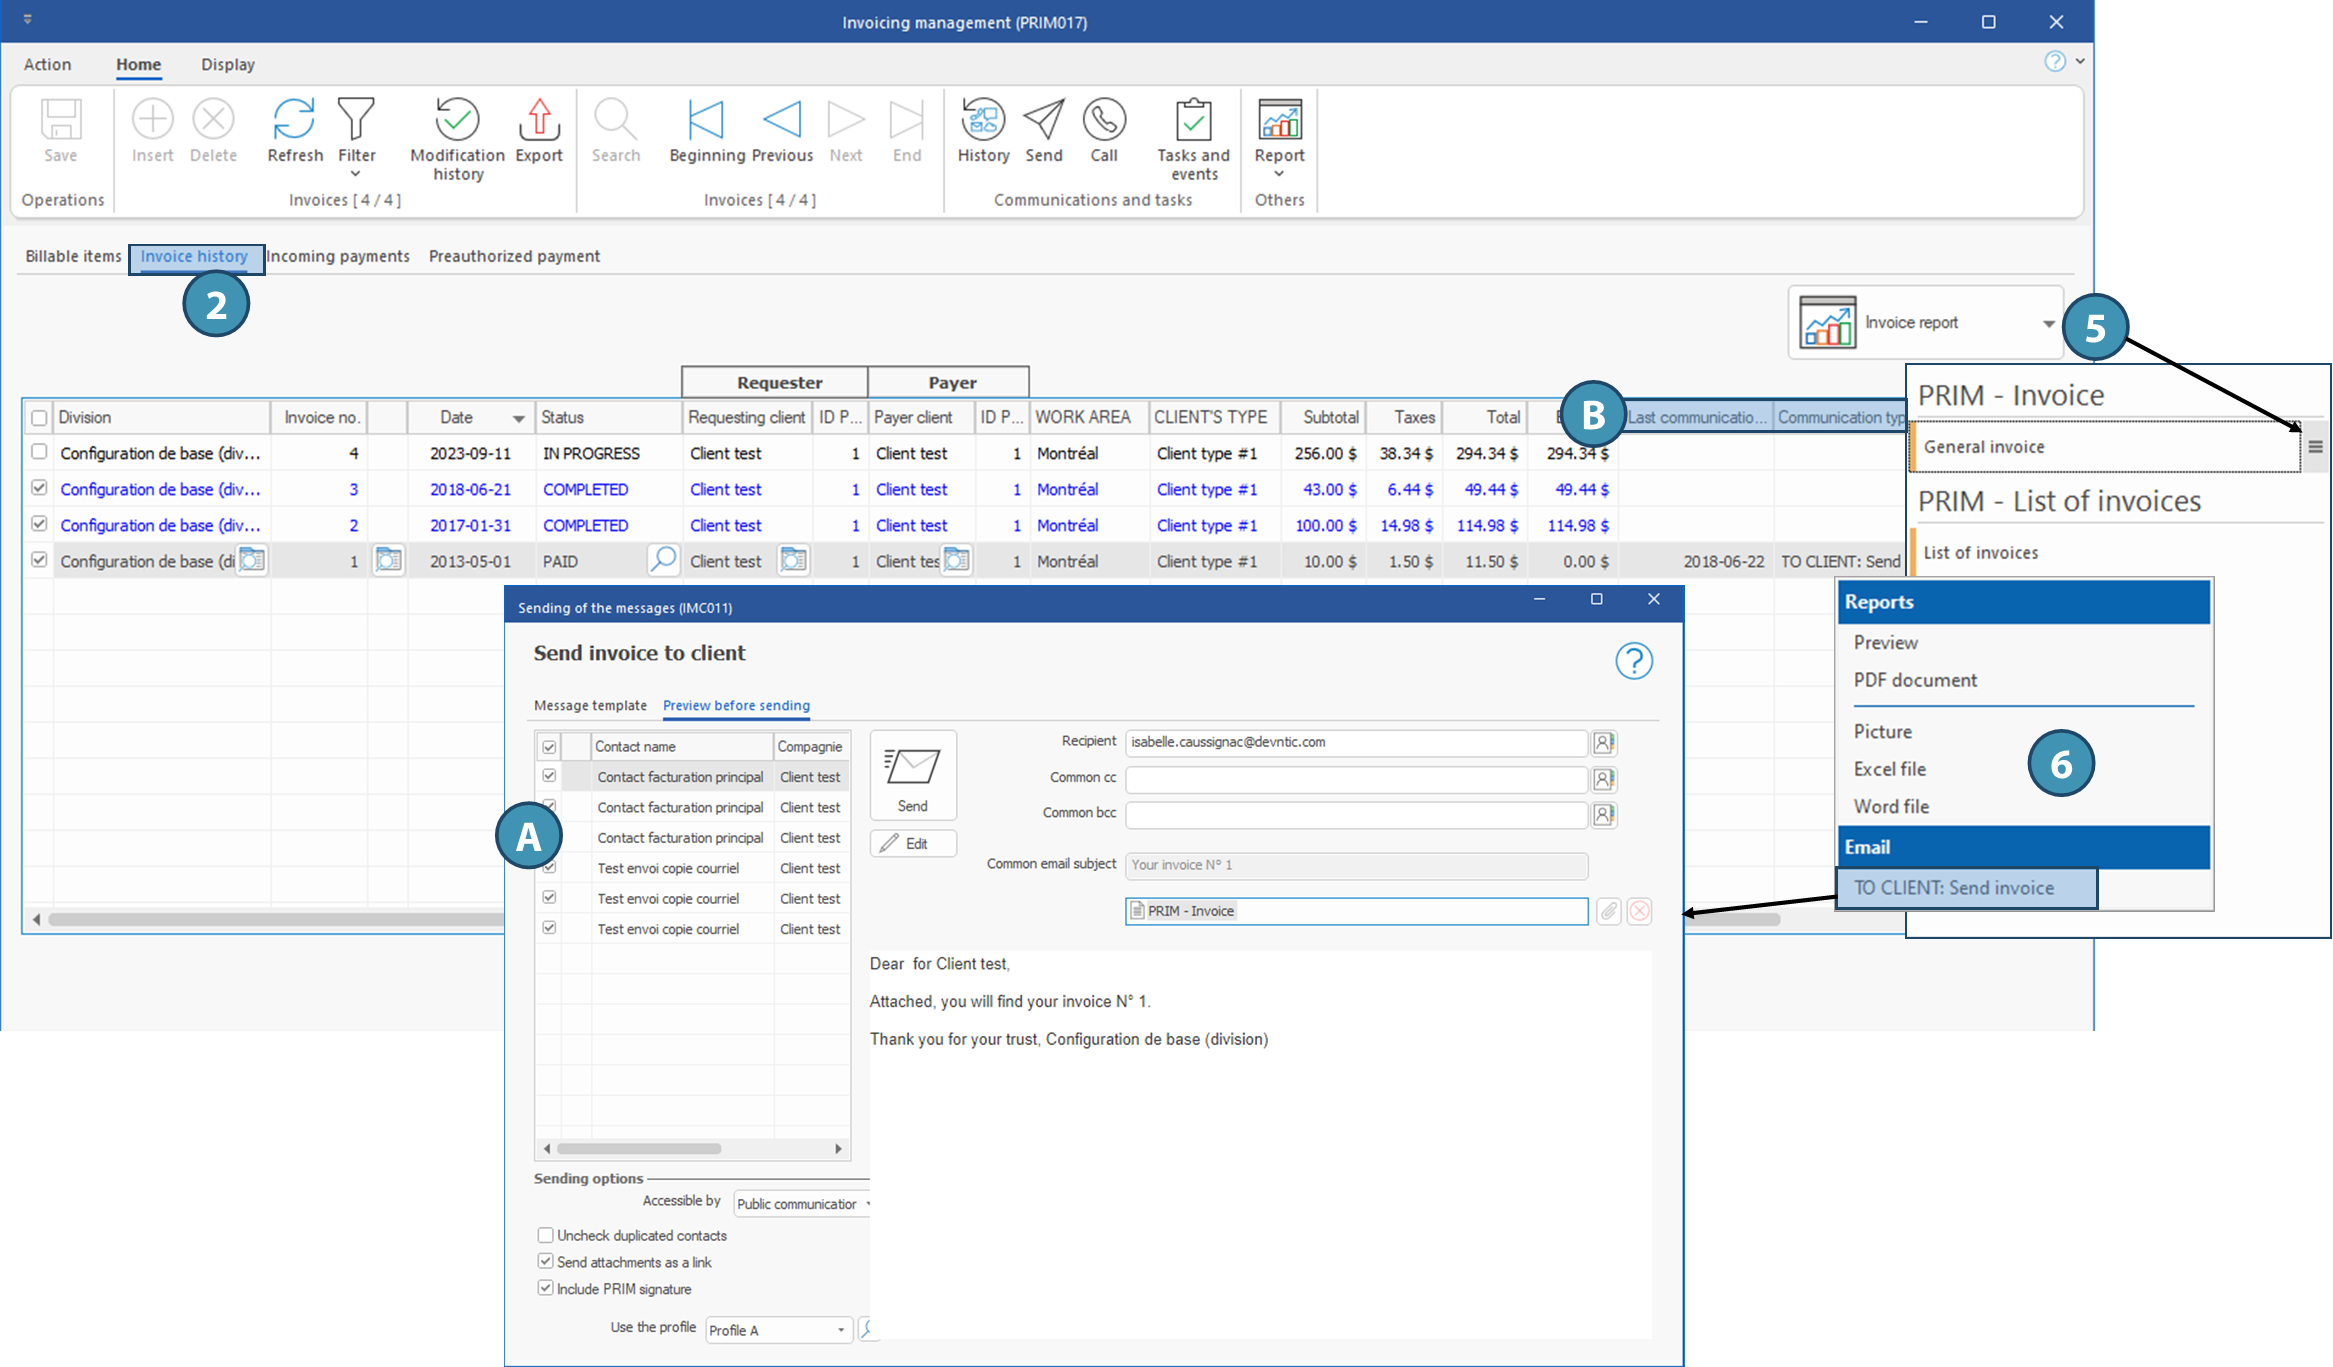
You can send by email, print or view an invoice with status "Completed", "Sent" or "Paid". These action are possible from various windows, such as Invoice and Invoicing management. You can refer to these pages to learn other options, but we will explain here how to view, print or send by email several invoices from the Invoicing management window.
1.Open the Invoicing management window. 2.Move to the tab Invoice history. 3.If needed, apply a filter to display only the invoices to send. 4.Tick the check box for one or several invoices.
5.Click on the button Invoice report, and then on the menu 6.Choose the desired option. To view or print, choose Preview or one of the other options (PDF Document, Excel file, Word file), and use the printing options in the document displayed. To send invoices by email, choose the option To CLIENT: Send invoice.
|

Created with Help+Manual 8 and styled with Premium Pack Version 4 © by EC Software