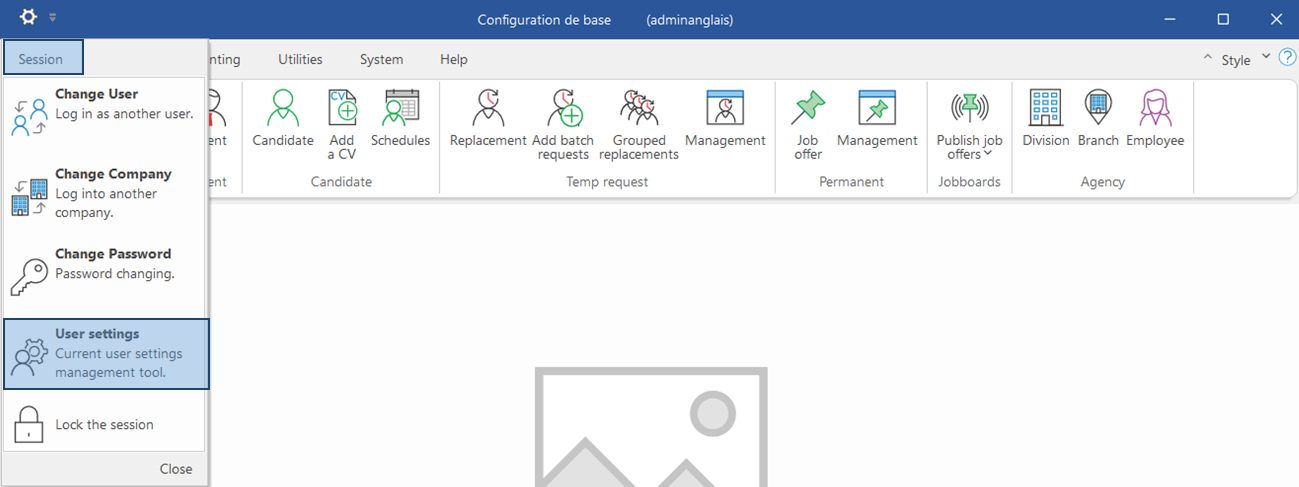
Each user can set up one or multiple user profiles.
For example, a receptionist could use 2 different profiles, a personal profile with personal professional email, and a second profile for reception, with a different email, such as a shared mailbox for reception.
The setup window will be slightly different depending on the sending and reception methods.
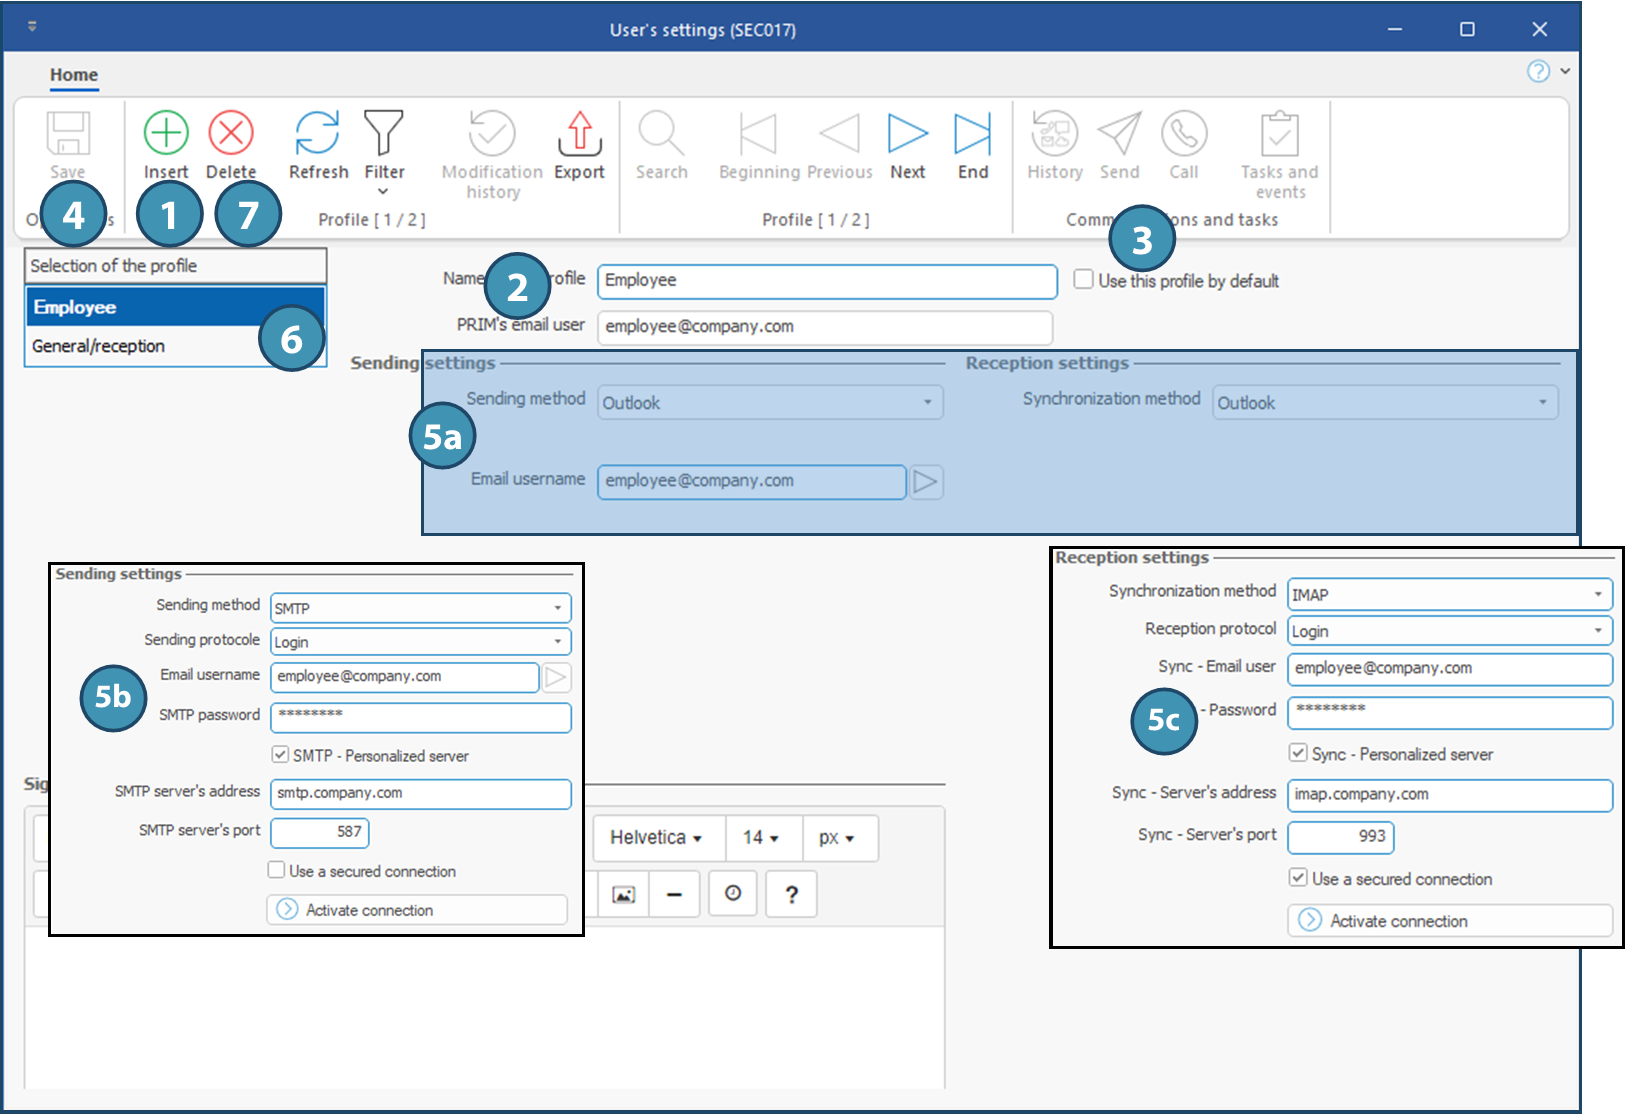
1.Click on Insert.
2.Enter a name for the profile and the email address to be used when sending emails with this profile.
3.Check "Use this profile by default" if this profile is to be used most of the time for sending emails through PRIM.
4.Click on  (Save). (Save).
5.Access to sending and reception settings will be unlocked once the profile is saved. Select the proper sending and synchronization methods. Fields will be added depending on the selected sending or reception methods - either Outlook (5a), or SMTP for sending (5b) and IMAP or Pop3 for reception/synchronization (5c).
 For sending method other than Outlook, the proper protocol, login ID, server addresses and ports must be set up to allow the synchronization. For additional information, see Synchronization Setup in advanced users section. For sending method other than Outlook, the proper protocol, login ID, server addresses and ports must be set up to allow the synchronization. For additional information, see Synchronization Setup in advanced users section.
 When creating the user profile, you will need to activate connection by clicking on the proper button (Activate connection). However, only the user indicated in the field "Name of the profile" can activate the connection. When creating the user profile, you will need to activate connection by clicking on the proper button (Activate connection). However, only the user indicated in the field "Name of the profile" can activate the connection.
Change user profile/email address used to send an email
6.You can change the profile used to send a message with a different email address from the default one. For example, use the profile « General/Reception » to follow-up on an information request. When sending the email, just select the proper user profile to send the email. The user profile must have been created beforehand.
Delete a profile
7.Select the profile and click on  (Delete). (Delete).

|

 Add/Modify or change user profile
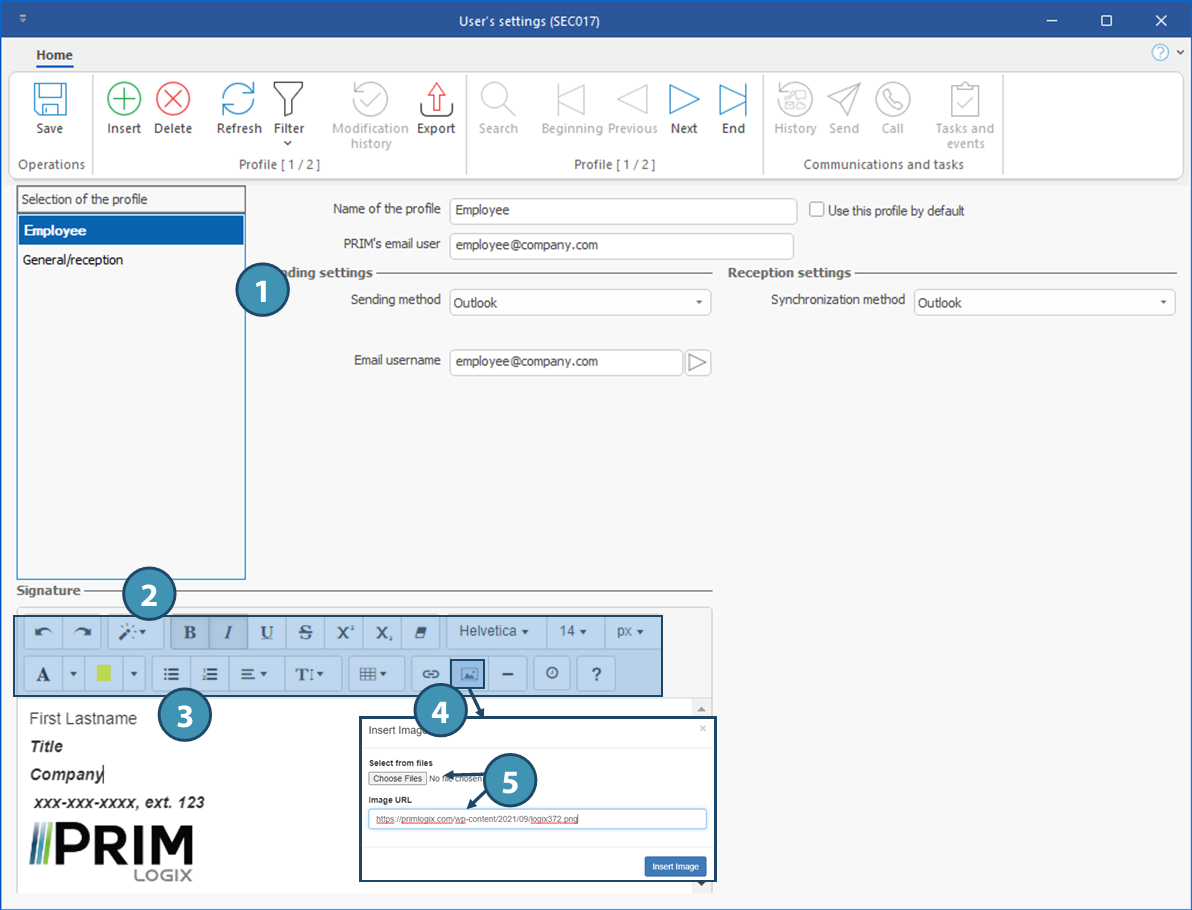
 Add a personalized signature

 (Delete).

 (Insertion