Email synchronization
Email synchronization allows you to import your received messages into your email inbox so that they can be accessed in PRIM Logix.
 Synchronization is only done with messages that come from an email address, present in a folder in PRIM.
Setup for email synchronization
In order to perform email synchronization, the send and receive settings must be configured in the user's profile.
To do so, please refer to the corresponding page in advanced users section.
To synchronize the emails:
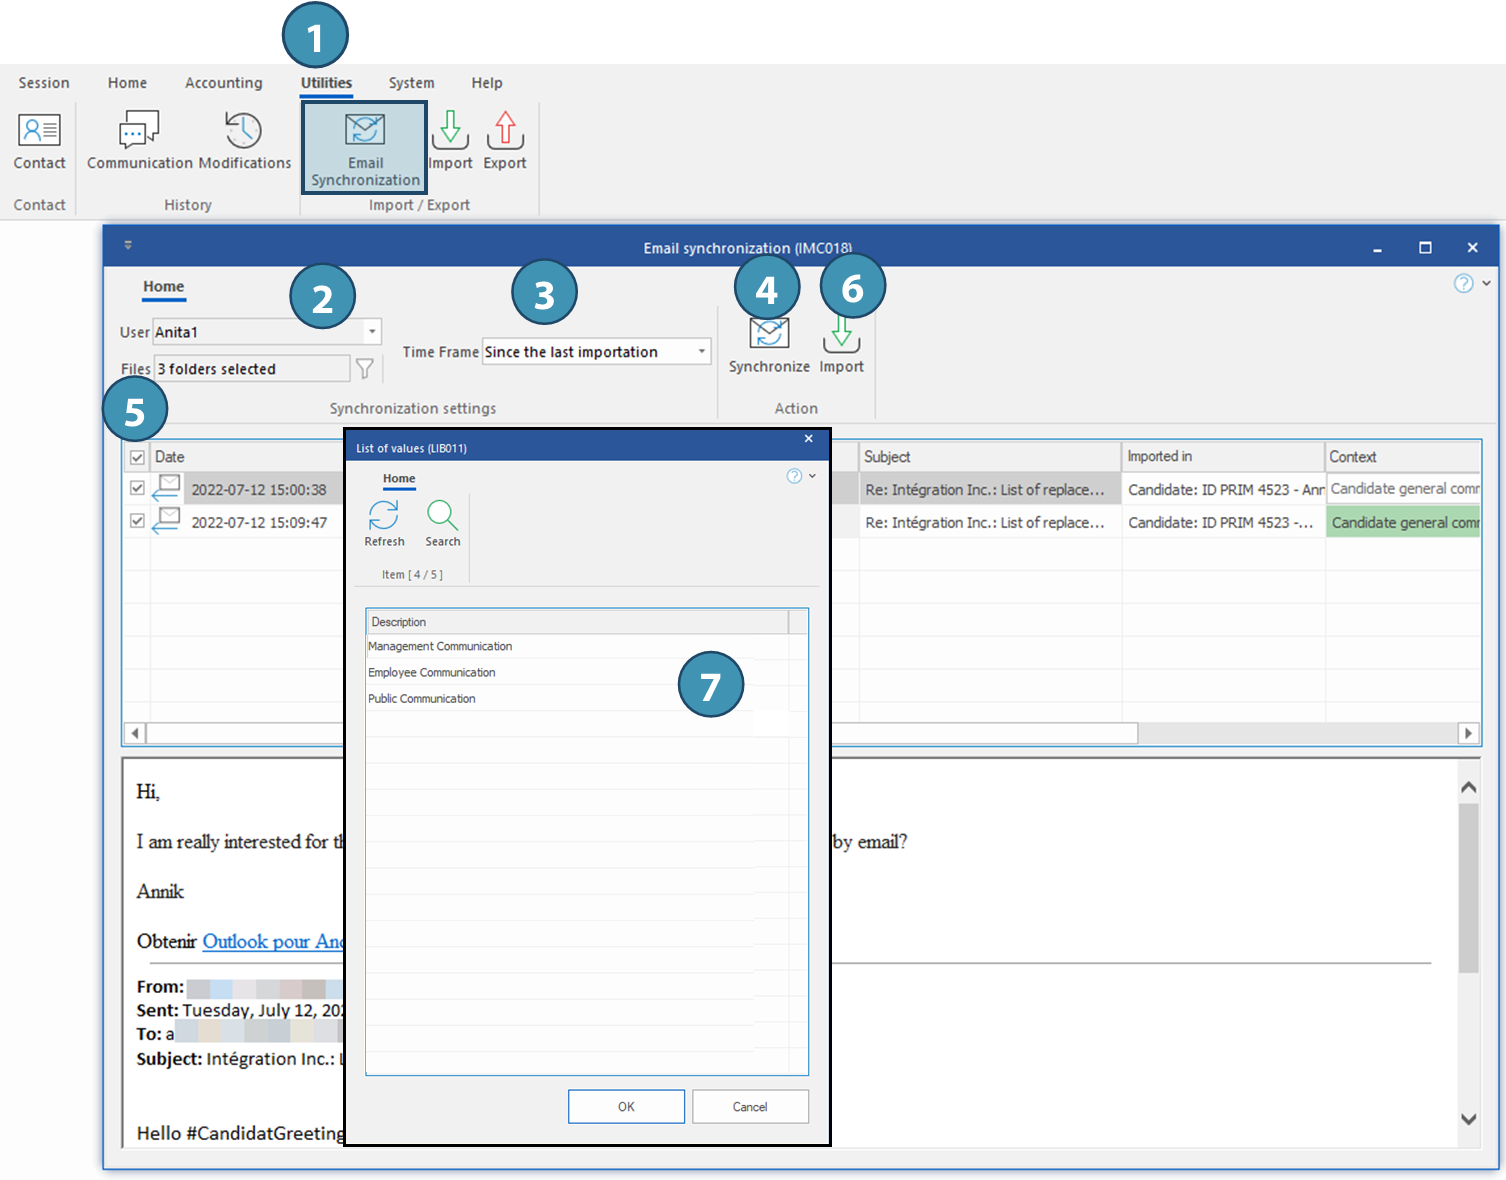
1. To synchronize your emails, go to the "Utilities" ribbon and the "Import / Export" section, then click on the "Email Synchronization" button
2. Choose a user profile from the drop-down menu and use the filter button to change the folders in your mailbox that will be synchronized.
3. Determine the period you want to go back in time for the synchronization.
 If synchronization has never been performed, it is recommended to choose a period other than "Since last import" or "All" because of the volume of emails that such a choice could represent.
4. Click on « Synchronize ».
5. When synchronization is complete, in the table, tick the checkbox for any email you want to import. You can tick them all easily with the checkbox at the top of the first column.
6. Click on "Import" to import the emails in PRIM Logix. Once imported, these will be in the corresponding files, for example, a candidate or a client's file.
7. In the displayed window, choose the communication security level for selected emails.
Emails imported following synchronization will be visible to users with security permissions equal to or greater than the security group selected. For example, an email assigned to the group "Public Communication" will be visible for all users. An email assigned to the group "Management Communication" will be visible only to users in this group. Users in other groups will not have access.
Description of columns in the email synchronization window
Column |
Description |
Date |
Date the message has been received |
From |
Name or email of the sender. |
To |
Name or message of the message's recipient. |
Subject |
Subject of the message. |
Imported in |
Name of the file in which the message will be imported.
Example: |
Context |
Green record: It is a response to a message previously sent via PRIM Logix. These records are automatically checked during synchronization and will be checked by default to be ready to be imported.
Yellow record: It is a new message. You will need to check the items to import. |
Attached to the message |
If the email is a response to a message previously sent via PRIM, the reference to the original message will be displayed. |
Message |
Indicates the state of synchronization |
Exclude a contact from the synchronization
In all contact files (Candidate, Client, Employee, but also in the Contacts Management window), the "Properties" tab allows you to choose the option "Exclude this contact from email synchronization".
By ticking this box, emails received or sent to the contact's address are not considered when synchronizing emails.