|
Navigation: Training plan > Section 6 - Communications > Section 6 - Advanced users > Message templates Add or modify a message template |
Scroll Prev Top Next More |
|
WARNING: This section is intended for advanced users and "Super users" of PRIM Logix.
The configuration items presented in this section may indeed have an impact on your operations.
If in doubt, consult your system administrator.
Please note that only users in the appropriate security groups can access the software configuration windows. |

Add or modify a message template
Several message templates, email or SMS are available in PRIM, however, you can edit a new message template or modify an existing template.
 Terms used under the tabs of the "Message template management" window
|
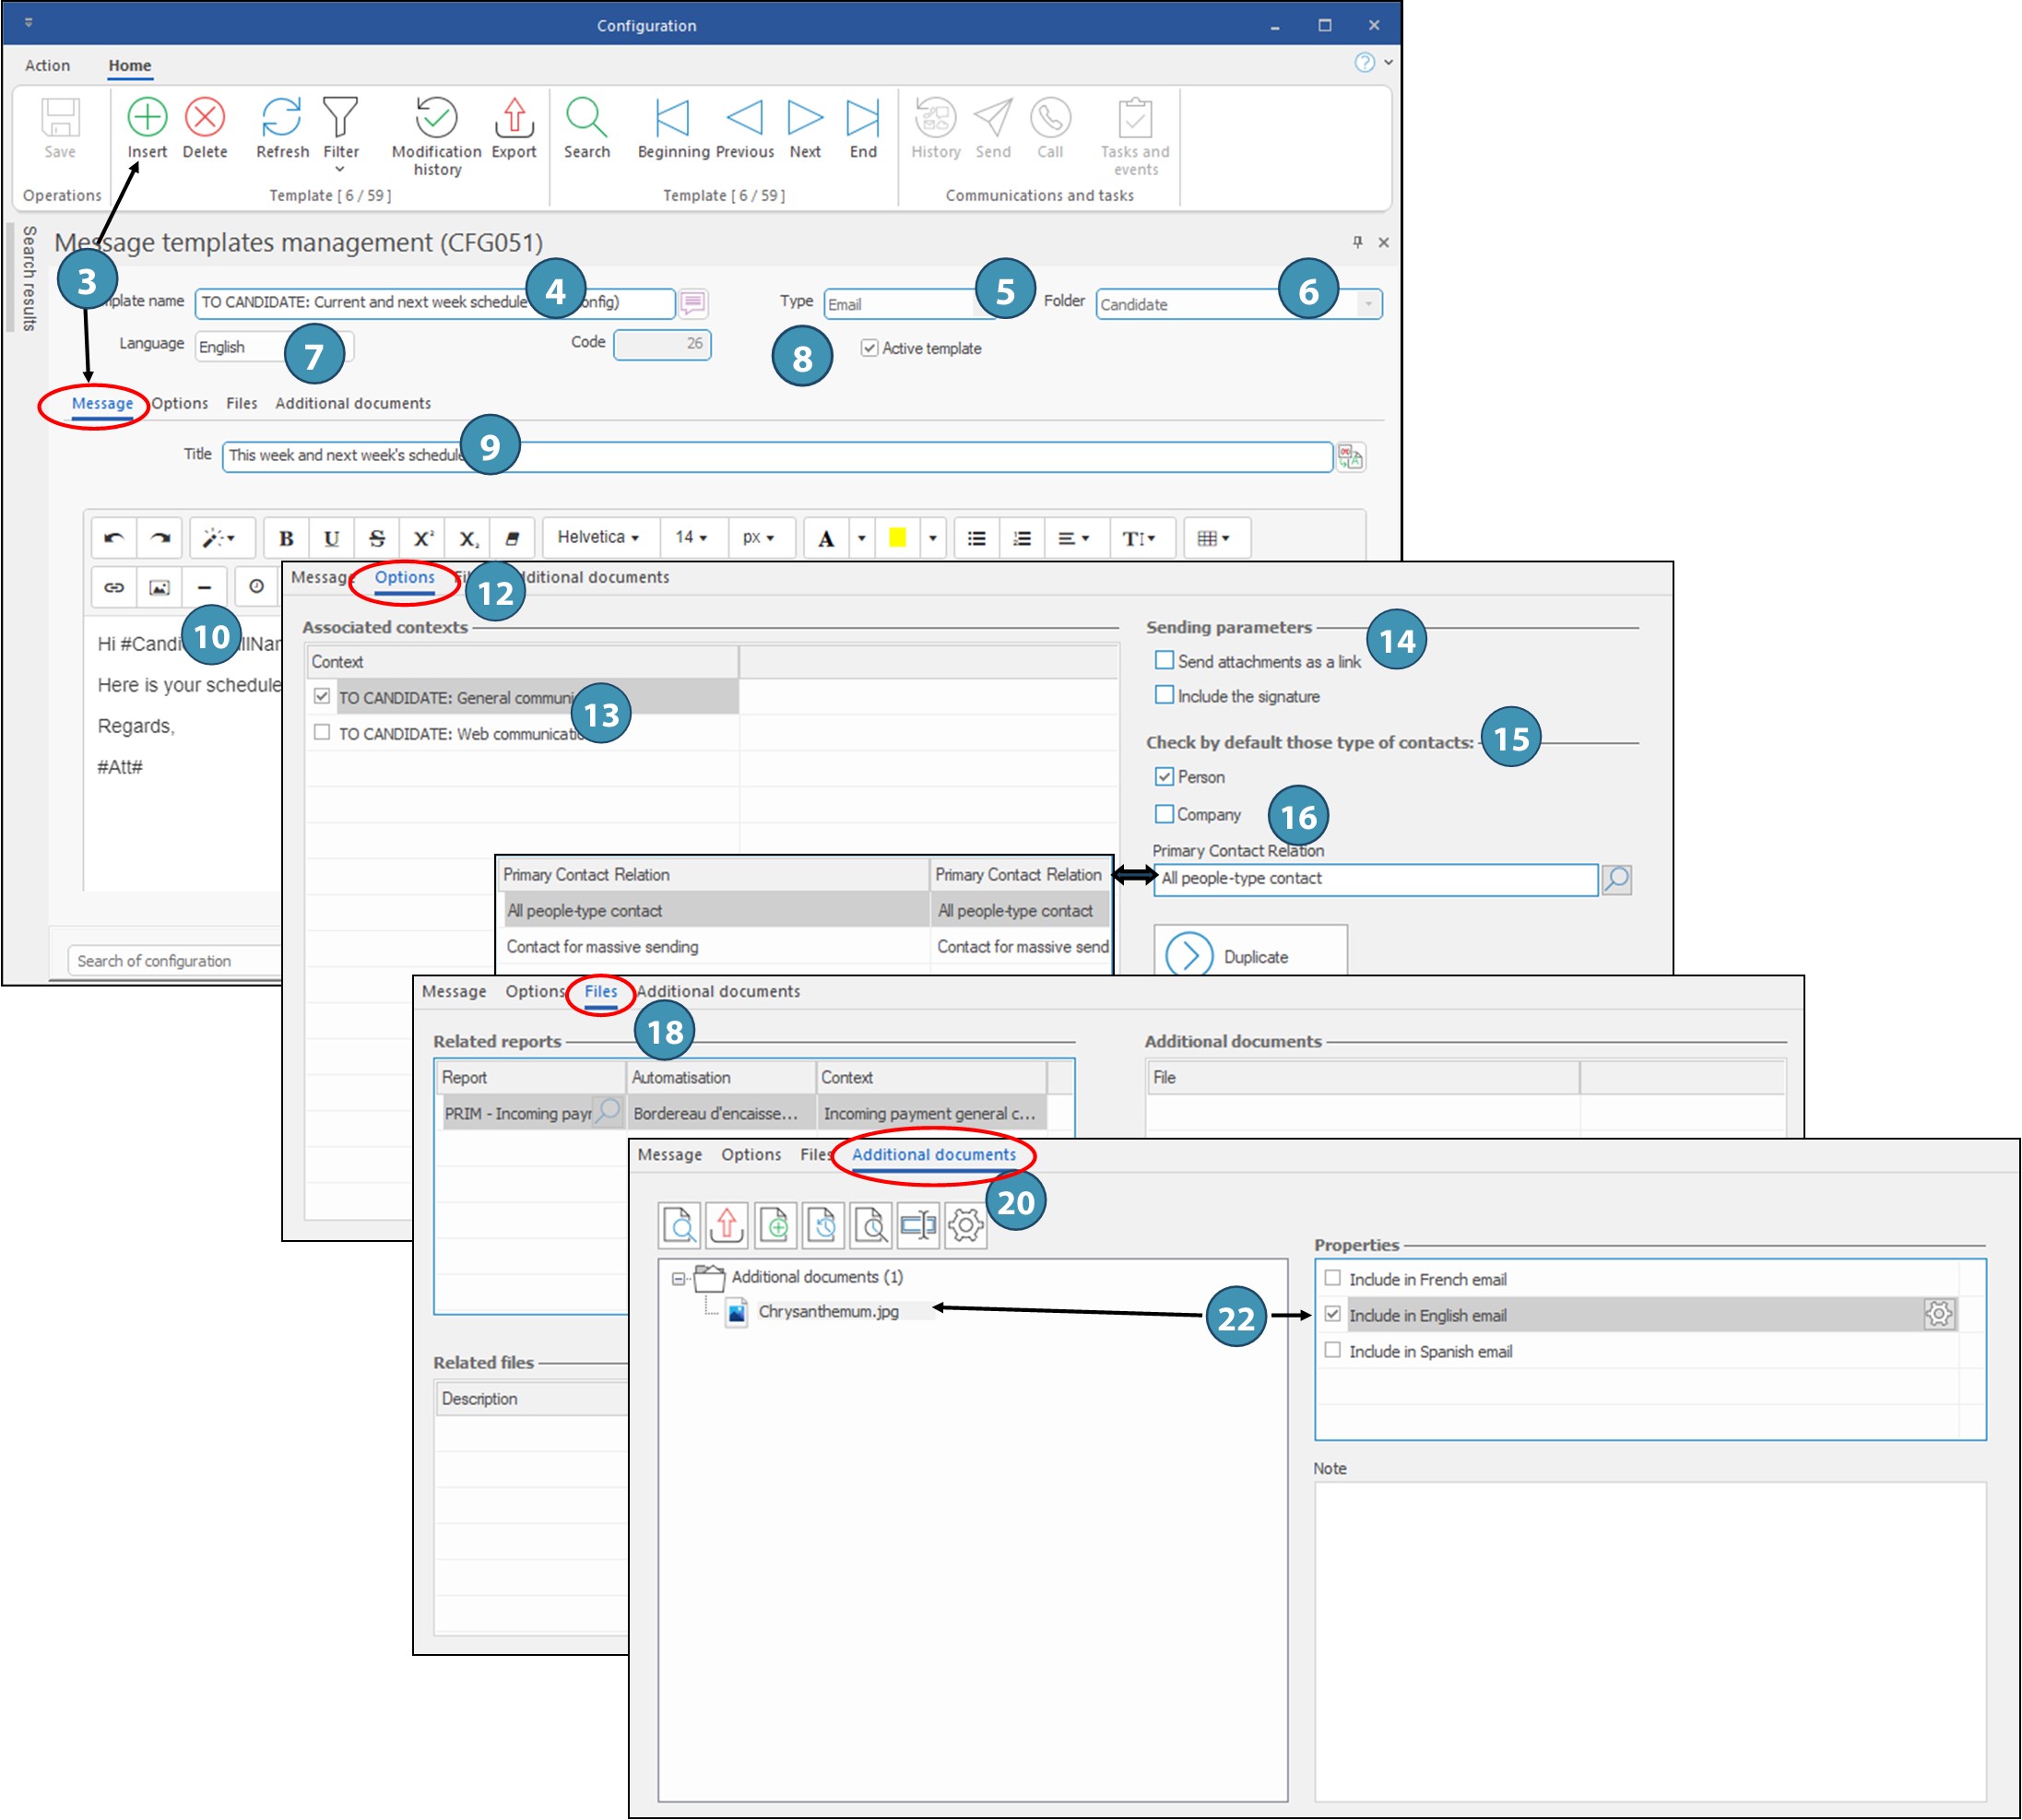
Add an email template
1.Open the window ''Message template management''. 2.If needed, hide the "Search results" pane to optimize the window. 3.Under the ''Message'' tab, click on 4.Enter the name of your new template. 5.Select the template type ''Email'' in the list of choices. The edition zone of the message is displayed. 6.Select the folder in which you want to add your template. 7.Select the language in which you will compose your message. 8.Tick the box ''Active template'' to allow PRIM users to use your template. 9.Enter the title or the subject of the email. 10. Write your message. 11.Click on 12. Move under the ''Options'' tab. 13. Depending on the selected folder in the section ''Associated contexts'', you will have a list of different contexts. Choose among the proposed items. 14. Select the sending parameters. 15. The section ''Check by default those type of contacts'' will be accessible according to the selected folder at the creation of the template. 16. If needed, check the type of contact that will be ticked by default at the sending of the email and the property which has to be ticked in the file of the contact. 17. Click on 18. Move under the ''Files'' tab if you want to attach a document to the template (a PRIM report or a document saved under the in ''Documents management'' tab). 19. Click on 20. Move under the ''Additional documents'' if you want to join a document saved on your workstation or your network. 21. From the "Home" ribbon, click on 22. Once added, select it, and select the the properties of the file. 23. Click on 24. If you company uses different languages, change the language (7) to compose in a different language. 25.Your message is ready. You will be able to use it at your next email sending, using the button
|

 (Insert).
 (Save).
Add a SMS template
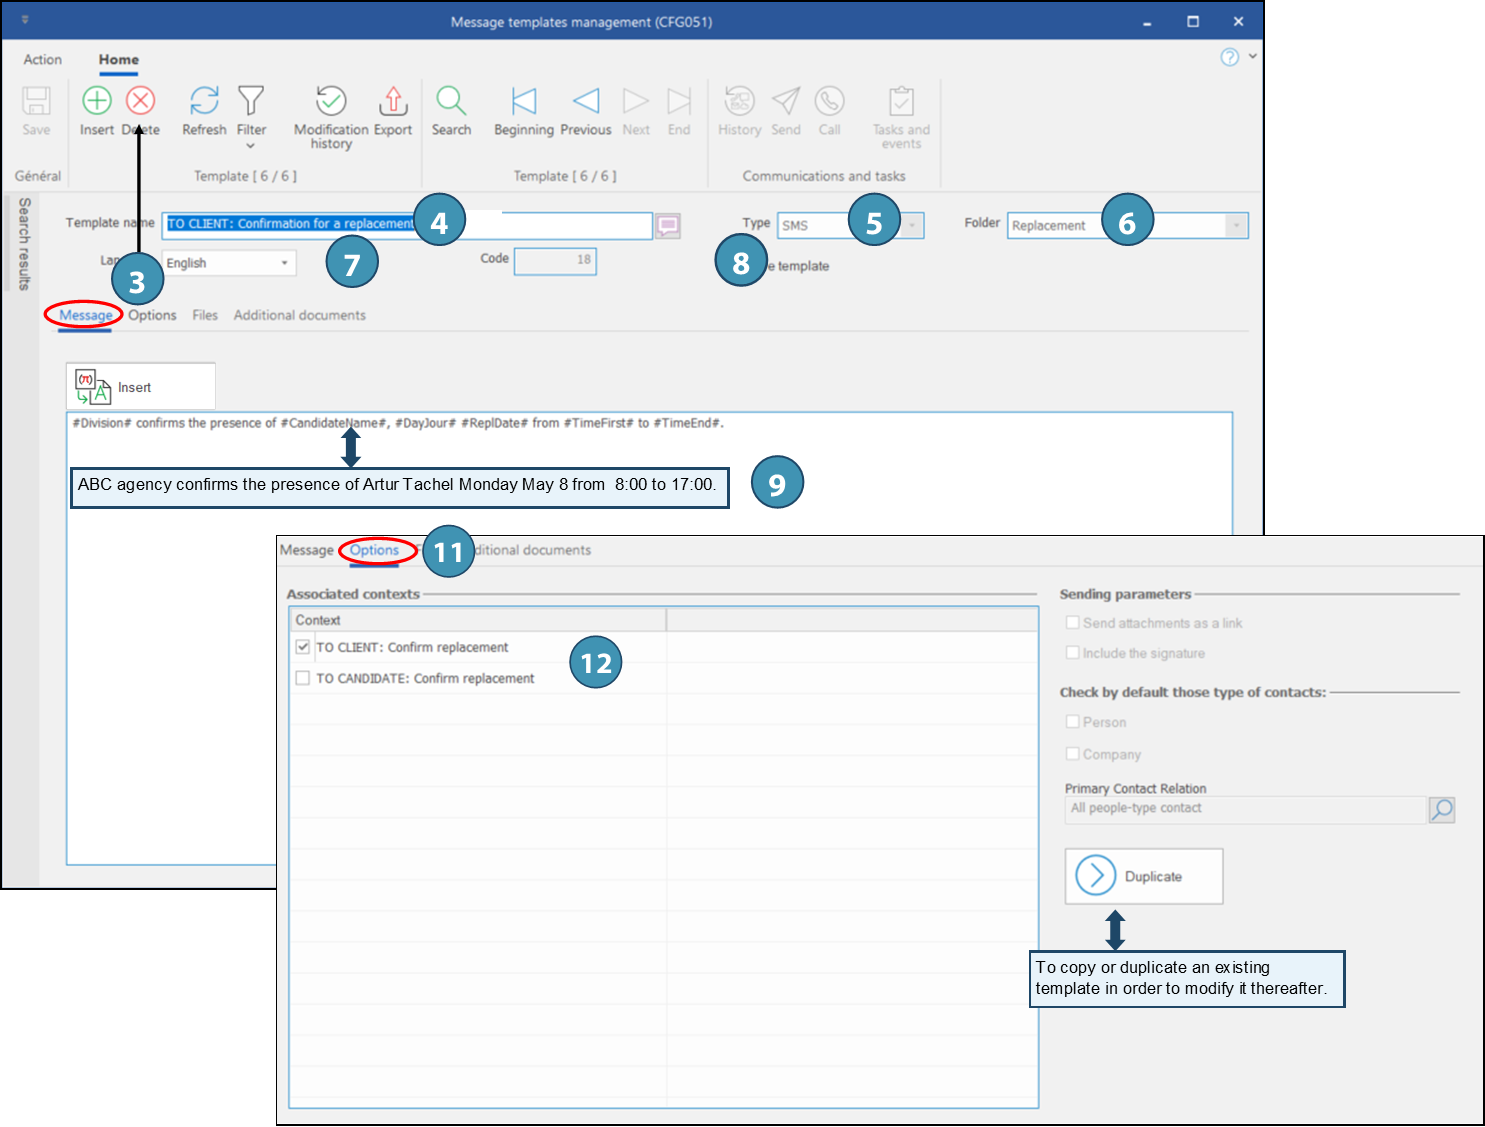
1.Open a ''Message templates management''. 2.If needed, hide the "Search results" pane to optimize the window. 3.Under the ''Message'' tab, click on 4.Enter the name of your new template. 5.Select the template type ''SMS'' in the list of choices. 6.Select the folder in which you want to add your template. 7.Select the language in which you will compose your message. 8.Tick the box ''Active template'' to allow the PRIM users to use your template. 9.Write your message. Use the available variables, if needed. Make sure not to exceed the number of allowed characters. 10. Click on 11. Move under the ''Options'' tab. 12. Depending on the selected folder in the section ''Associated contexts'', you will have a list of different contexts. Choose among the proposed items. 13. Your message is ready. You will be able to use it at your next SMS sending. Make sure to compose a message for each language used.
|
Modify an existing template
1.From the list, select the template you want to modify. 2.Make the changes in the body of the message. 3.Click on
|
Use variables in your message to customize it
What is a variable?
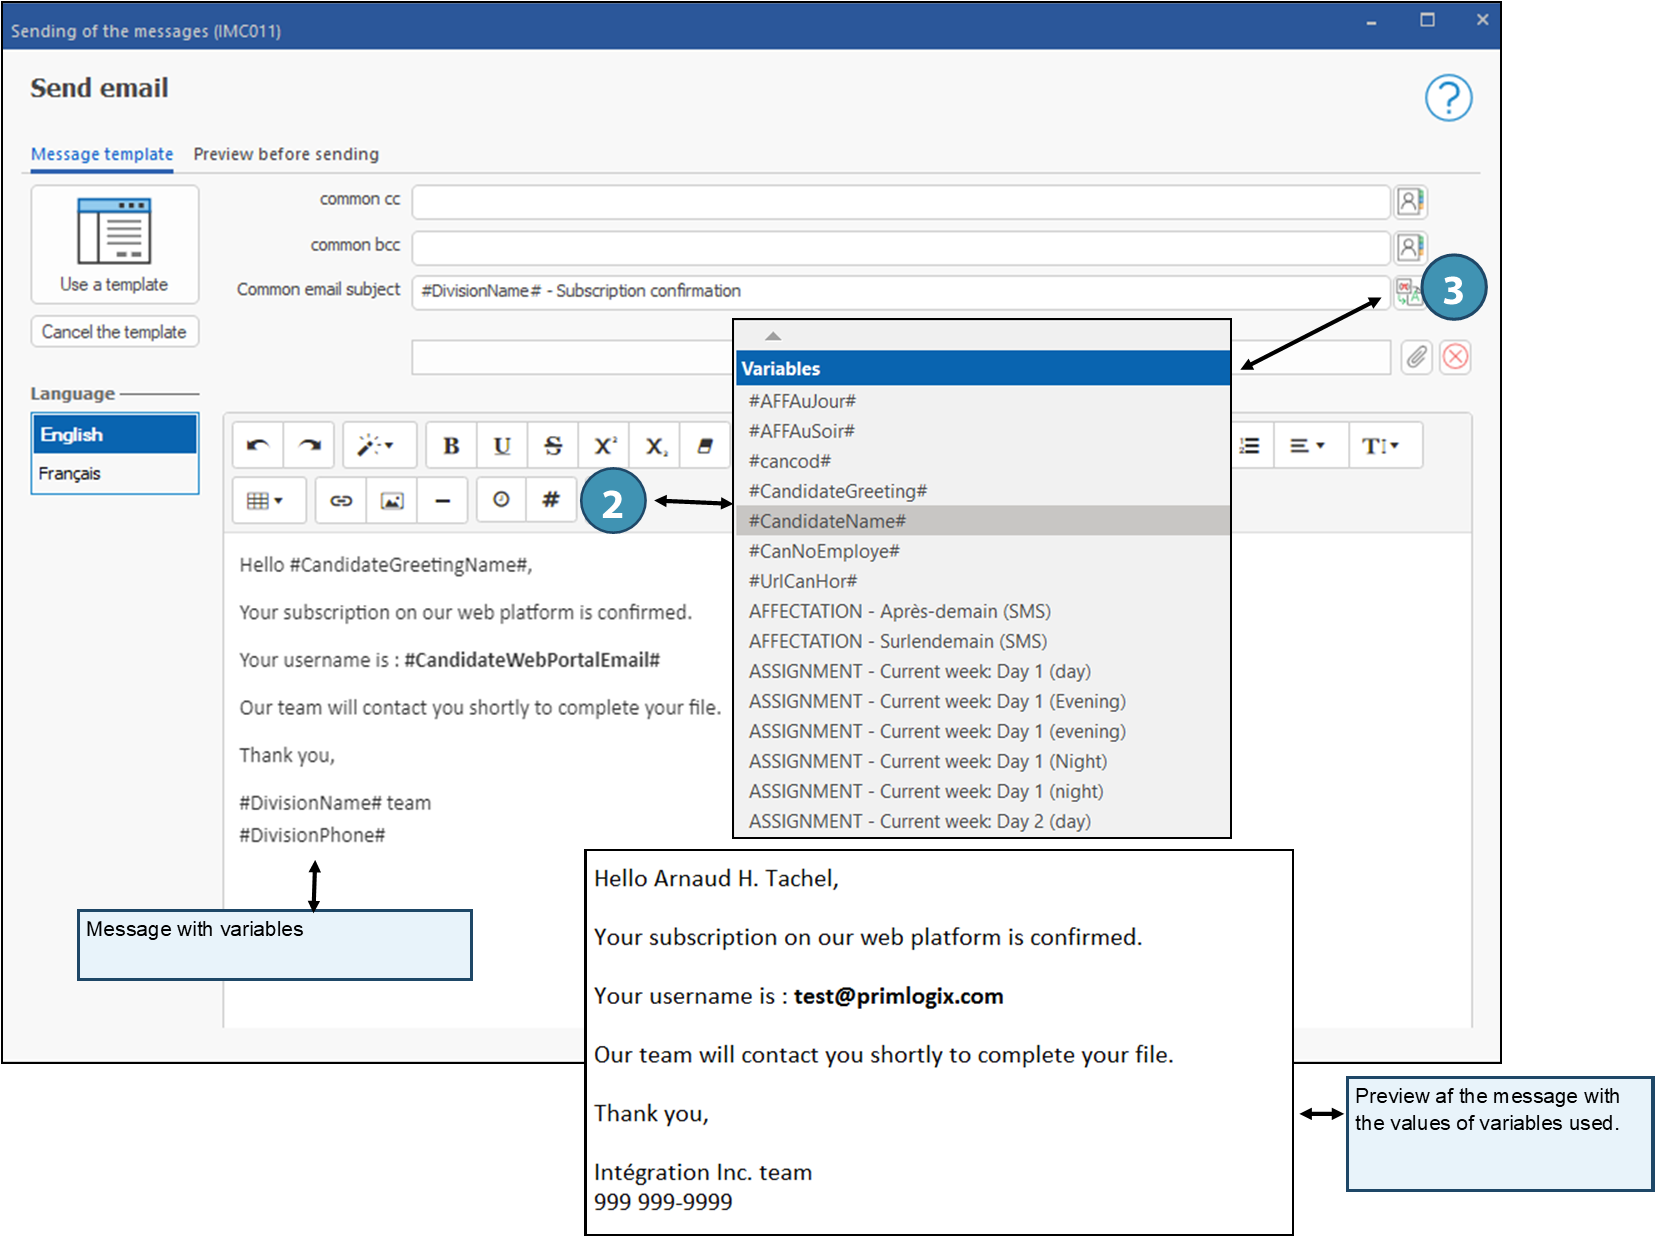
A variable is a symbol in an email or SMS template that will take on a certain value when sent.
For example, a variable that is associated with a name of a client and is added in a message template will be erased to display the name of the client to whom the message is addressed.
See sections "Add an email template un modèle de courriel" and "Add a SMS template" to learn how to create templates. Nous traiterons ici de l'ajout de variables dans un message, although the feature is the same in a template.
1.You are in the window for sending of the messages, at the design step of your message. 2.To insert a variable in the text, click on 3.To insert a variable in the subject of an email, click on 4.If you did not insert the variable at the right place, you can move it by using the ''Cut - Paste'' method. 5.Click on
|


Rename variables.
It is possible to rename the proposed variables in order for them to better reflect the use you make of them.
1.In the "System" ribbon, click on "Settings" to open the configuration window. 2.Perform a search (for example : variables) to get the window for management of Send variables (CFG046). The variables are lassified by entity (left table): move on the desired entity. 3.Look in the table on the right for the variable that you want to rename. 4.Use the translation button to rename the variable according to your preferences and save.
|


Created with Help+Manual 8 and styled with Premium Pack Version 4 © by EC Software