Define a schedule for a mission
Go to the "Display" ribbon to open the "Schedule". This pane is divided in 4 sections: a list of existing schedules (A) and 3 tabs allowing you to manage the schedules (B).
For each mission, it is possible to create one or several schedules. Click on "Insert a new schedule" in the list (C) pour créer un horaire.
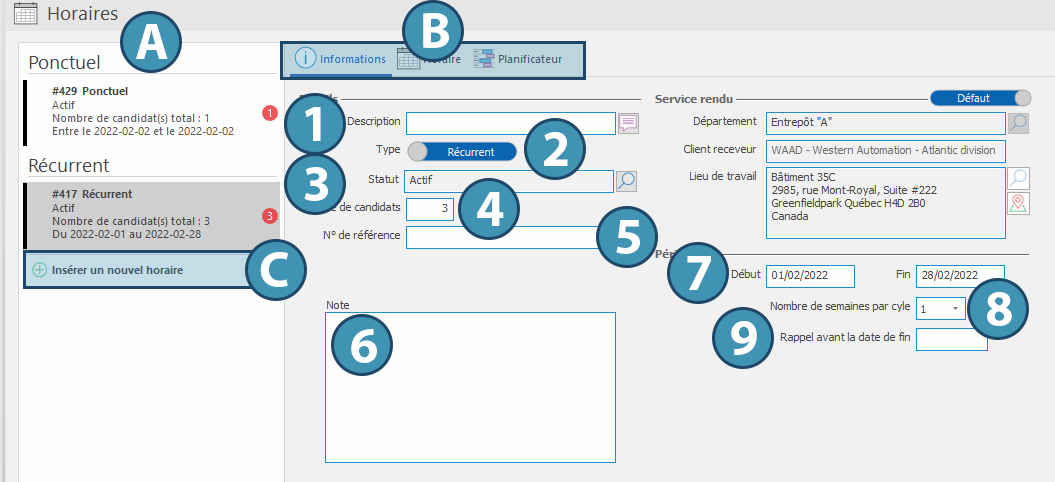
In the "Information" tab, fill out the fields to set up the schedule:
1.Give a title to the schedule, if desired.
2.Specify the type of schedule: Punctual or Recurrent.
3.Select the status of the schedule: only active schedule will need to be filled.
4.Specify the number of candidates needed for this schedule.
5.If applicable, specify the reference number for the schedule.
6.If needed, add a note about the schedule.
In the case of a recurrent schedule:
8.Specify the period for which the schedule applies.
9.Specify the number of weeks included in the cycle of the recurrent schedule. It is possible to create schedules with cycles up to 8 weeks.
10. If necessary, specify a date before the end of the period to create a reminder as a task in the Events and tasks module.
Add a schedule to a mission
After creating a schedule following the steps above, move to the "Schedule" tab of the same pane.
If the schedule is recurrent:
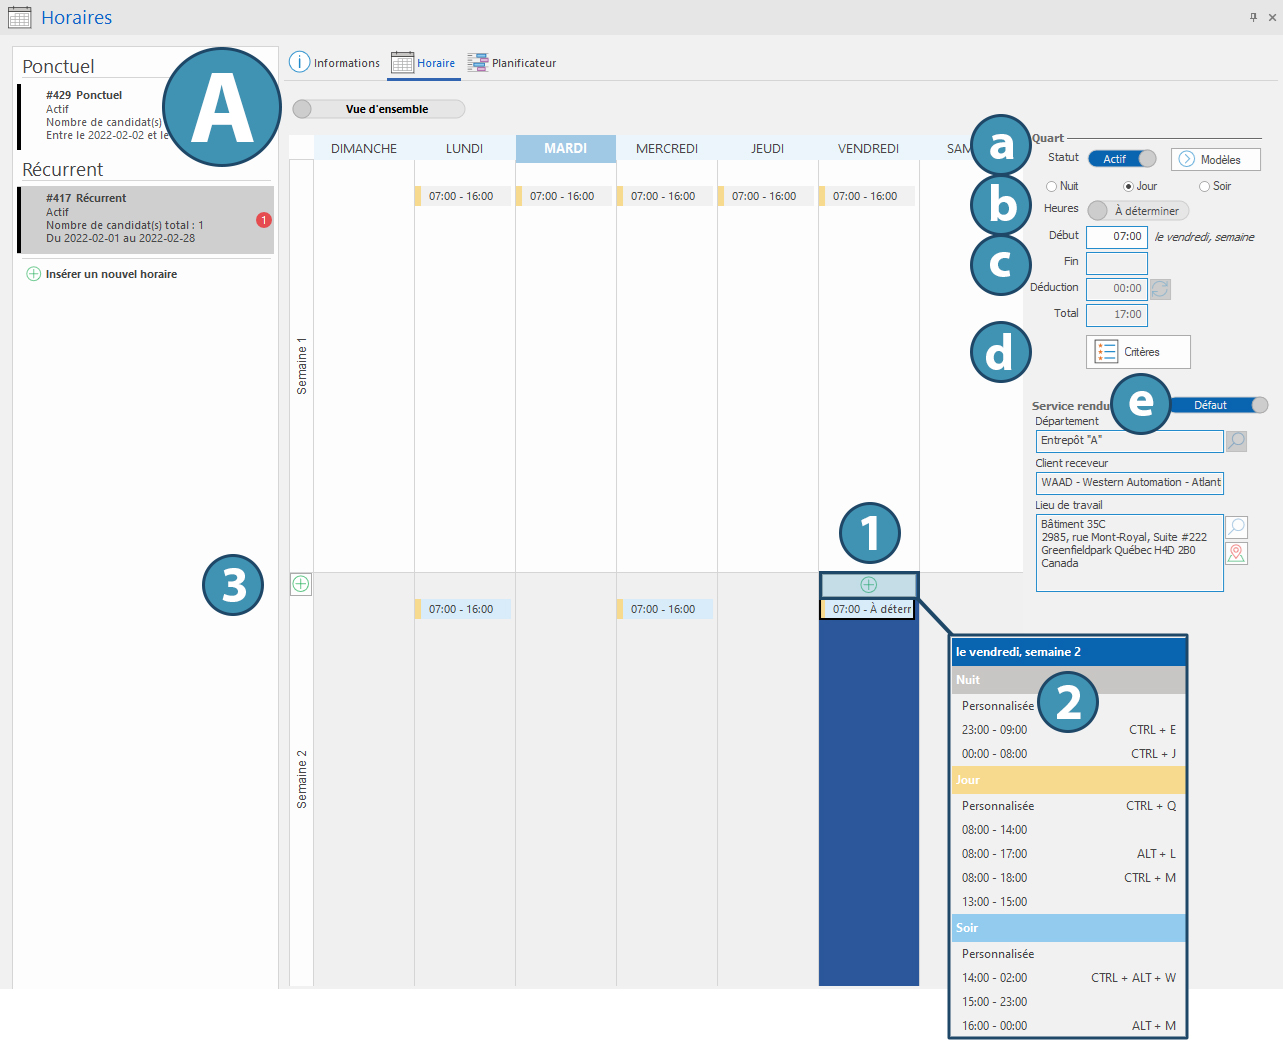
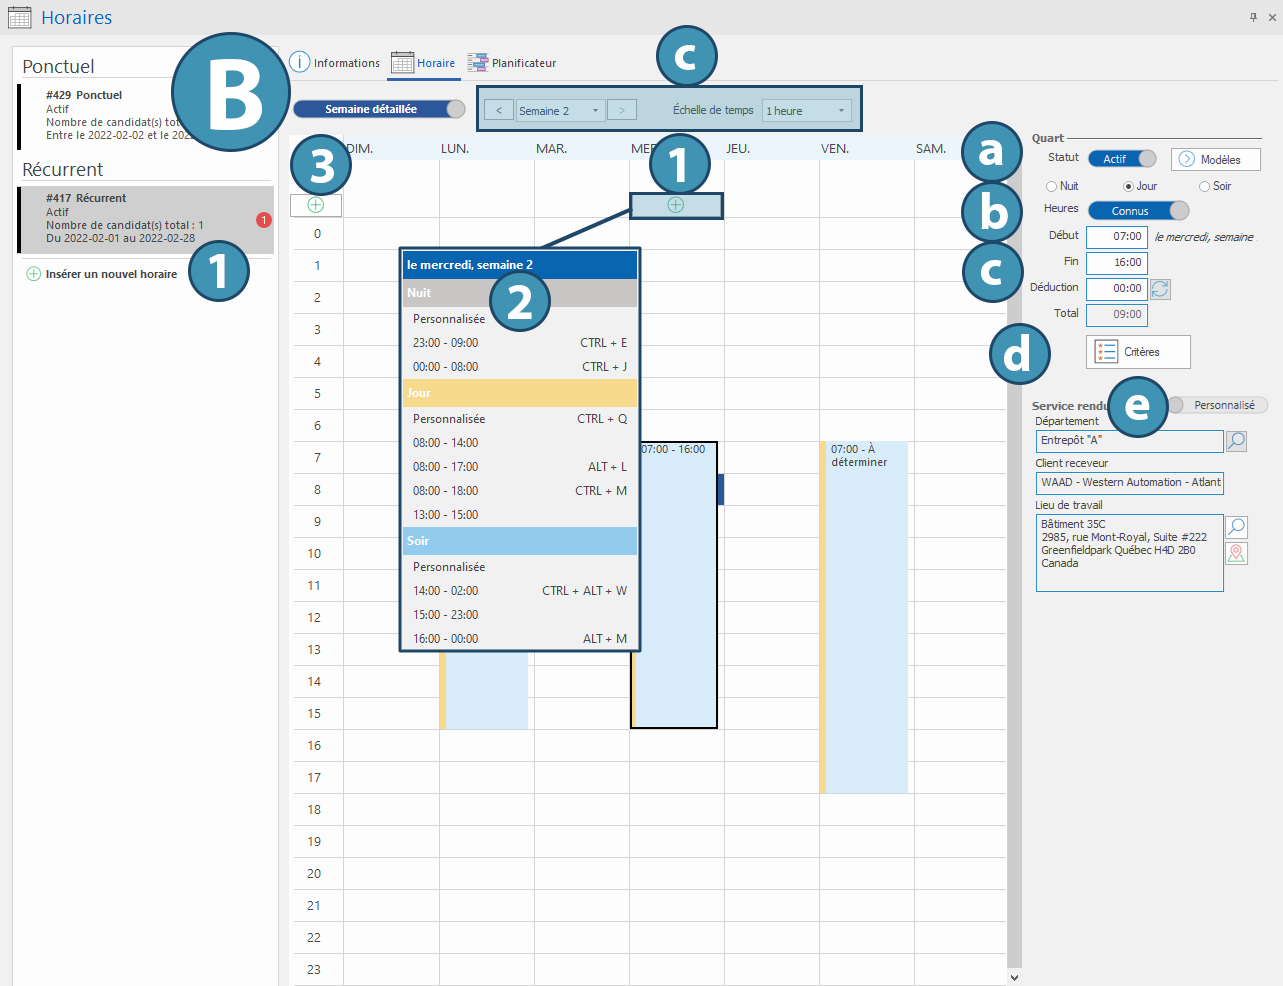
It is possible to alternate between an overal view (A) and a detailed view (B). In the "Detailled week" view, use the arrows or calendar to select the desired week (C).
To add a time range manually, select a day in the calendar and click on  (Add) (1) or right-click on the column of the day. A contextual menu is displayed, allowing you to choose among various preconfigured templates (2) or create a custom schedule.
 In the case of a recurrent schedule, you can also insert a schedule template for a full week. Just click on (Add) for the desired week, clicking on it on the top left corner of the calendar (for "Detailed week" view) or directly besides the number of the week in "Overall view".
Complete or modify the information pertaining to a time range at the right of the calendar:
a. Define the status of the schedule and apply a template if desired, then select the type of shift.
b. You can opt to indicate if schedule are already defined ("Known") or "To be determined". In this case, only a start time will be required to save the schedule.
c. Specify the start and end time. The deduction will be calculated automatically, according to the client preferences. However, it is possible to change it manually.
d. If the schedule has specific criteria, you can indicate it here using the "Criteria" button.
Using specific criteria for various schedules of a same mission will allow you to refine candidate selection or even assign different candidates to tasks requiring completely different skills from one another.
e. The information about the service provided will be replicated "by default" from the "Mission details" pane. If the information is not the same for this schedule, it is possible to customize it by sliding the "Default" button to the right.
If schedule is punctual:
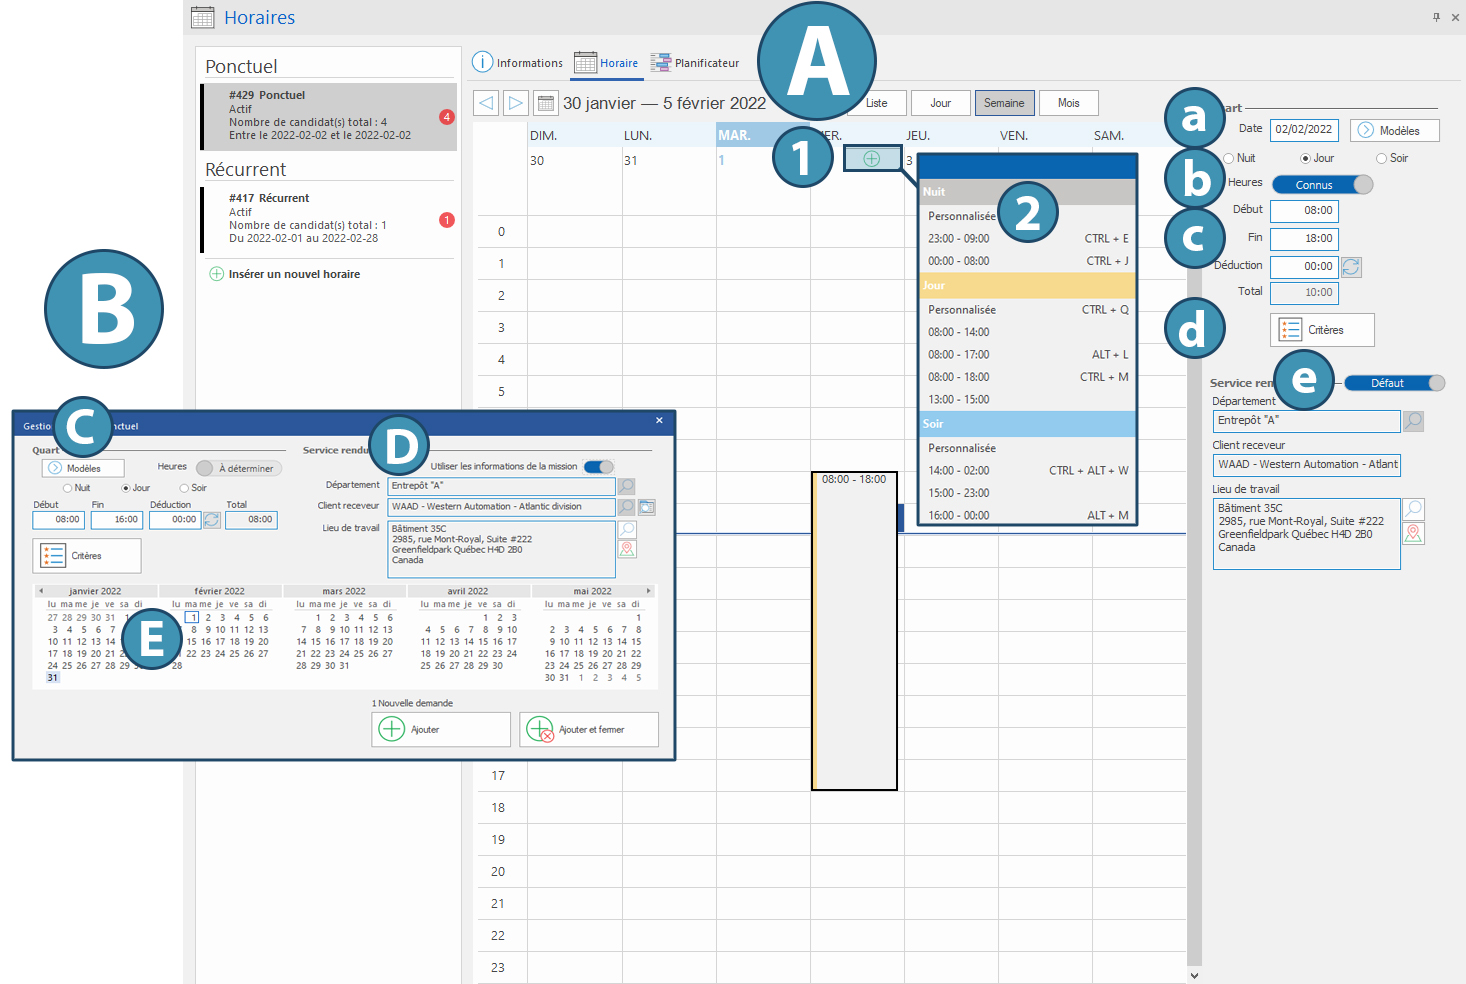
It is possible to alternate between Day, Week, Month or List views (A).
To add a time range manually, select the day in the calendar and click on (Add) (1) or right click in the column of the desired day. A contextual menu is displayed, allowing you to choose among various preconfigured templates (2) or create a custom schedule.
In the case of a punctual schedule, you can use the punctual shift manager (B) to add one or more shifts in batch. To do so, just left double-click in a column or click on the "Insert" button from the "Home" tab. The window for management of punctual shifts opens, allowing you to enter information about the schedule (C), the service provided (D) and the desired date(s) (E).
Complete or modify the information pertaining to a time range at the right of the calendar:
a. Define the status of the schedule and apply a template if desired, then select the type of shift.
b. You can opt to indicate if schedule are already defined ("Known") or "To be determined". In this case, only a start time will be required to save the schedule.
c. Specify the start and end time. The deduction will be calculated automatically, according to the client preferences. However, it is possible to change it manually.
d. If the schedule has specific criteria, you can indicate it here using the "Criteria" button.
Using specific criteria for various schedules of a same mission will allow you to refine candidate selection or even assign different candidates to tasks requiring completely different skills from one another.
e. The information about the service provided will be replicated "by default" from the "Mission details" pane. If the information is not the same for this schedule, it is possible to customize it by sliding the corresponding button.