1.Open a grouped replacements window. To create a new request, click on "Insert" from the "Home" ribbon in the window.
2.The window allowing you to select the client is displayed.
 If you create the grouped replacement from the client file, the client will already be populated in the proper field. If you create the grouped replacement from the client file, the client will already be populated in the proper field.
3.Enter a title for the grouped replacement. By default, this title is the one that will show on the Web platform, but you will be able to modify it.
4.Save.
Add a mission
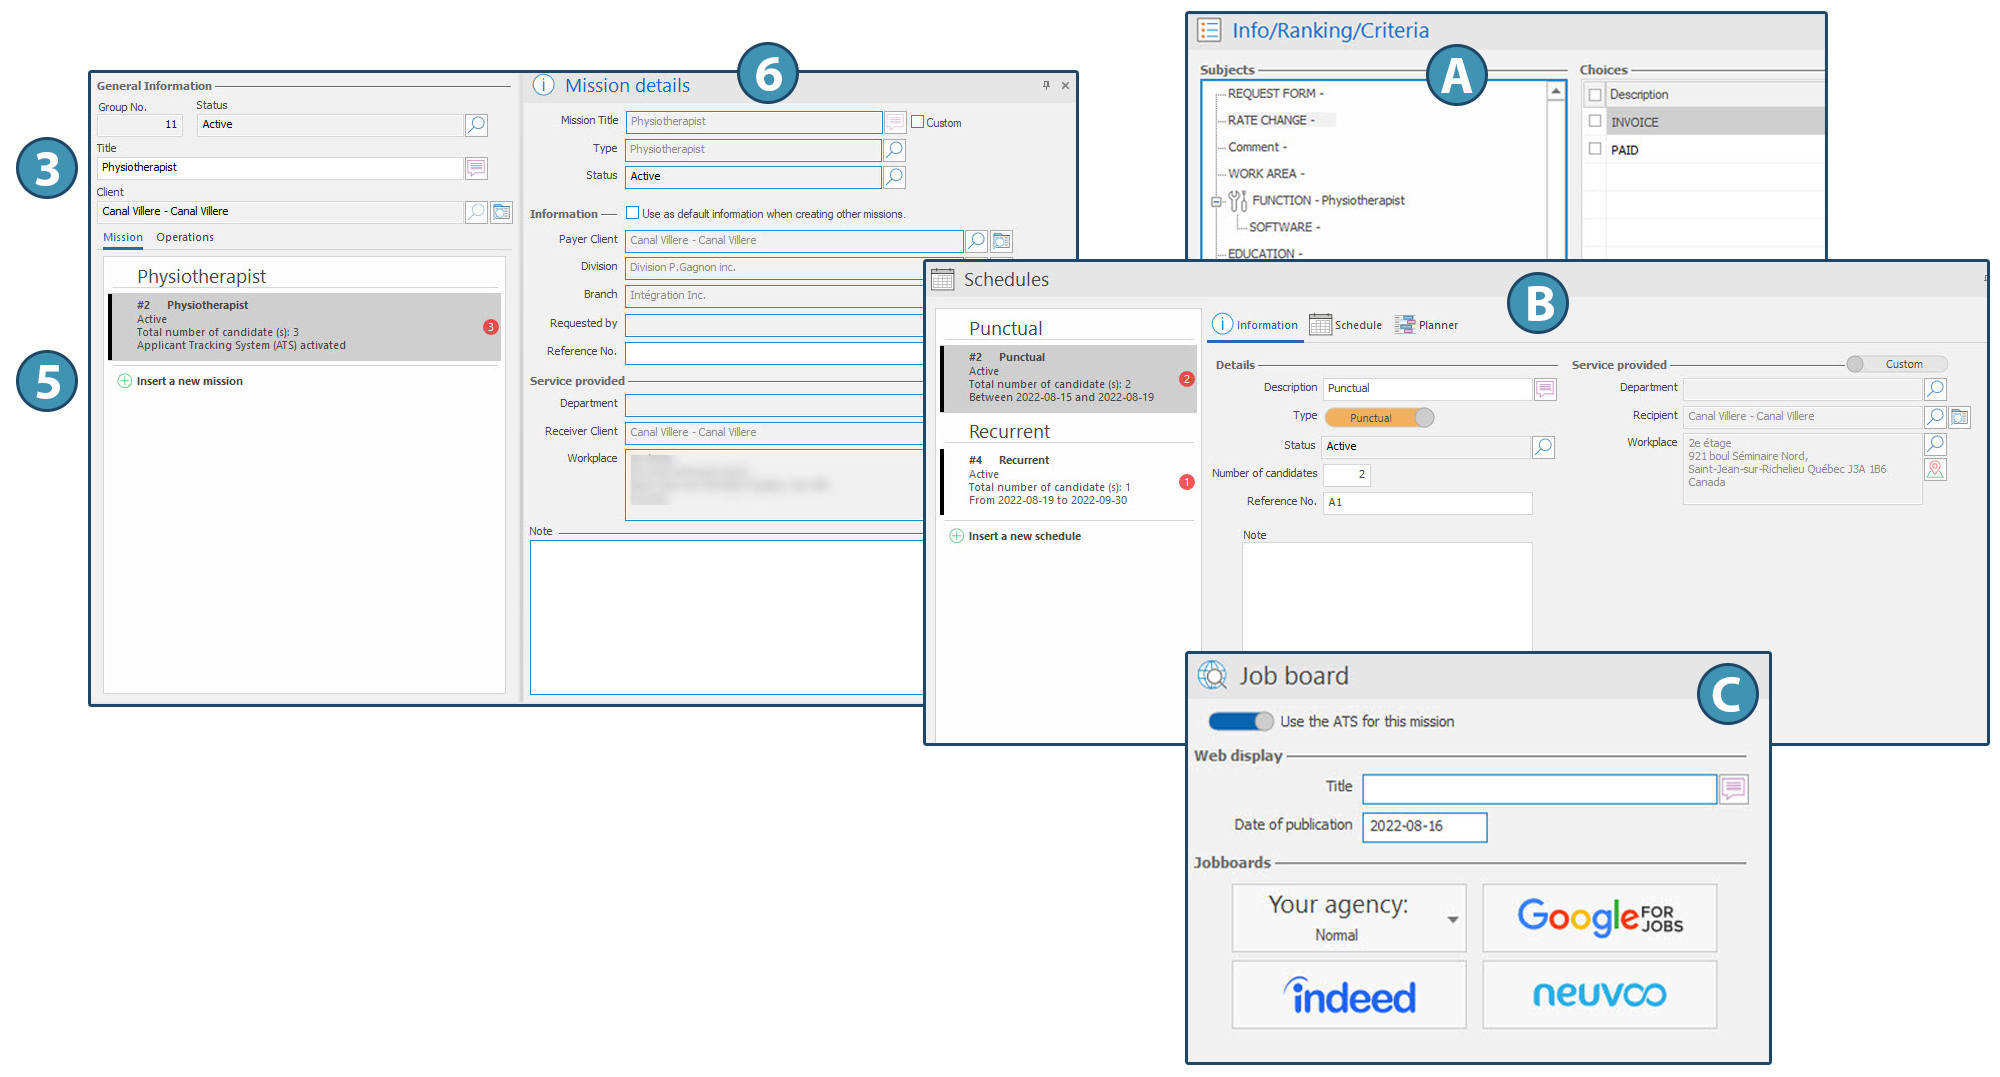
5.Click on "Insert a new mission" to add a mission to the grouped replacement.
6.In the pane "Mission details", fill out the blank fields.
 Ticking the box "Custom" will allow you to enter a different title specific to the mission. If the check box is not ticked, the mission will be named according to the type of mission selected. Ticking the box "Custom" will allow you to enter a different title specific to the mission. If the check box is not ticked, the mission will be named according to the type of mission selected.
7.Save.
8.Client information will appear in the "Mission Details" (6) pane, based on the information in the client's file. You can modify it for each mission.
9.It is possible to leave an internal note about the mission.
10.To add another mission, click on "Insert a new mission". The value selection window is displayed, allowing you to choose the function of this new mission.
11. If you add a mission requiring a function different from previous missions, this function will be specified in the main list.
After adding one or more missions, you can configure the elements for each mission using the various panes in the "Display" ribbon, in particular:
-Adding some criteria and information specific to the mission, using the pane "Info/Ranking/Criteria" (A)
-Defining one or several schedules, using the pane "Shedules" (B)
-Tracking applications using the pane "Jobboard details" (C)
 Panes available in the "Display" ribbon are described in section dans la section « Grouped replacements panes ». Panes available in the "Display" ribbon are described in section dans la section « Grouped replacements panes ».

|
 (Grouped replacements) in the "Temporary" section of the "Home" ribbon.
 PRIM offers 3 locations to open this window and add a grouped replacement: