Assign a candidate and manage grouped replacements
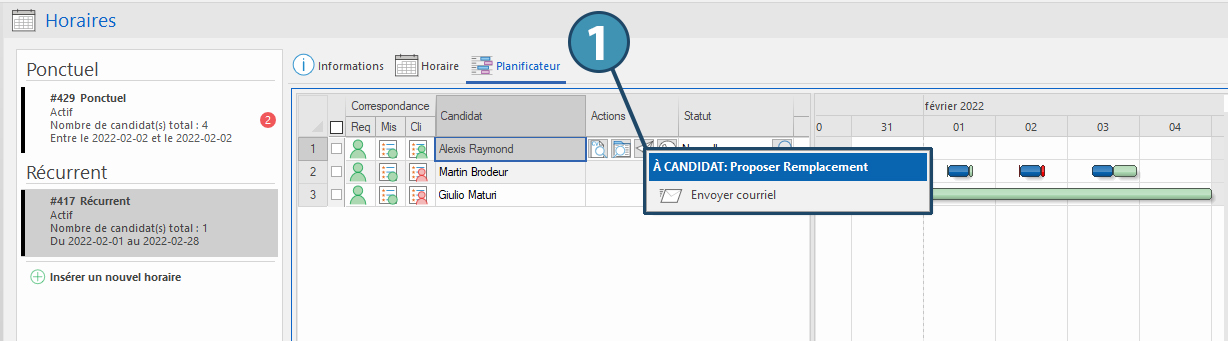
Use the planner
See the corresponding page to see how to use the planner.
Use the ATS (Applicant Tracking system)
To use the ATS, see Jobboard management».
Add punctual requests to a schedule
In a group replacement, it is possible to add a punctual replacement to a mission that is already filled. To do so:
-If the mission has only a recurrent schedule: add a punctual schedule at the desired date.
-If the mission includes a punctual schedule: add the shift to the punctual schedule OR add a new punctual schedule.
To learn how to add a punctual schedule, see section Define a schedule for a mission.
Exclude a shift from a recurrent schedule
The button  allows a specific shift to be excluded from a recurring schedule. This allows it to be treated independently of other shifts in the recurring schedule. For example, it is then possible to assign another applicant to this shift only.
This button can be acccessed in the "Operations" pane, and in any list where the replacements are displayed :
-Replacement window
-Replacement management window
-Operations tab in Candidate and Client windows. des dossiers candidats et clients.
Click on the button to exclude the shift from the recurrent schedule. It can then be processed as a unique replacement from the Replacement or Replacement management windows.
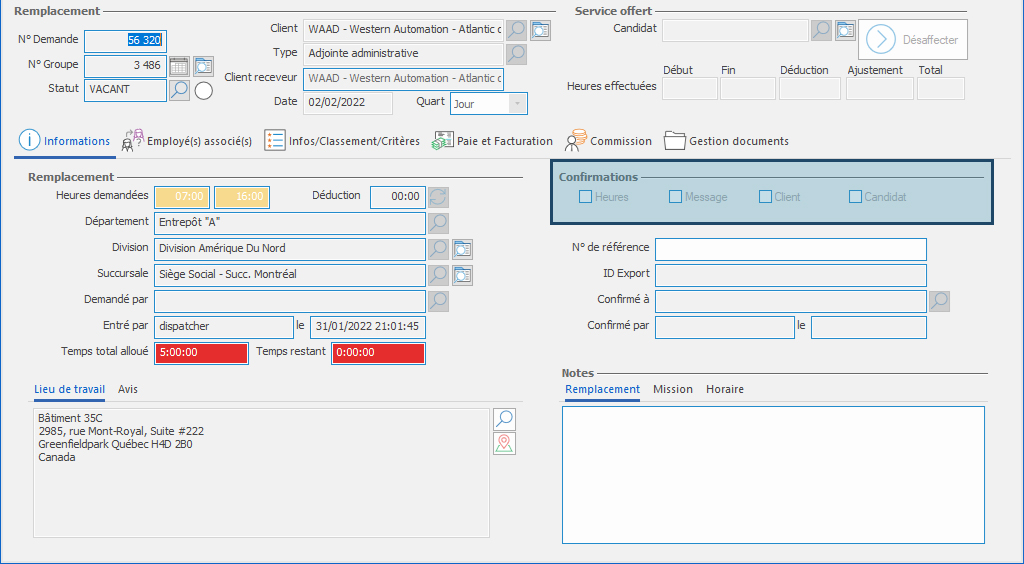
Confirm a grouped replacement
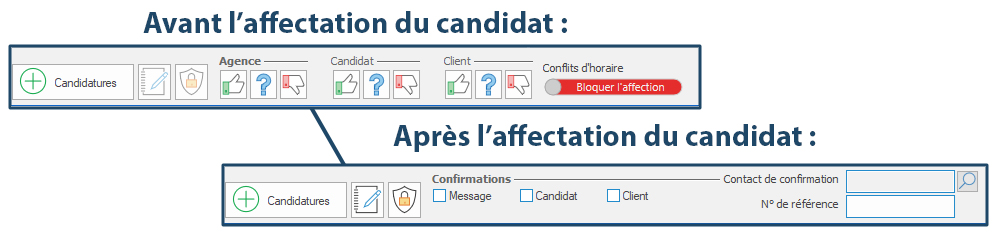
Confirmation of an assignment to a grouped replacement is done for each schedule and each candidate.
When a candidate is assigned to a schedule, button for interest in the planner are replaced with confirmation checkboxes: tick the corresponding checkbox to validate that a contact has received confirmation for the assignment.
It is possible to use an email template. Just click on  (Send communication).
Note that it is also possible to tick the corresponding checkboxes in the "Replacement" window.