|
Navigation: Training plan > Section 9 - Accounting > Invoicing > Create and manage the invoicing Settings for invoicing in client's file |
Scroll Prev Top Next More |
Settings for invoicing in client's file
 All rate customizations apply only from the start date entered in the "Price History" window.« Historique de prix ».
 Click on
  in the la fenêtre « Historique de prix » effacera toutes les personnalisations configurées ou ajoutées à l'enregistrement sélectionné.
 Bill a payer partner
For a more efficient management of their invoicing, some of your clients structured with ''Head office'' and ''Branches'' will have their invoices paid by a partner.
This is the role of the payer partner. The name and address of the payer partner will appear on the invoice, in the "Invoiced to" section, even if the service was provided at another location.
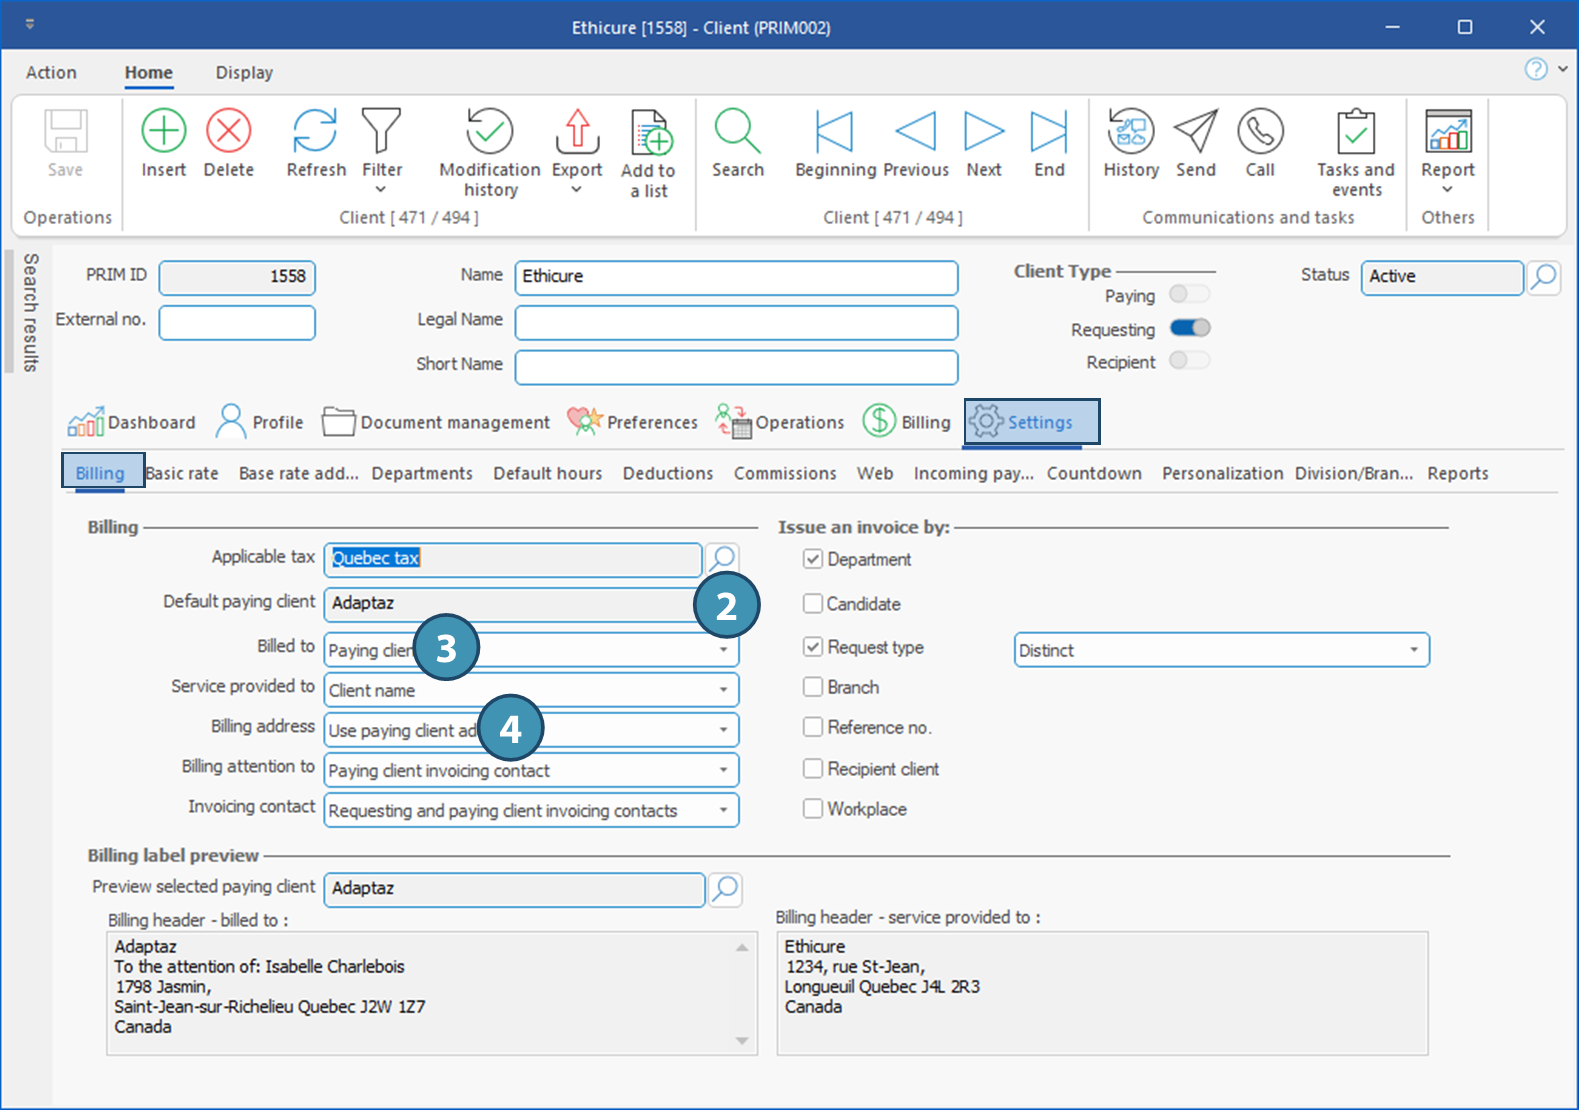
Here's how to specify a default paying partner, and ensure that the invoice is sent to them:
1.In a client file, click on Settings tab and on Billing sub-tab. 2.Click on 3.Specify if the invoice must be created with the name of the paying client or the requesting client. 4.In the field Billing address, select the address that should be displayed on the billing label (paying or requesting client).
To see the description of other fields and billing options, such as the contacts to be used for invoicing, see the corresponding section in the page Tab - Settings, Client section.
|
 Customize the billable and payable rates for a specific client
PRIM allows the personalization of the billable and payable rates in the file of your clients.
Customize an hourly rate in the file of a client
Section - Invoice: The billed hourly rate for the selected function is customized in this client's file.
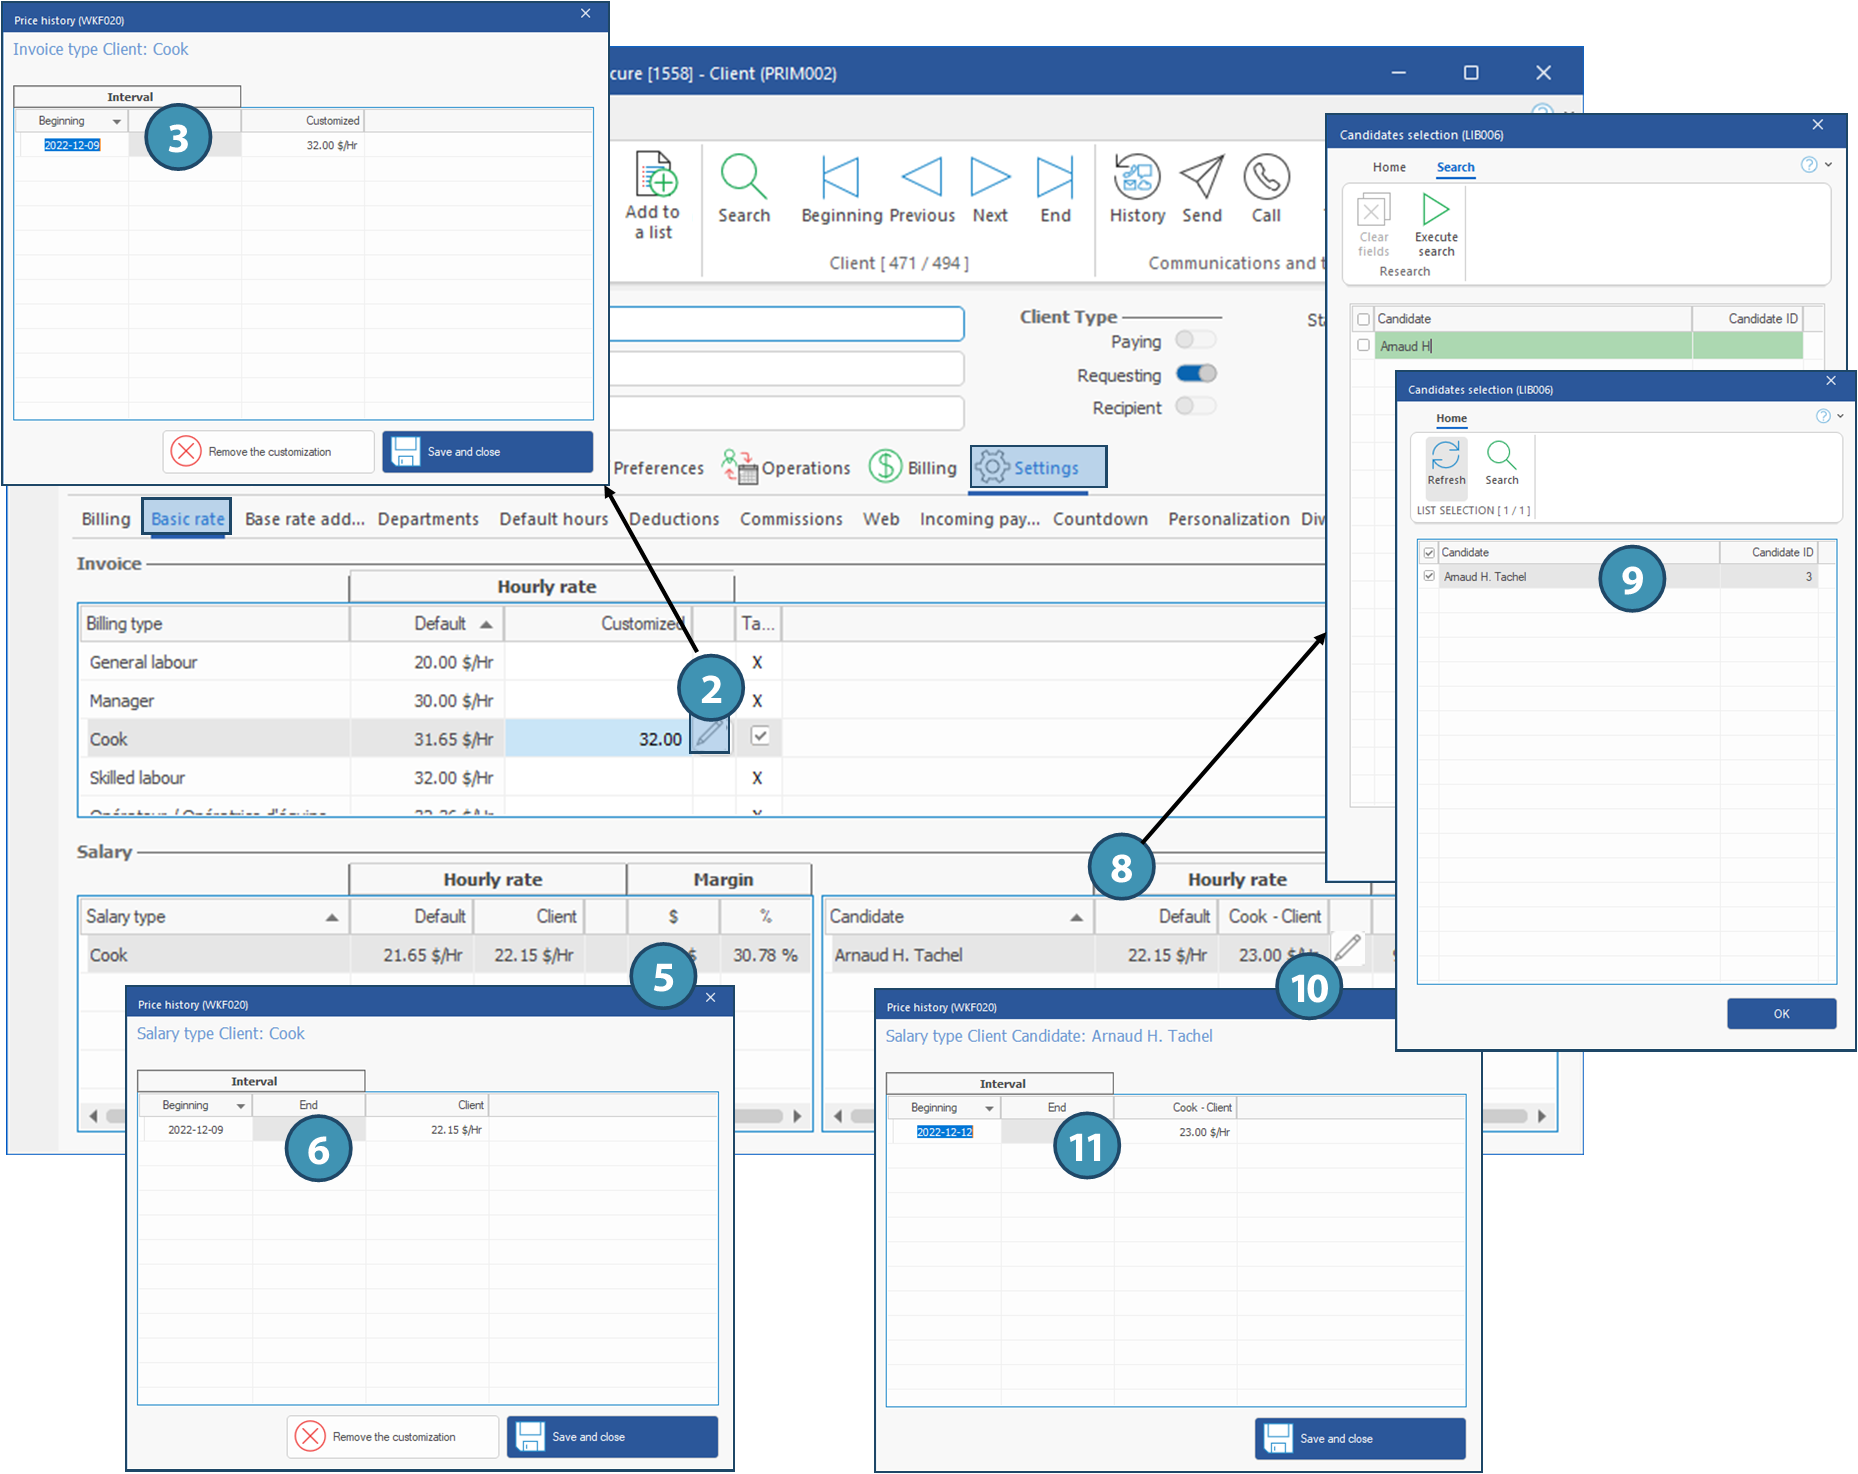
In the example below, for a cook, le taux horaire facturable par défaut de 31,65 $ est changé pour 32 $.
1.In a client file, click on Settings tab, and on Basic rate sub-tab. 2.Select the billing type to modify and click on 3.Enter the start date on which the modification will be applied as well as the new amount. 4.Click on Save and close.
Section - Salary: The paid hourly rate for the selected function is customized in this client's file.
In the example below, the default paid hourly rate of $21.65 is changed to $22.15. 5.Select the salary type to modify and click on 6.Enter the start date on which the modification will be applied as well as the new amount. 7.Click on Save and close.
Section - Salaire - Candidat : Le taux horaire payé pour la fonction sélectionnée et le candidat sélectionné est personnalisé dans le dossier de ce client.
In the example below, the default paid hourly rate of $22.15 (corresponding to the customization above for the client) has been changed to $23.00.
8.Click on an empty line in this section. The Candidate selection window is displayed in search mode: ID PRIM or the name of the candidate and click on 9.Select the candidate and click on OK. 10. On the line of the candidate that has been added, click on 11.Enter the start date on which the modification will be applied as well as the new amount. 12.Click on Save and close.
|
 Customize the special codes for a specific client
PRIM allows the customization of the special codes in the file of your clients.
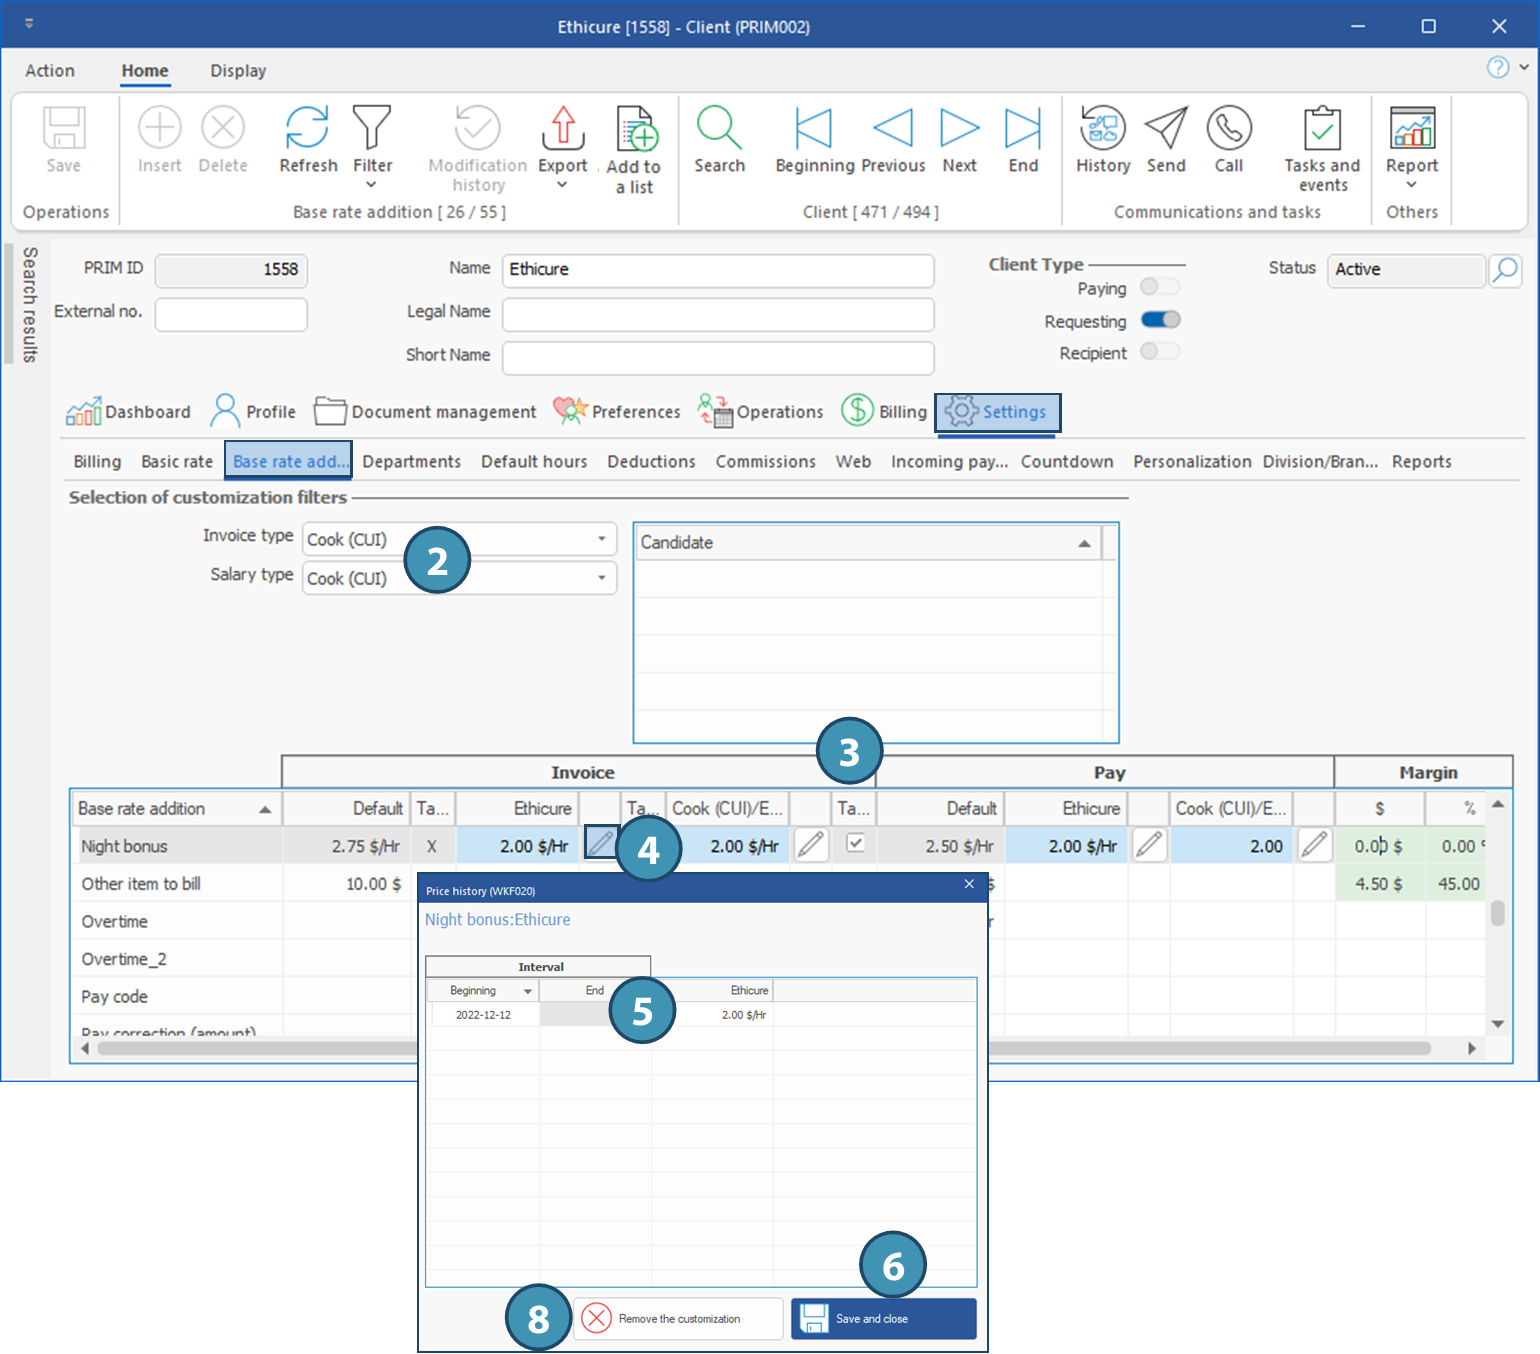
In the example below, the modifications are applied to the 'Night bonus'' code, for the client and the function, for both invoice and pay.
1.In a client file, click on Settings tab and on Base rate addition sub-tab. 2.Under Selection of customization filters, select the Invoice type and Salary type to which you want to apply the customization. 3.The items related to the selected types will be displayed at the bottom of the window, in 2 main sections, Invoice and Pay. 4.Select an item in the list. In the column where you want to apply the modification, click on 5.Enter the start date on which the modification will be applied as well as the new amount. 6.Click on Save and close.
Delete a customization
7.Click on 8.Click on
|
Created with Help+Manual 8 and styled with Premium Pack Version 4 © by EC Software


 (Execute search) to launch the search.
