Window - Candidate Schedule
This window is designed to give an overview of the assignments and availability of candidates authorized to work, in addition to other useful information such as the number of hours worked during the defined period or the date of the last assignment. Some actions are also possible, such as sending a message or assigning a candidate to a temporary request.
Presentation of the window
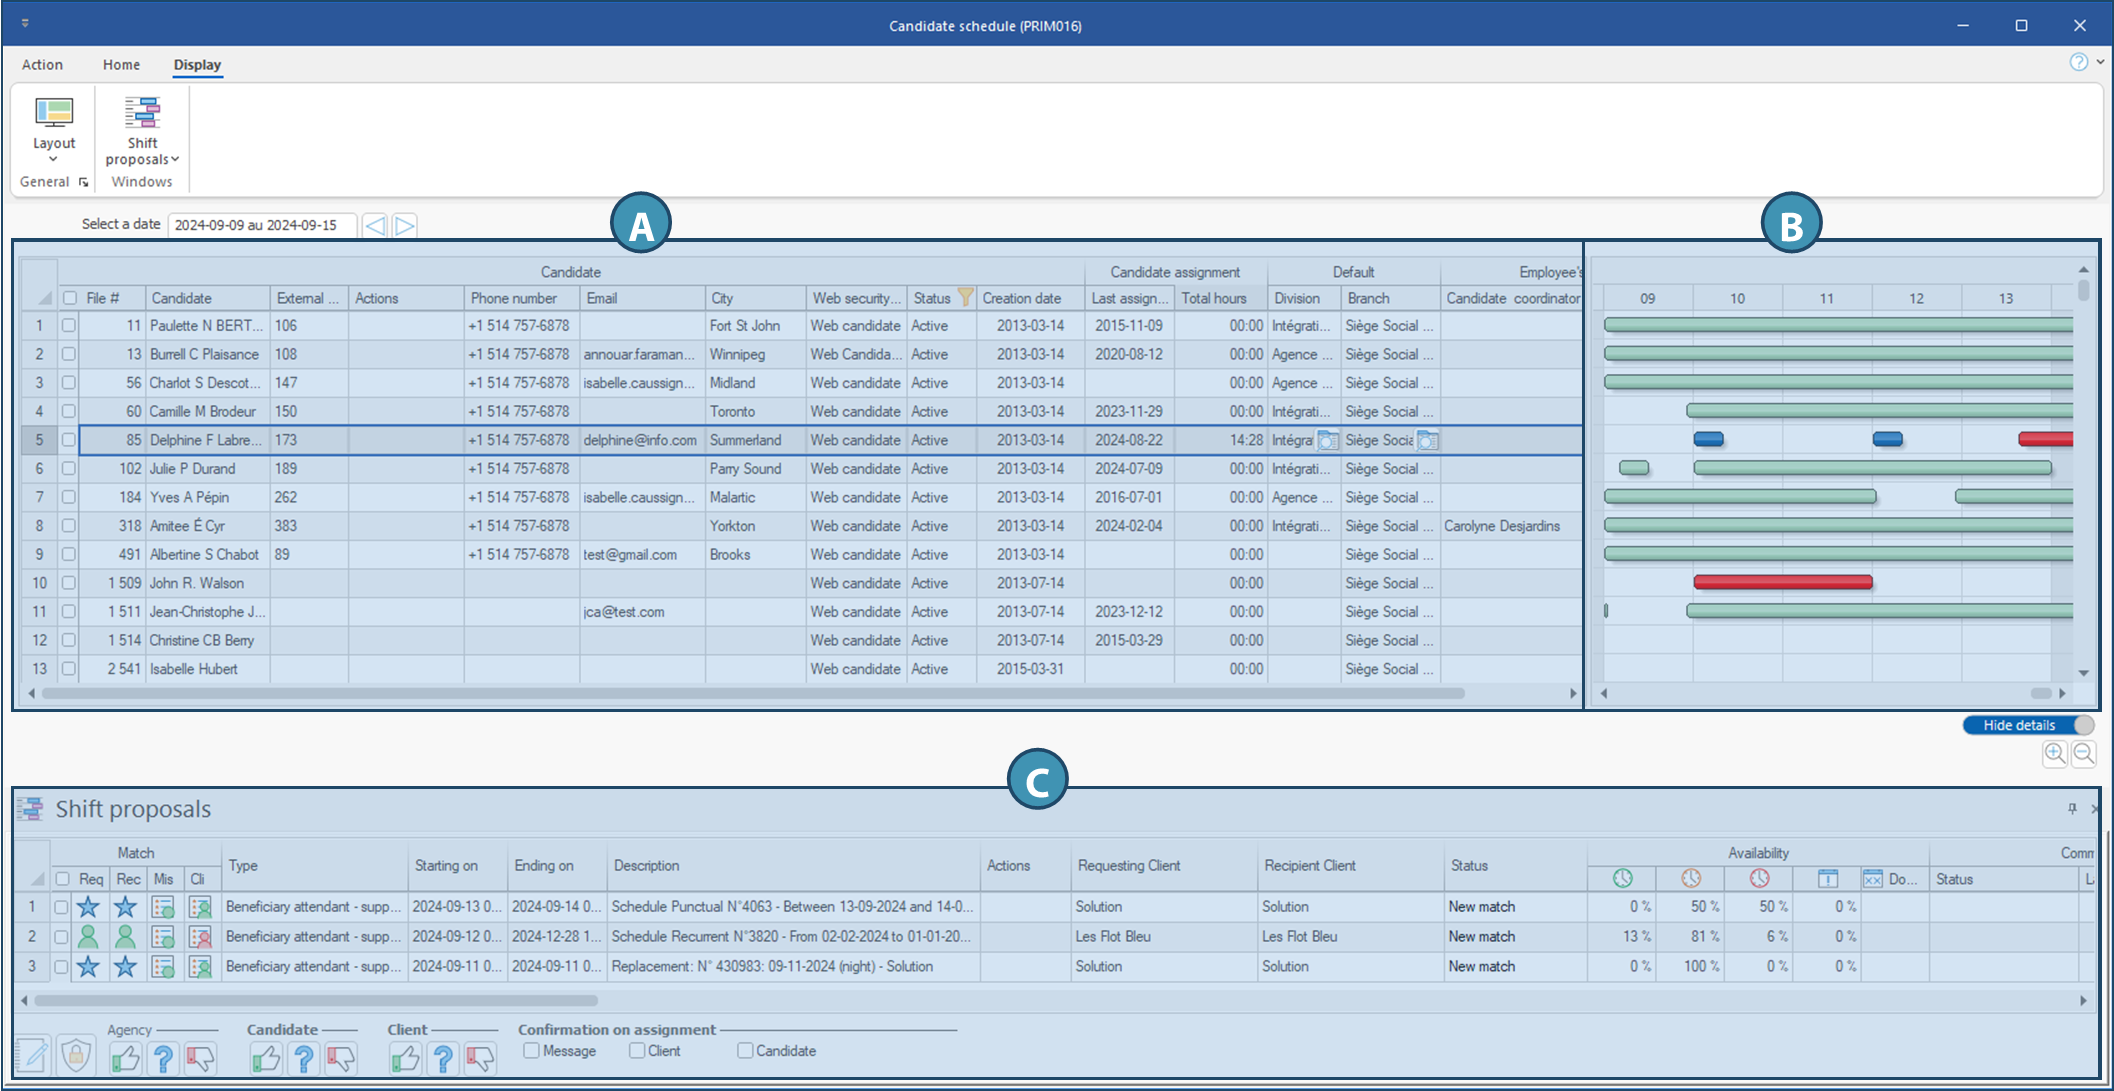
Candidates list (A)
This section shows the list of all candidates and relevant information about them in a grid. The columns in this grid are grouped into different sections
•Candidate: Columns in this section display various information about the candidates : PRIM file no., name, external no., actions, phone number, email Web security group, status, creation date
•Assignments: date of last assignment, total hours worked during the selected week(s)
•Default: default division and branch for the candidate
•Employee's function: If the agency associates internal employees to candidates, the responsible employee for the candidate will be specified in the proper columns, such as Candidate coordinator and Candidate representative
 You can apply filters on column headers in this grid to refine the candidates displayed.
In addition to the existing columns, it is possible to display additional columns corresponding to existing criteria in candidates' files.
Schedule (B)
This section displays availability and assignment data of your candidates in a Gantt chart for the specified time frame. Here's a description of what you can see:
•Available: Periods for which the candidate has indicated being available are represented by a green band. .
•Not available: Periods for which the candidate has indicated not available are represented by a red band.
•Assignments: Candidate's assignments are represented by a blue band. Hovering the cursor over the band also provides details of the assignment, and a link to the shift.
This section can be hidden and displayed by clicking on the “ Hide details/Show details ” switch.
Shifts proposal pane (C)
This pane is launched from the Display ribbon. It shows the list of requests matching the candidate's profile for the selected time frame, and allows you to assign the candidate.
Actions and filters
In addition to usual filters et sorting options on each column, other actions can be performed on this screen.
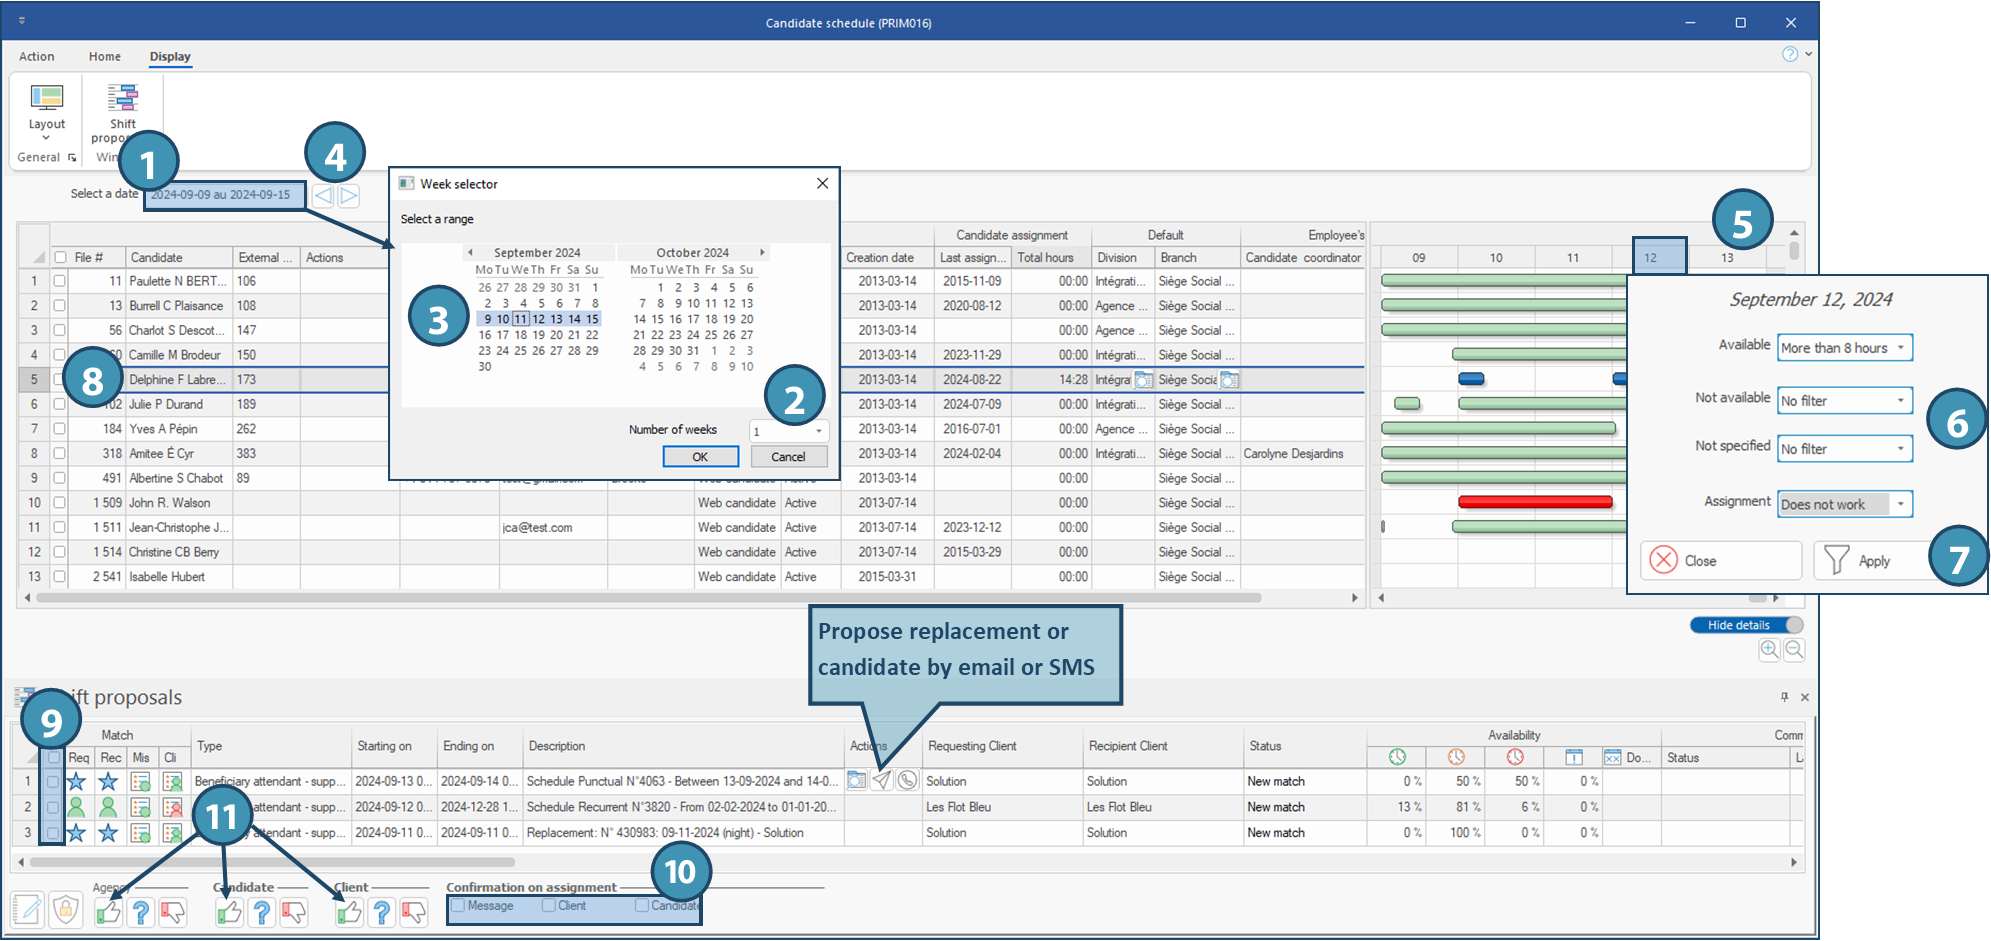
Choose time frame to be displayed
You can choose to display the date for up to 4 weeks, either in the past or in the future.
To specify the time frame to be displayed :
1.Click in the field Select a date. The Week selector window is displayed.
2.Specify the Number of weeks to be displayed (up to 4 weeks).
The specified number of weeks will determine the visible data in Gantt chart for availability and assignments, but also the total of hours in the "Total hours" column, and the shift available in the "Shift proposal" pane.
3.Click on a date of the first week to be displayed. The full time frame matching the specified number of weeks will be selected.
4.You can also shift to previous or next weeks using 
 buttons to the right of the field Select a date.
The first day of the week depends on what has been defined in your custom configuration.
Filters candidates based on availability and assignments
Filtering options have been added on each day, allowing you to display/not display candidates based on their availability or assignments. So you may have an overview of working candidates schedules, or to see candidates available who don't have assignment for a specific day.
To display and set up filters on a specific day:
5.Click on the header of that day in the Gantt chart to display filtering options.
6.For each available filtering option, select a choice in drop-down menu. here are the available choices for each option:
Available: More than 0 hours, More than 4 hours, More than 8 hours, More than 12 hours, More than 16 hours, More than 20 hours, All day
Not available: More than 0 hours, More than 4 hours, More than 8 hours, More than 12 hours, More than 16 hours, More than 20 hours, All day
Not specified: More than 0 hours, More than 4 hours, More than 8 hours, More than 12 hours, More than 16 hours, More than 20 hours, All day
Assignment : Works, Does not work
7.Click on Apply to apply the filters
When filters have been applied to a specific day, the icon  is displayed on that day's header. To remove the filter, just click again on that column. The button "Close" is replaced with a button "Remove filter".
Assign a candidate using "Shift proposal" pane
The Shift proposal pane allows you to assign a candidate to one or more shifts matching his or her profile. It works in the opposite way to the planner: it displays vacant shifts matching the candidate's profile.
This pane is also available in the Candidate window. However, in Candidate window, only the shifts corresponding to the displayed period will be proposed.
To assign a candidate to a shift :
8.Select the candidate's line.
9.Thick the shift you want to assign.
10. If you want to confirm and assign at once, tick the relevant confirmation check box(es) .
11. Click on  under the entity responsible for assignation depending on the assignment method (agency, candidate or candidate AND client) to assign the candidate.
If you want to first propose the shift to the candidate, or the candidate to the client, you can do so using the button displayed in the "Actions column of the selected line.