|
WARNING: This section is intended for advanced users and "Super users" of PRIM Logix.
The configuration items presented in this section may indeed have an impact on your operations.
If in doubt, consult your system administrator.
Please note that only users in the appropriate security groups can access the software configuration windows. |

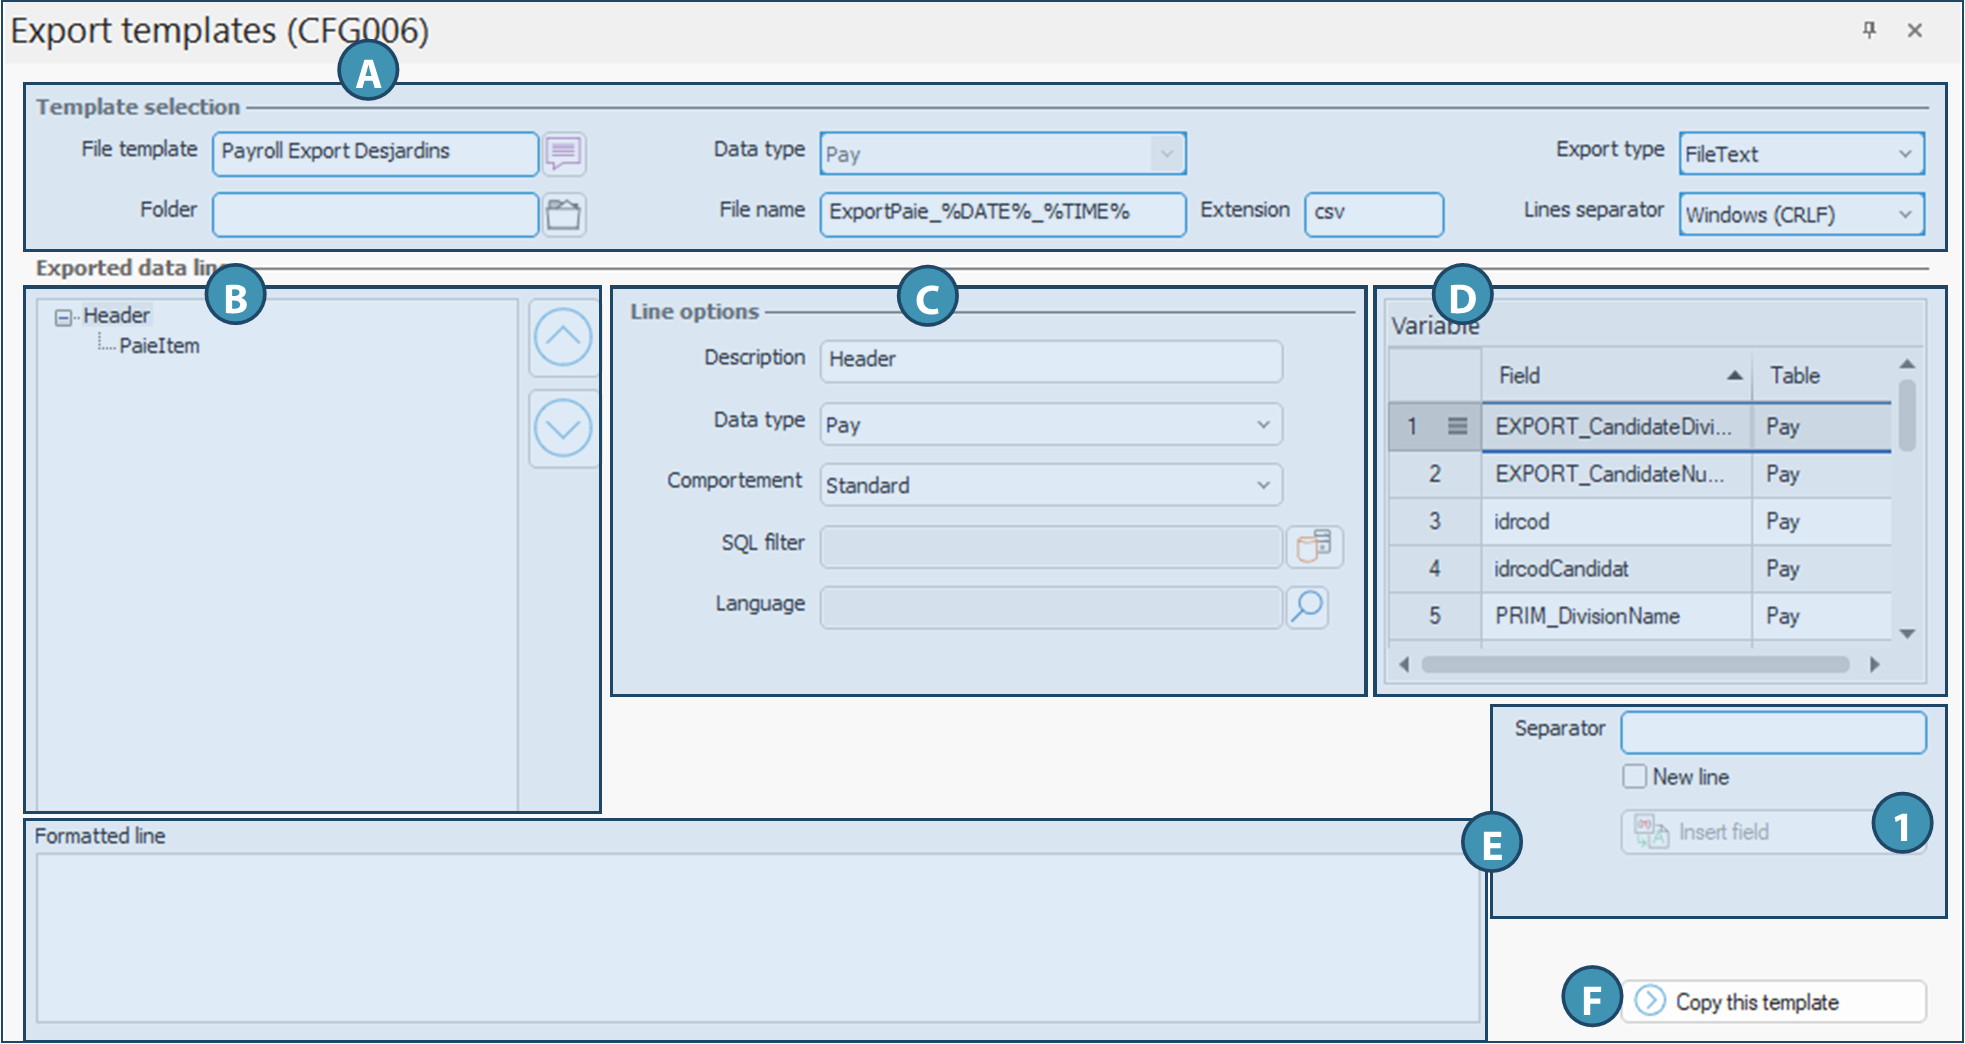
Export templates (CFG006)
The Export templates pane (CFG006) lets you configure various templates used to generate data export files (e.g. payroll, time, candidates) to external systems such as payroll or accounting systems. These templates can therefore be customized according to the organization's needs.
Overview of the window
The window is divided into several sections, whose purpose and fields are explained below.
A. Model selection
This section provides general information on the model displayed.
File template: Functional name for the export template.
Folder: Indicate in this field the path to the directory where you wish the files to be saved by default. If no path is specified, the user will need to specify a location when creating the file.
Data type: Type of data to be exported (e.g. payroll).
File name: Name of the generated file, with the possibility of dynamic variables such as %DATE%, %TIME%.
Extension: File format (e.g. .csv).
 If export is fully integrated using an API, simply enter a dot in the field.
Export type: Drop-down menu for selecting export file format(Acomba, FileText, FileJson, FileXML, Quickbooks).
Line separator: Drop-down menu to select the line end format used(Carriage return [CR], Windows [CRLF], Unix [LF]).
B. Exported data line
Represents the hierarchical structure of the data blocks to be exported. The elements shown here are generic terms for illustrative purposes. In the illustration below, the Header line would correspond to the category of data to be exported, and the "PayItem" line to one of the exported data items. These elements are added and defined during creation in section C. Their designation will therefore be different and customized according to the model.
Header: Node header line.
PaiItem: Details line (in our example, payroll amounts).
Use the arrows 
 to reorganize exported lines.
C. Selected line options
This section allows you to set parameters for each line in the export template.
Description: Enter a sufficiently descriptive line name in this field. For example, if the template is used to export invoices, the description of the main line could simply be Invoices.
Data type: Drop-down menu for selecting the data type of the selected line. The choices in the drop-down menu will depend on the data type selected in section A.
Behavior: Drop-down menu for selecting the data export execution mode, which determines the presentation of exported data in the results.
SQL filter: Allows you to add custom filtering of exported data, so that some data is not exported in this section of the export template.
Language: In certain contexts, it is possible to specify the language in which data will be exported, if available in several languages. E.g.: for payroll, candidate language.
D. Variables
This section displays the information available according to the type of data in the selected line. Variables will be used to build the line of data to be exported.
Field: Name of the field to be inserted.
Table: Origin of the field in the database (e.g.: Payroll).
Function: Double-click or click on Insert field (1) to add the data item to the line.
E. Exported line formatting
This section allows you to format exported lines.
Separator: Character between each field (e.g. comma, semicolon).
New line: Check to insert a new line.
Formatted line: Preview of the result of an exported line with selected fields.
F. Copy template
Copy template: Creates a copy of the current template to quickly create a new one.