|
Navigation: Training plan > Section 3 - Candidate > The Candidate Window Tab - Settings |
Scroll Prev Top Next More |
Tab - Settings
The Settings tab allows you to customize some information set up by default for the candidate.
 For customized rates configuration, the following sub-tabs will be seen in detail in the "Accounting" section.
If you have access to this section and to the Salary sub-tab, you can add the candidate's banking information for direct deposit of payroll.

 Sub-tab - Absence management
The Absence management sub-tab llows you to manage hours in the candidates' time banks.
Hour banks with an associated payroll and billing code are automatically added to candidates' files. However, depending on your configuration, they may differ from those shown below.
To access it, in the Candidate window, go to Settings tab and Absence management sub-tab (1).
Add or modify the number of hours in banks
In the Management of time banks section (A), enter or modify the number of hours allocated for this candidate for each of the banks. Click on
View absence history
In Absence history section (B), you will find history of all the candidate's declared absences, including any absence not associated with a code. The records in red indicate absences reasons that were refused.
|

 (Save).
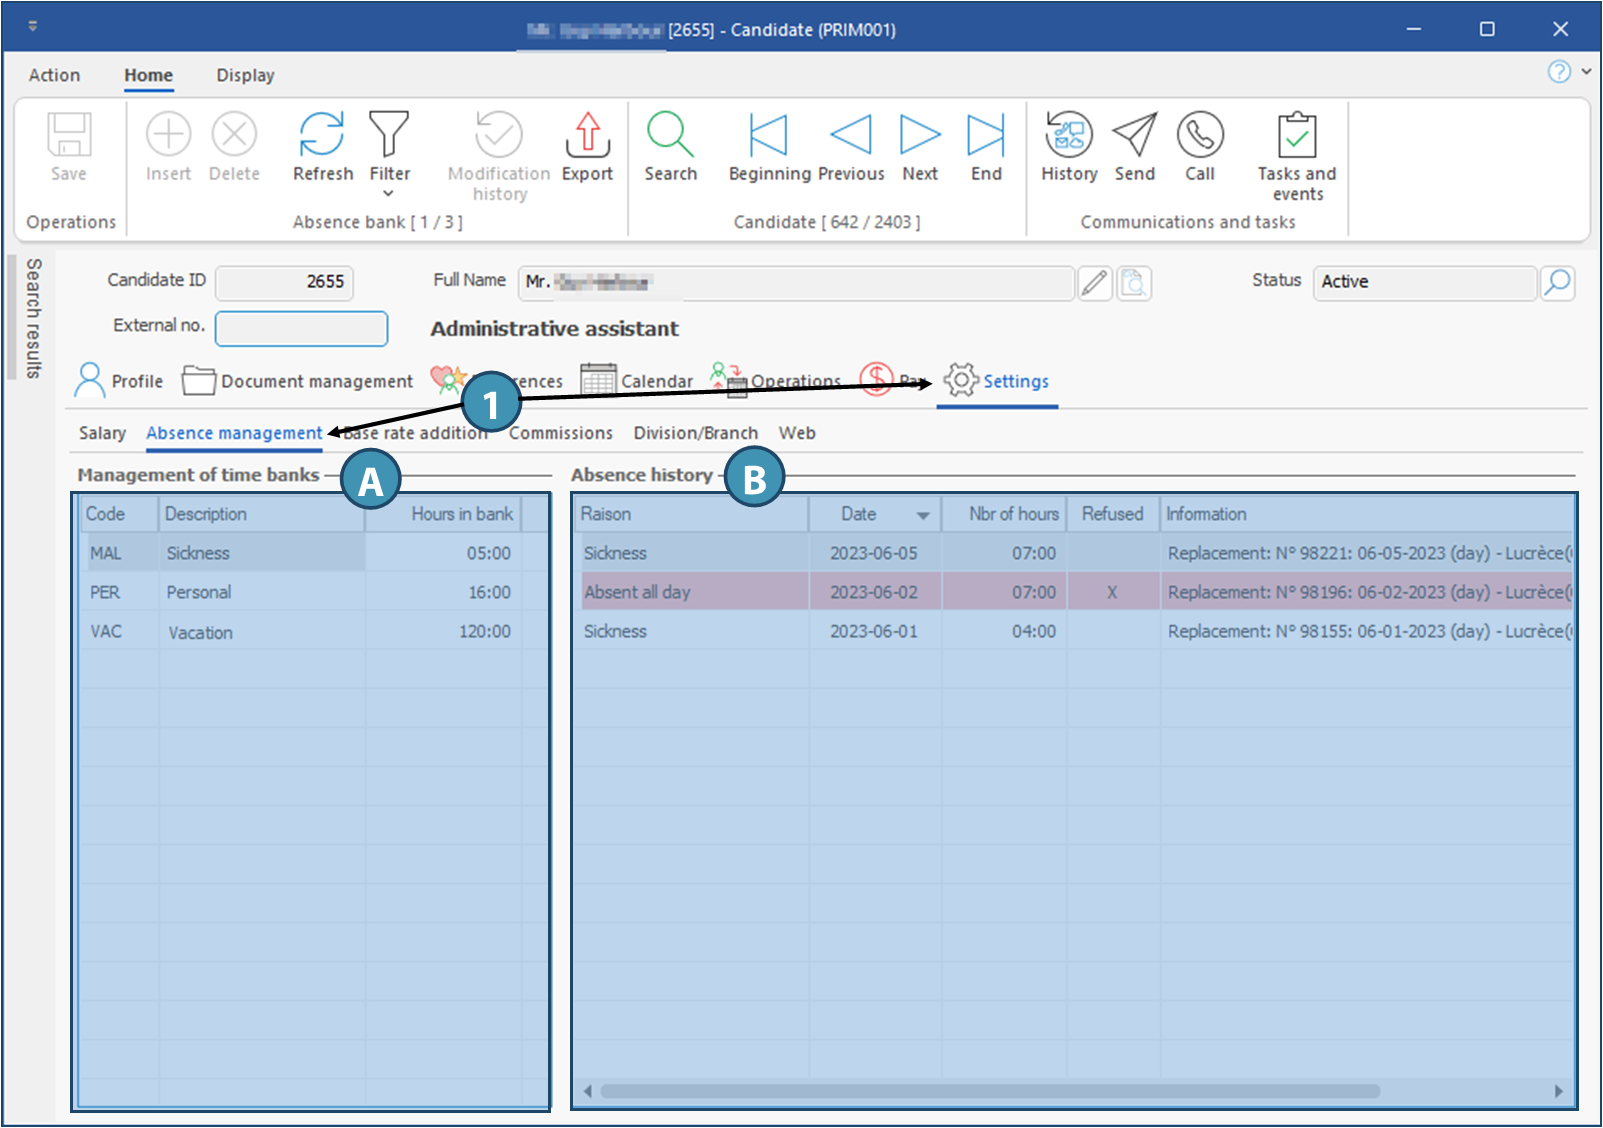
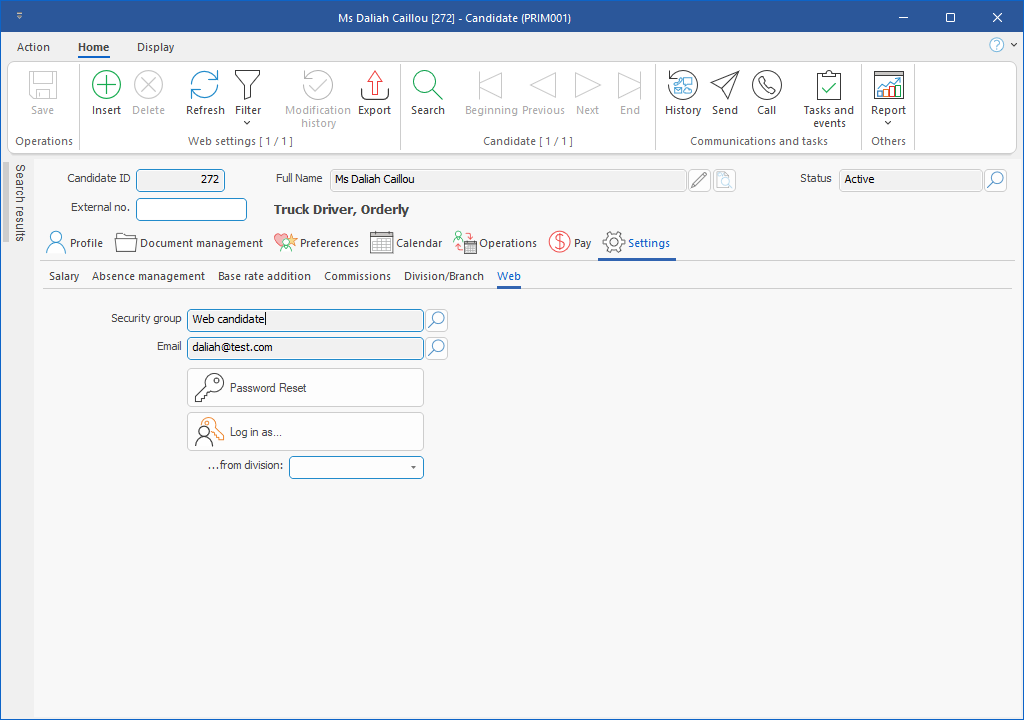
Sub-tab - Web
The Web sub-tab allows you to create Web access for a candidate, to reset his/her password or to connect to the personal space of the candidate on the Web portal.
Description of fields1.Security group: Corresponds to the Web access security group, as defined in the security groups. The Web access security groups determine what a candidate can and cannot see on the web portal, according to the security settings set up in the back office. For a candidate, the default group is Web candidate.
2.Email: This field shows the email that should be used to connect to Web portal. To create the candidate's access to Web portal, click on
3.Password Reset: When you click on this button, an email is sent to the candidate with a link for password reset. . 4.Log in as: Allows to your agency's employees to connect to the candidate's account on Web portal without the password.
|


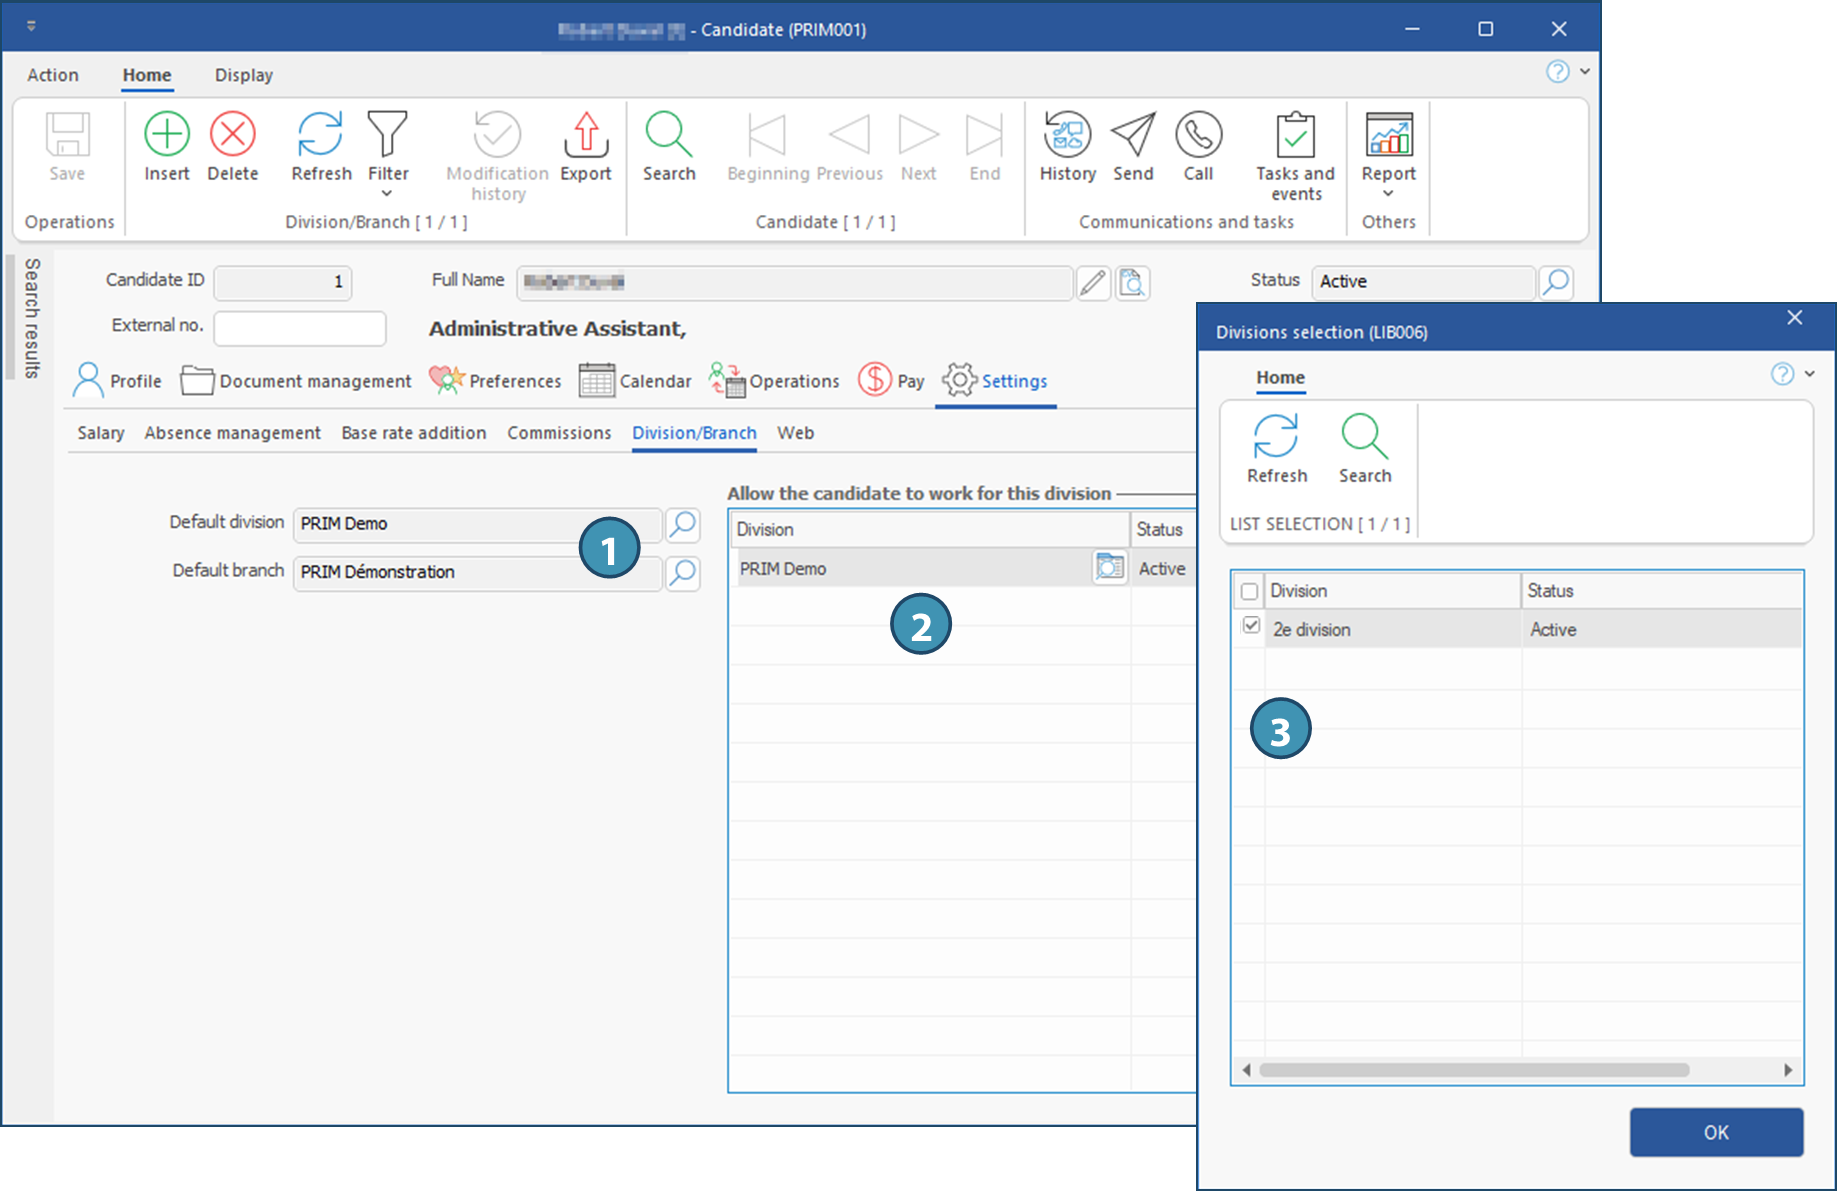
Sub-tab - Division/Branch
The sub-tab Division/Branch allow management of the association between the candidate, the division and the branch.
Add a default division and branch1.In the left section of the window, click on
Add a division the candidate is allowed to work for
2.In section "Allow the candidate to work for this division", click on an empty line to add a record. 3.In the window that is displayed, tick one or more division and click on OK.
4.Click on
|

Created with Help+Manual 8 and styled with Premium Pack Version 4 © by EC Software